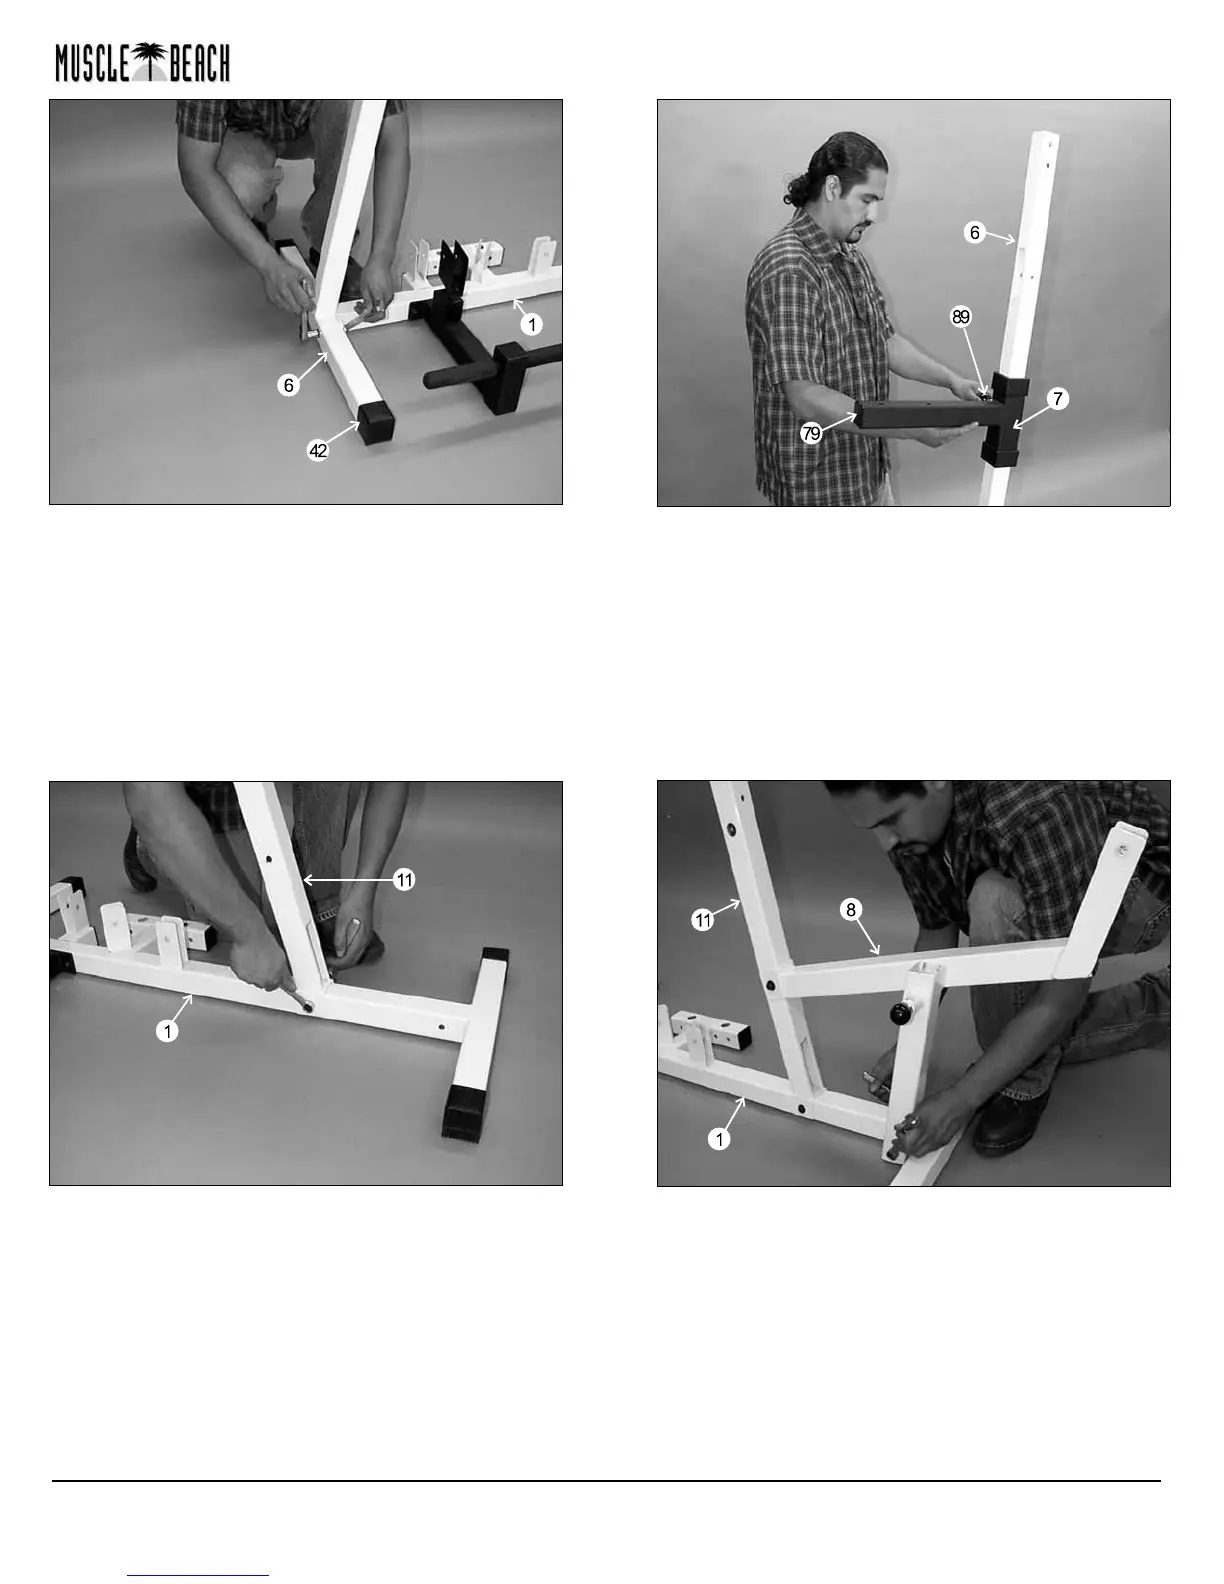
FIG. 5 Attach the Rear Upright (#6) to the Base Frame
(#1) and secure it using two Hex Head Cap Screws 3/8-16 X 3
(#61), four Flat Washers SAE 3/8 (#73) and two Nylon Insert
Lock Nuts 3/8-16 (#70). Note: Do not tighten this hardware
assembly at this time. Next, insert two Plastic End Caps 2” Sq.
w/groove (#42) into the Rear Upright (#6), as shown above.
FIG. 6 Slide the Pec Dec Adj Seat Tube (#7) onto the
Rear Upright (#6), as shown above. Note: Position the Pec
Dec Adj Seat Tube (#7) with the Push-Pull Pin 1/2 (#89)
facing the same side as the selector holes on the Rear
Upright (#6).
FIG. 7 Attach the Front Upright (#11) to the Base Frame
(#1) and secure it using one Hex Head Cap Screw 3/8-16 X 2
3/4 (#55), two Flat Washers SAE 3/8 (#73) and one Nylon
Insert Jam Lock Nut 3/8-16 (#69). Note: Do not tighten this
hardware assembly at this time.
FIG. 8 Attach the Leg Ext Bench Frame (#8) to the Base
Frame (#1) and Front Upright (#11). Secure the Leg Ext
Bench Frame (#8) to the Base Frame (#1) using one Hex
Head Cap Screw 3/8-16 X 4 1/2 (#88), two Flat Washers SAE
3/8 (#73) and one Nylon Insert Jam Lock Nut 3/8-16 (#69),
Next, secure the Leg Ext Bench Frame (#8) to the Front
Upright (#11) using one Hex Head Cap Screw 3/8-16 X 2 3/4
(#55), two Flat Washers SAE 3/8 (#73) and one Nylon Insert
Jam Lock Nut 3/8-16 (#69). Note: Do not tighten this hardware
assembly at this time.
CMB-2 Muscle Beach Home Gym
3


 To Next Page
 Loading...
