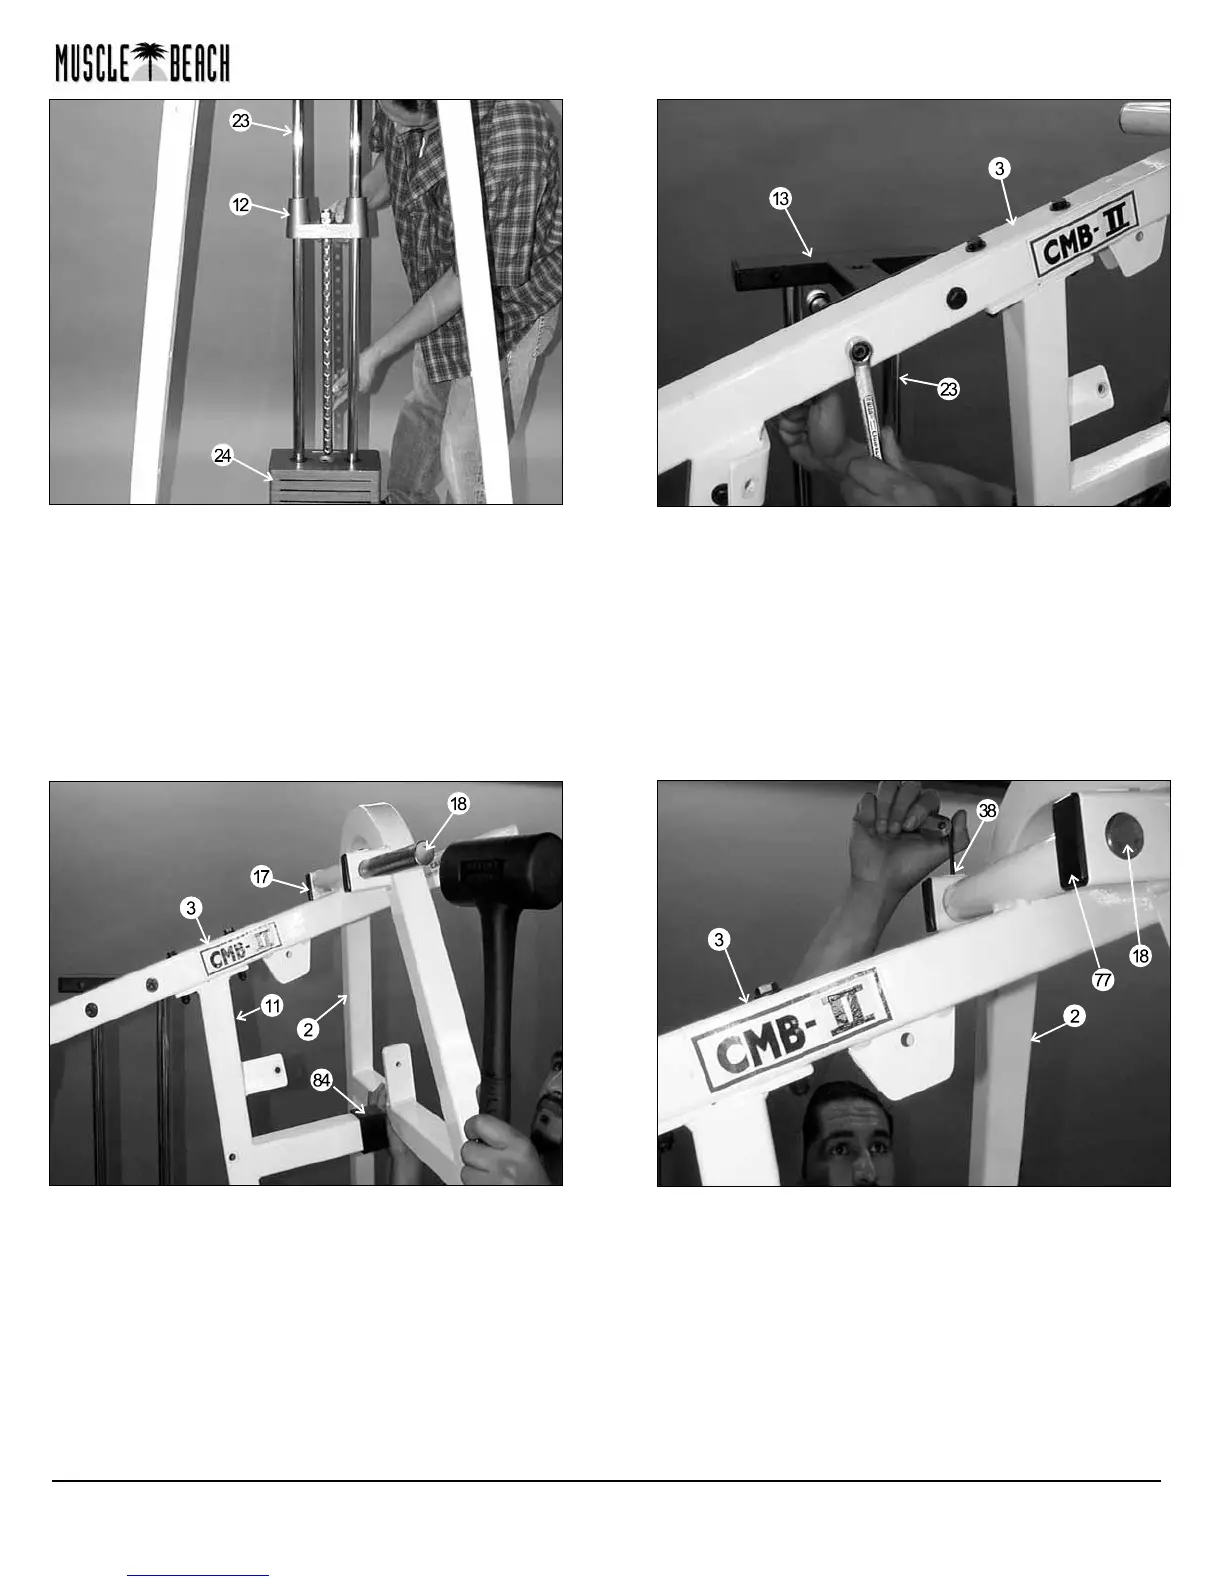
FIG. 13 Now slide the Top Plate/ Selector Bar (#12) over
the Guide Rods (#23) allowing it to come to rest on the
completed weight stack.
FIG. 14 Maneuver each of the Guide Rods (#23) into the
holes on the bottom side of the Guide Rod Retainer (#13).
Next, mount the Guide Rod Retainer (#13) along with the two
captive Guide Rods (#23) to the side of the Top Pulley
Assembly (#3) and secure using two Hex Head Cap Screws
3/8-16 X 2 3/4 (#55), four Flat Washers SAE 3/8 (#73) and two
Nylon Insert Jam Lock Nuts 3/8-16 (#69).
FIG. 15 Now position the Press Arm (#2) to the Top Pulley
Assembly (#3), as shown above. Next, press the Pivot Axle 1
X 11 3/4 (#18) through the holes in the Press Arm (#2) and
through the receptacle tube on the Top Pulley Assembly (#3)
using a rubber mallet hammer until it is flush with both sides.
Then insert the Rubber Stopper Cap 2” Sq (#84), as shown on
the Front Upright (#11). Note: It is recommend that you you
grease the Pivot Axle 1 X 11 3/4 prior to assembly.
FIG. 16 At the top edge of each end of the Press Arm (#2)
is a set screw fixture. Secure the Press Arm (#2) using two
Set Screws 3/8-16 X 1/2 (#38). Use the Hex-Key 3/16 (#80)
tool for fastening the Set Screws 3/8-16 X 1/2 (#38). Next,
insert two Plastic Insert Caps 1 X 2 (#77) into the tube-ends of
the Press Arm (#2).
CMB-2 Muscle Beach Home Gym
5


 To Next Page
 Loading...
