Do you have a question about the Muscle Rack UR301260PB5P-SV and is the answer not in the manual?
Unit must be placed on a level surface and secured to a wall to prevent tipping and ensure safety.
Use two people for assembly, keep children away from small parts, and wear gloves when handling metal components.
Adhere to maximum weight limits per shelf and for the entire unit, distributing weight evenly for stability.
Assembly involves fitting rivets into post slots; contact details provided for support and replacement parts.
Assemble posts with braces and beams, ensuring narrow slot ends point down and seat rivets correctly.
Add wood shelves and subsequent levels using beams and braces, ensuring proper rivet seating.
Use post joints to connect posts and add the third level with beams, braces, and a wood shelf.
Add remaining levels, post caps, and conduct a final inspection to ensure all rivets are securely seated.
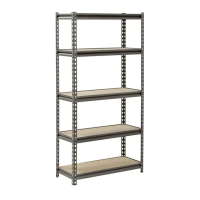
This document describes the 5-SHELF Boltless Steel Shelving with particleboard shelves, a versatile storage unit designed for various applications. It is available in several models, including UR301260PB5P-SV, UR361872PB5P-SV, UR481872PB5P-SV, and UR482472PB5P-SV, indicating different dimensions for width, depth, and height.
The primary function of this device is to provide a robust and adaptable storage solution. It consists of a boltless steel frame and particleboard shelves, allowing for easy assembly and customization. The shelving unit is designed to hold a significant amount of weight, making it suitable for storing a wide range of items in garages, workshops, basements, or other areas requiring organized storage. The boltless design simplifies the assembly process, eliminating the need for nuts and bolts and allowing for quick setup and adjustments.
The shelving unit is built to handle substantial loads. Each individual shelf has a maximum weight capacity of 800 lbs (363 kg). The entire shelving unit, when fully assembled, has a total maximum weight capacity of 4,000 lbs (1,814 kg). These capacities are contingent on proper weight distribution across the entire shelf surface.
The components of the shelving unit include:
Specific part numbers are provided for each model, ensuring compatibility and ease of replacement. For example, the UR301260PB5P-SV model uses URPS30-SV posts, URBR12-SV braces, URBM30-SV beams, and RPB31230 wood shelves. The UR482472PB5P-SV model, on the other hand, utilizes URPS36-SV posts, URBR24-SV braces, URBM48-SV beams, and RPB32448 wood shelves. All models share common post joint (MPC0409-SV) and post cap (RL-PC-B1.4) part numbers.
Assembly: The shelving unit features a boltless design, meaning assembly is achieved by fitting the rivets of the beams and braces into the slots of the posts. A rubber mallet is recommended to properly seat the rivets, though a hammer can be used with a cloth or wood block to prevent damage. The assembly process is broken down into four steps:
Weight Distribution: To ensure safety and stability, it is crucial to evenly distribute weight loads across the entire shelf surface. Larger, heavier items should always be stored on the bottom levels, while smaller, lighter items should be placed on the upper levels.
Safety Guidelines:
Periodic Inspection: Users are advised to periodically inspect the unit to ensure that all brace/beam rivets are properly seated into the post slots. This helps maintain the structural integrity and safety of the shelving unit over time.
Documentation: The manual emphasizes keeping the instruction manual for future reference, which is essential for proper maintenance, troubleshooting, and understanding the unit's specifications.
Replacement Parts: In case of damage or missing parts, replacement components can be obtained by contacting Edsal Manufacturing Co. LLC. When requesting parts, users should provide the Model Number, Part Number & Description, Location Purchased, and Date Purchased to ensure accurate and efficient service. Contact options include chat (www.edsal.com/chat or www.edsal.com/contact), email (support@edsal.com), or phone (773-475-3131).
This shelving unit is designed for durability and ease of use, providing a practical solution for organizing various spaces while adhering to important safety and maintenance protocols.
| Brand | Muscle Rack |
|---|---|
| Model | UR301260PB5P-SV |
| Category | Racks & Stands |
| Language | English |