Now that you have inserted the blade properly in the blade-holder, you can use the Muse’s control panel
and menu options to expertly manage the speed and force of the cutter. Cutting vinyl successfully requires
managing the amount of force you apply to the material and the speed at which the tool carriage moves
across the platen.
2.2 Cut Settings
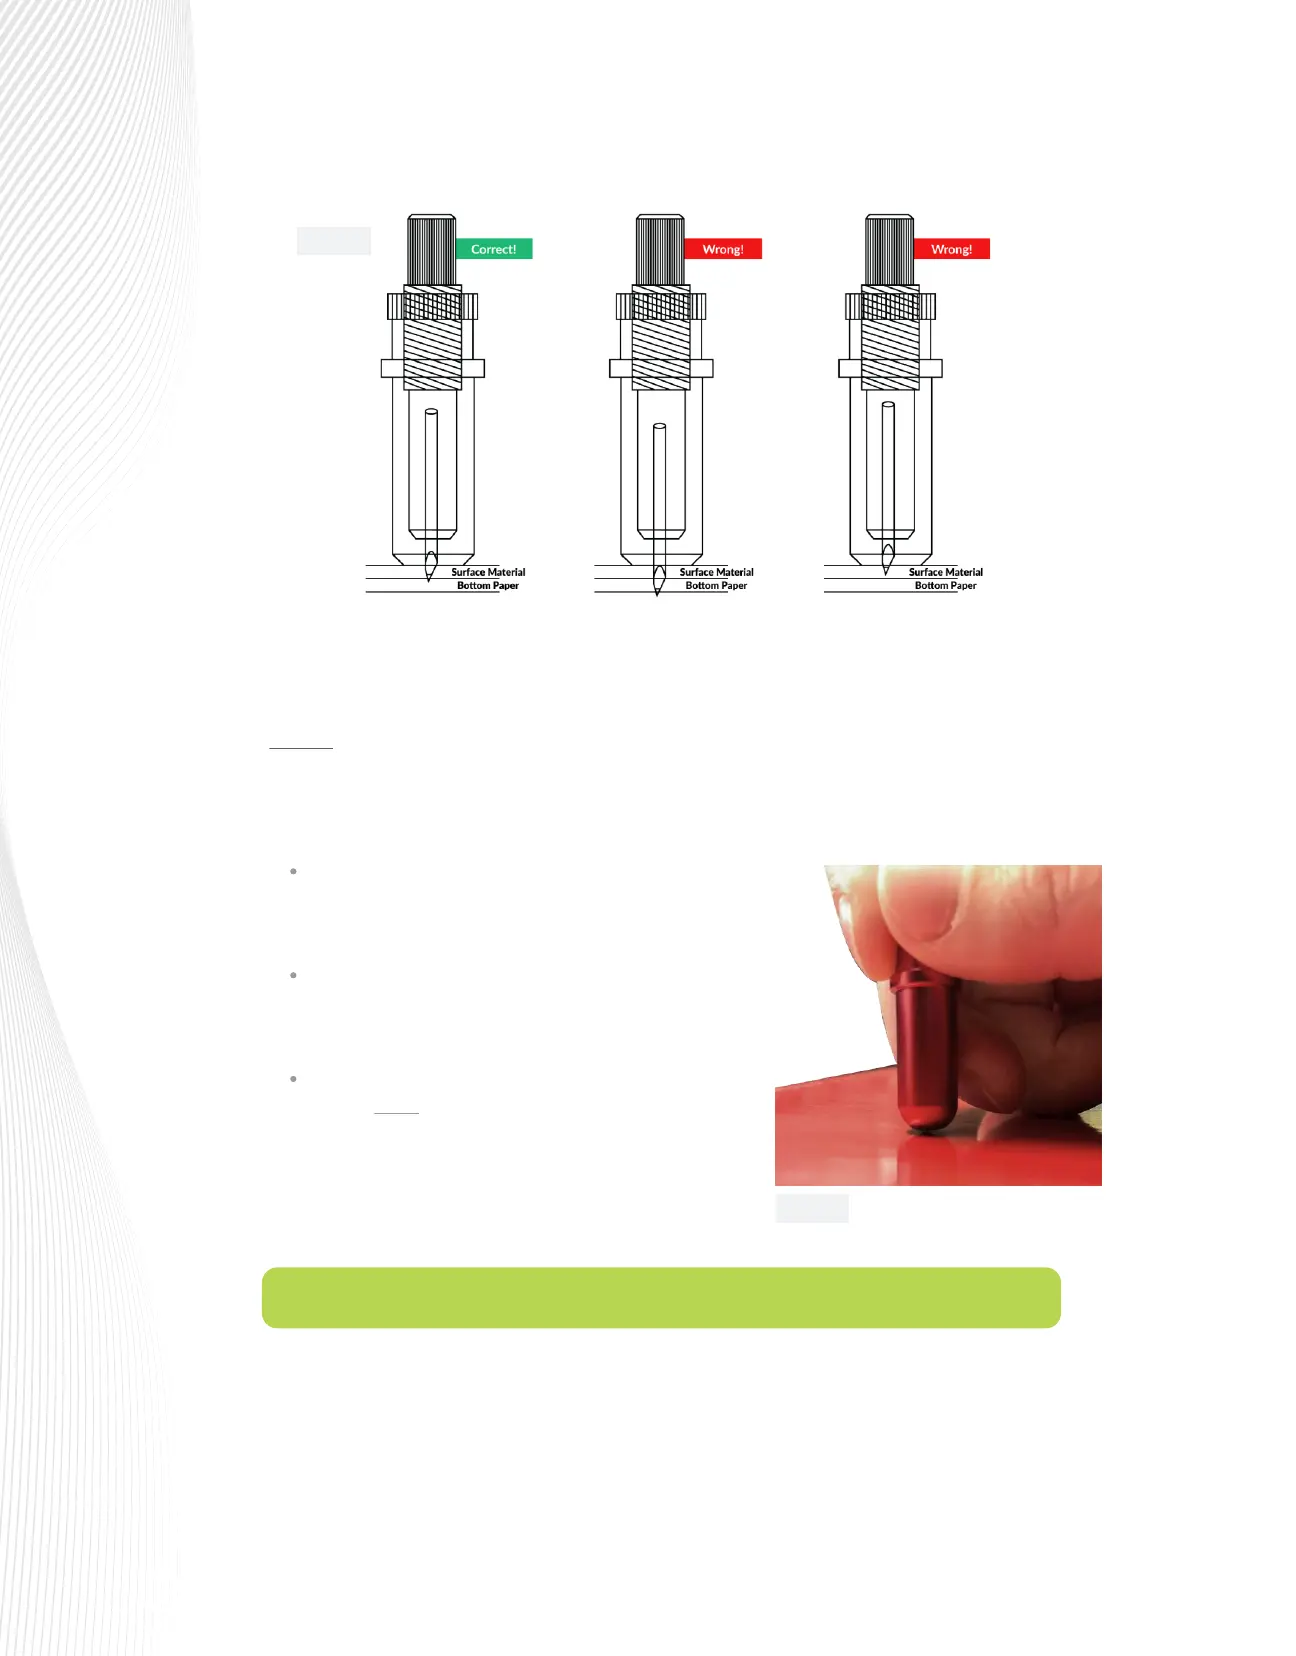
Box Test: To make sure the blade is inserted properly, use the images in FIG. 2.1.1 as a guide. Once the blade is
installed in the blade-holder, place a sheet of vinyl on a at surface, and place the blade-holder against the
vinyl. Try to hold it perfectly perpendicular to the surface (FIG. 2.1.3). Next, move the blade-holder across the
vinyl and draw a square. Set aside the blade-holder and try to weed the box.
Perfect. The blade cuts
through the vinyl, but not
the release liner.
The blade is too far out. It’s
cutting all the way through
the release liner.
The blade isn’t out far
enough to cut through the
vinyl.
If you cannot remove the box from the rest of the vinyl, you
may not have cut deeply enough. The blade may need to be
adjusted so that the tip extends farther.
If the vinyl lifts easily, but the release liner below is deeply
scored or cut all the way through, the blade is cutting too
deeply. Adjust it so that less of the tip is showing.
If you can easily weed the box, but the release liner paper
below is barely scored (or not scored at all), the blade is
installed correctly in the blade-holder. You are now ready to
install the blade-holder in the tool carriage and use the
speed and force settings to optimize cut quality and
eciency.
Fig. 2.1.3
Fig. 2.1.2
 Loading...