2.7 Resolution/Scale Calibration
If you were to cut out any particular shape, for example, a 10” x 10” square, you might nd that it actually
measures 9-15/16” x 10-1/32”. It will be very close to 10” x 10” but perhaps just slightly smaller or larger in
either or both dimensions. Now this might be perfectly acceptable for the type of cutting you do. Therefore,
it may not even be necessary to do this particular calibration. However, if you do want to make sure your
shapes are cut precisely to scale, the following procedure will allow you to calibrate your Muse cutter.
Using the test pen and a large sheet of paper, draw the square, noting which side was drawn left-to-right
(which is the X side) and which side was drawing front to back (which is the Y side), as you face the Muse
head on.
To calculate the SCALE, divide the design dimension by the actual drawn dimension times the current
SCALE. Thus, if you draw a 10” square and it measures ~10 1/32” (left-to-right) or if you draw a 250 mm
square and it measures ~ 250.8 mm (left-to-right), then:
Repeat the test to verify the dimensions are correct. If you still need to adjust, repeat the calculation with the
newly measured dimensions but remember to also multiply by the SCALE numbers you entered into the
SCALE screen. Then enter those new SCALE values and test again.
X SCALE = 10” ÷ 10 1/32” x 1= 10” ÷ 10.03” x 1 = 0.997
Or, in metric, X SCALE = 250 mm ÷ 250.8 mm x 1 = 0.997
Repeat for Y SCALE. In this example, assume the Y side
drew smaller than 10” and the calculated Y SCALE is
1.002.
Return to the SCALE screen and enter the values using
the + and – buttons:
In your design software, add a
square and size it to 10” x 10”
or, if using metric units, 250
mm x 250 mm.
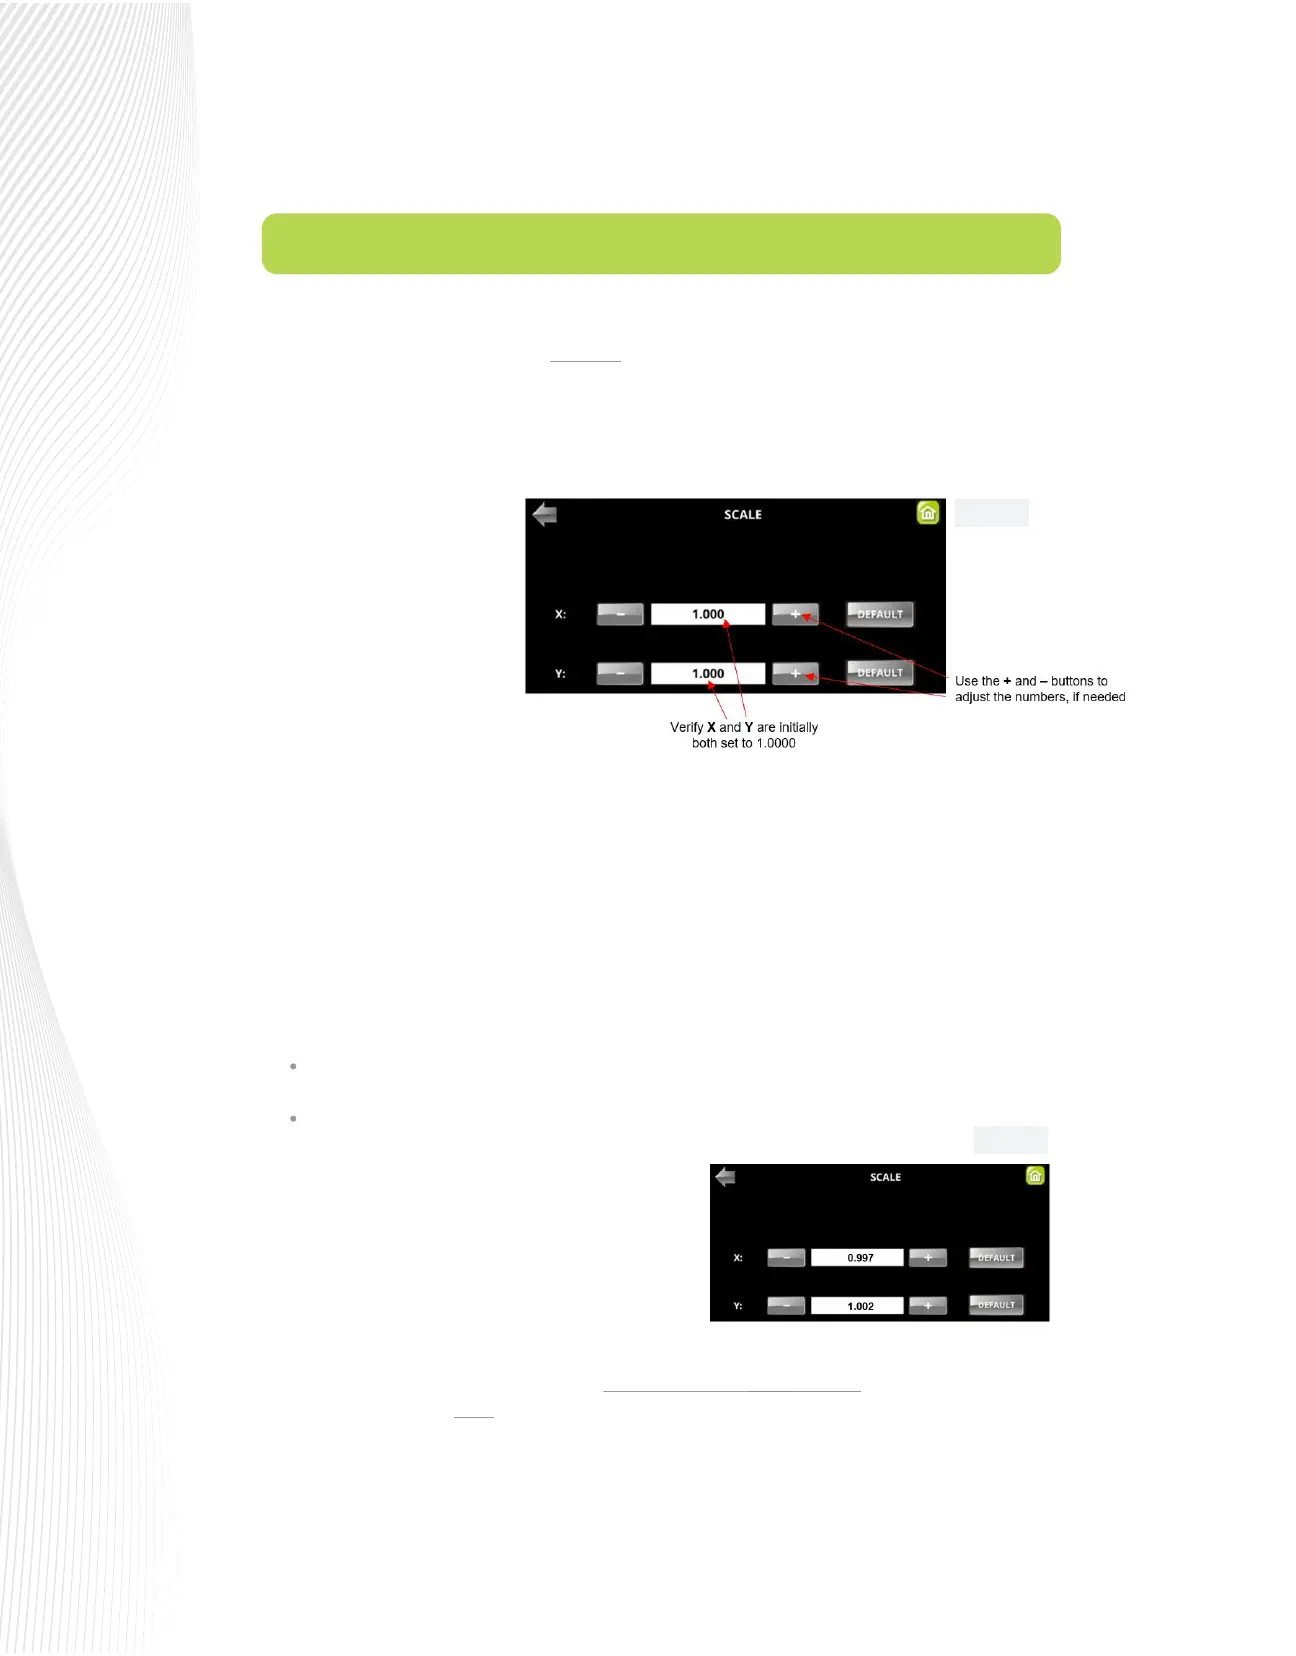
On the Muse control panel, go
to SET>ADVANCED
SETTINGS>SCALE. The
following window opens
where you can verify that the
current X and Y SCALE values
are both set to 1.0000:
Fig. 2.7.2
Fig. 2.7.1
 Loading...