2.6 Cutting from Create Space to the Muse
When you are ready to cut, click on the Cutter
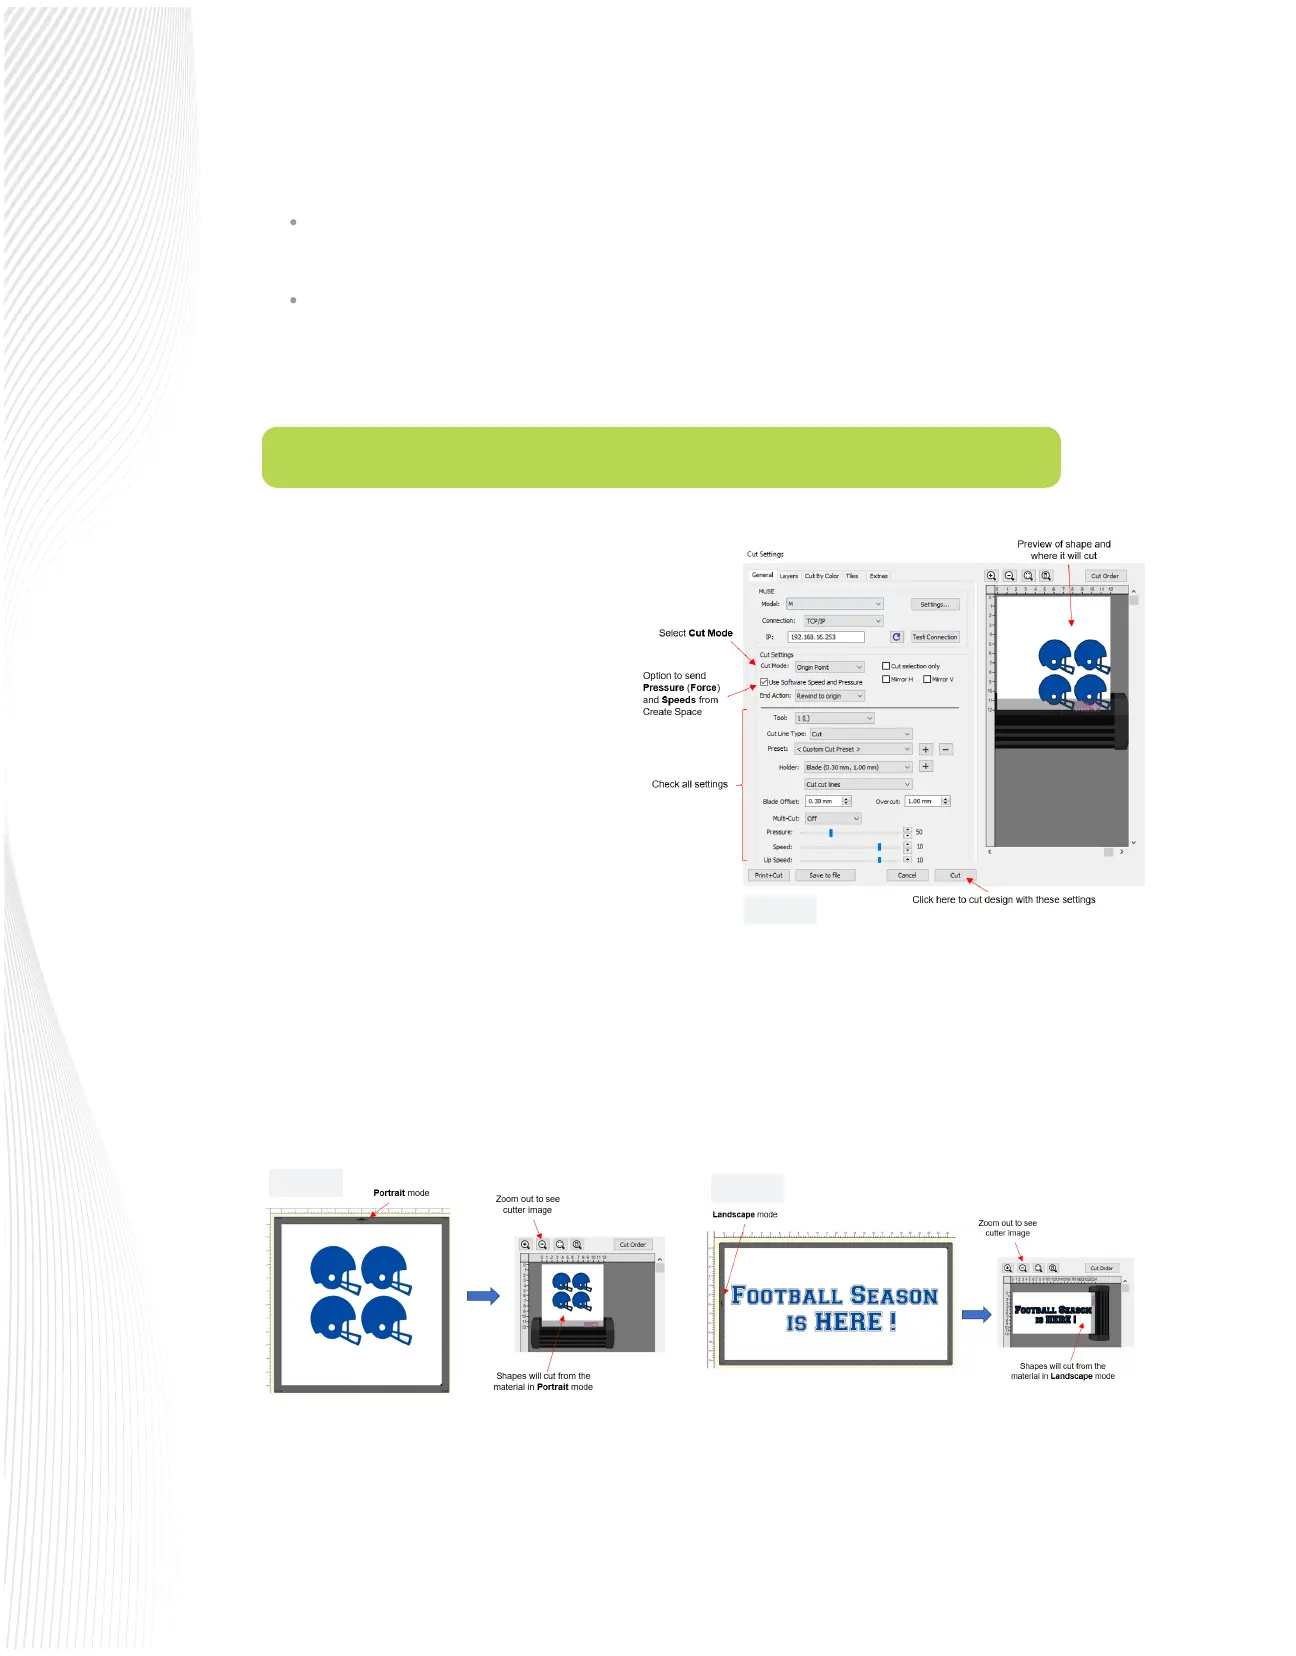
icon to open the Cut Settings window:
Cut Mode controls where shapes will cut on the
material. Typically, you will choose Origin Point to
be more ecient with material. Shapes will be
aligned and cut next to the origin you set on the
material. If the Cut Mode is set to WYSIWYG,
shapes will cut based on their placement in the
document (mat) area as shown in FIG. 2.6.2 and
2.6.3.
Use Software Speed and Pressure: Enabling this
option will use the Pressure and Speed settings in
SCAL, thus overriding those set on the Muse’s
control panel.
When you are ready to send the project to the Muse, click on Send.
To the right of the General tab is the Options tab , where you can set Passes if your material cuts better
with more than pass.
Also to the right of the General tab is the Advanced tab , where you can modify the Overcut setting
covered in Section 2.2.3.
Note that when designing in Create Space, you can use either Portrait mode (typically used with the included
cutting mat) or Landscape mode (typically used for longer projects). These are set on the Document Panel to
the right, along with setting up your document area under Mat Size. Keep in mind that the triangle (arrow) on
the edge of the on screen can be used to indicate where your shapes will cut relative to the direction the
material is fed into the Muse. You can also then verify, based on the preview in the Cut Settings window where
the shapes will cut relative to the Muse itself:
As you can see in FIG. 2.6.1, there are other cutting functions available in this window, such as Cut Order, Cut by
Color, Layers (Cut by Layer), Mirroring, and more.
When you are ready to send the project to the Muse, click on Cut.
Fig. 2.6.2
Fig. 2.6.3
Fig. 2.6.2
Fig. 2.6.1
 Loading...