4.3 Window Tint with MUSE M60
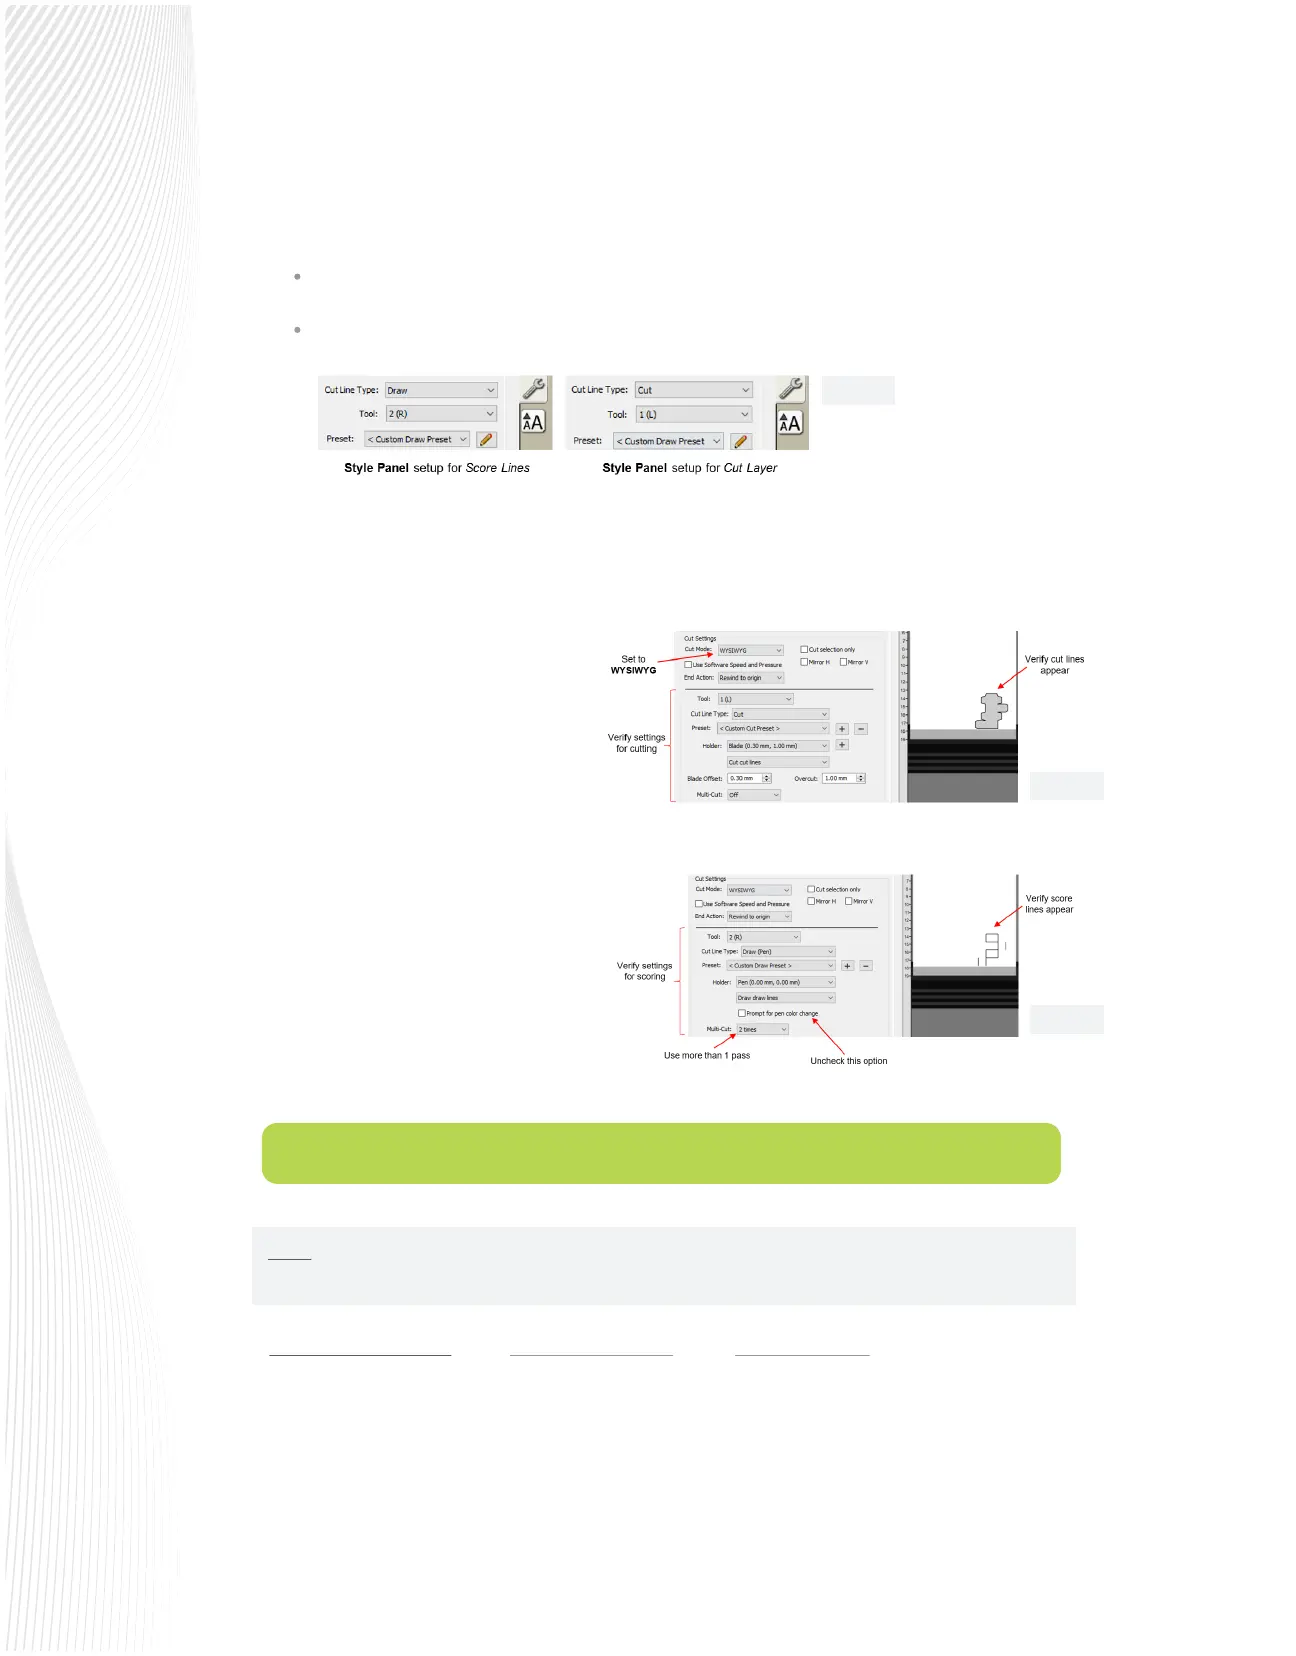
Select one layer at a time and, on the Style Panel, change settings in the following way:
With the layers properly assigned, the project can now be sent to the Cut Settings window. Make sure Cut
Mode is set to WYSIWYG. (If left at Origin Point, the score lines will not align properly with the cut lines.)
Under Tool, select 1(L) and enter the
settings for cutting the cut lines. Verify the
cut lines appear in the Preview:
Change Tool to 2(R) and enter the settings
for scoring the fold lines. Disable the option
for Prompt for pen color change:
Before cutting, verify the M60 is set up for
Dual head use. Mount the tools, load the
material, set the origin based on the left
side tool. Perform any necessary test cuts.
Click on Cut in the Cut Settings window and
the scoring and cutting will occur in one
process.
Normal Window Tint Film using a MUSE 30-degree blade and the Muse Blade Holder
The Force should be low; ideal would be between 5-8 on the sliding scale. The blade should be adjusted only
as deep as the lm to be cut. Aim for the lower number when using a new and serviceable blade and make
adjustments as the blade dulls.
For the Speed, on the sliding scale, 3-5 is ideal. Aim for the lower speed as recommended by the manufacturer.
Score Lines: Set Cut Line Type to Draw and set Tool to 2(R)
Cut Layer: Set Cut Line Type to Cut and set Tool to 1(L)
NOTE: All suggested settings are a starting point, depending on the media adjustments that may be
required based on the media itself.
Fig. 4.2.4
Fig. 4.2.3
Fig. 4.2.2
 Loading...