Parallelizer Owner’s Manual
4
2.3 MIDI Control Change mode
The Parallelizer can be controlled via MIDI Control Changes. Each MIDI Control Change includes a controller number
which specifies the Parallelizer which to turn on or off.
The Parallelizer can select from four different groups of Control Change numbers.
Refer to page 5 ‘Set Group of Control Change Numbers’.
2.4 MIDI Program Change + Control Change mode
In this mode, the Parallelizer can be controlled via both MIDI Program Change and Control Change.
In other words, on/off combinations can be recalled via the MIDI Program Change and each switch can be switched
on/off via the MIDI Control Change.
3. Set Operation Mode
1. Apply power while holding down FX1 and FX2 switches. The FX1 and FX2 LEDs will flash.
At this moment, the two switches can be released.
2. The four LEDs display the current operation mode.
3. Press Switches FX1, FX2, FX3 and Dry according to this table.
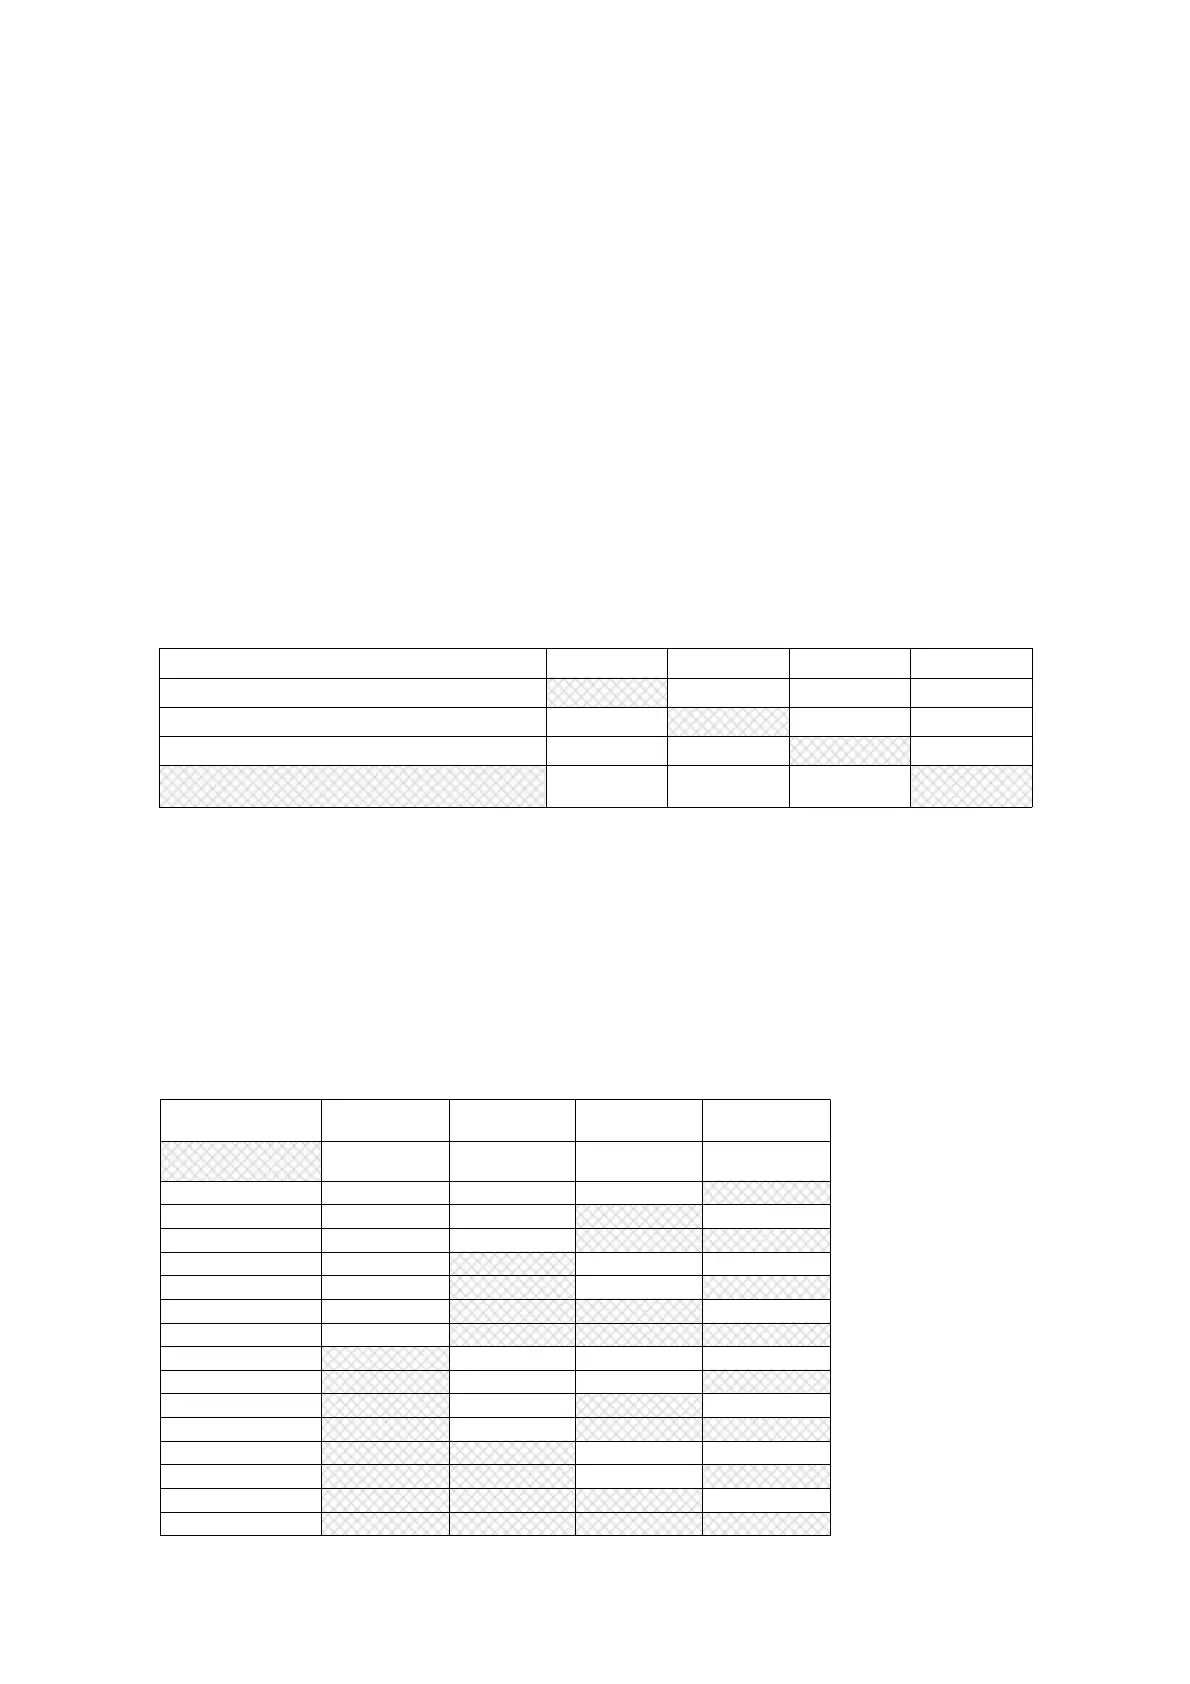
OPERATION MODE FX1 LED FX2 LED FX3 LED DRY LED
Manual mode ON OFF OFF OFF
Program Change mode OFF ON OFF OFF
Control Change mode OFF OFF ON OFF
Program Change + Control Change mode
(Factory Default)
OFF OFF OFF ON
4. Press and hold the DRY switch to save new Operation mode into the memory.
The Parallelizer will restart automatically.
4. Set MIDI Channel
1. Apply power while holding down FX2 and FX3 switches. The FX2 and FX3 LEDs will flash.
At this moment, the two switches can be released.
2. The four LEDs display the current MIDI channel.
3. Press Switches FX1, FX2, FX3 and Dry according to this table.
MIDI
Channel
FX1 LED FX1 LED FX1 LED DRY LED
1
(Factory Default)
OFF OFF OFF OFF
2 OFF OFF OFF ON
3 OFF OFF ON OFF
4 OFF OFF ON ON
5 OFF ON OFF OFF
6 OFF ON OFF ON
7 OFF ON ON OFF
8 OFF ON ON ON
9 ON OFF OFF OFF
10 ON OFF OFF ON
11 ON OFF ON OFF
12 ON OFF ON ON
13 ON ON OFF OFF
14 ON ON OFF ON
15 ON ON ON OFF
16 ON ON ON ON
4. Press and hold the DRY switch to save new MIDI channel into the memory.
The Parallelizer will restart automatically
 Loading...