INSTALLATION INSTRUCTIONS
INSTRUCCIONES PARA LA INSTALACIÓN
INSTRUCTIONS D’INSTALLATION
E.L. Mustee & Sons, Inc.
5431 West 164th St.
Brook Park, OH 44142
Phone: 216.267.3100
Fax: 216.267.9997
Email: info@mustee.com
Web: www.mustee.com
Models:
Modelos:
Modèles:
22C
24C
UTILATWIN
®
COMBO
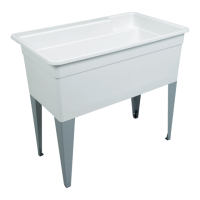
Laundry Tubs
Lavaderos UTILATWIN
®
COMBO
Cuves de lessivage à DEUX BACS UTILATWIN
®
PREPARATION: LA PREPARACION: PREPARATION :
Before removing the existing laundry tub
or the installation of your new Mustee
UTILATWIN
®
laundry tub, make sure that both
the hot and cold water lines are turned off.
If applicable, disconnect the existing
supply lines, trap assembly and remove old
tub. Transfer or sump pumps must be properly
supported by the floor, plus additional bracing
for the waste lines. Do not rely on the molded
drain for support. Use only Teflon
®
tape for all
threaded connections. DO NOT OVERTIGHTEN!
Antes de quitar el lavadero existente o la
instalación de su nuevo lavadero Mustee
UTILATWIN
®
, asegúrese de que las llaves de
paso del agua fría y caliente estén cerradas.
Si es posible, desconecte las líneas de suministro
existentes, el conjunto del sifón y quite el lavadero viejo.
Las bombas de transferencia o sumideros deben estar
adecuadamente sostenidos por el piso, además de contar
con soporte adicional para los desagües. No confíe en el
drenaje moldeado para proporcionarle apoyo. Use sólo
cinta adhesiva Teflon
®
para todas las conexiones roscadas.
¡NO APRIETE DEMASIADO!
Avant de retirer la cuve de lessivage existante ou de
commencer l’installation de votre nouvelle cuve de
lessivage UTILATWIN
®
de Mustee, assurez-vous que les
conduites d’eau chaude et d’eau froide sont fermées.
Au besoin, déconnectez les conduites d’alimentation
existantes et le siphon, puis retirez l’ancienne cuve.
Les pompes de transfert ou de vidanges doivent être
bien supportées par le plancher
, et les tuyaux de
décharge doivent être fixés solidement. Ne comptez pas
uniquement sur le soutien du drain moulé. N’utilisez du
ruban Teflon
®
pour tous les raccordements filetés. NE LES
SERREZ PAS TROP!
READ ALL INSTRUCTIONS CAREFULLY AND INSPECT PRODUCT
FOR DAMAGE BEFORE STARTING YOUR INSTALLATION.
LEA TODAS LAS INSTRUCCIONES DETENIDAMENTE Y VERIFIQUE QUE EL
PRODUCTO NO ESTÉ DAÑADO ANTES DE COMENZAR LA INSTALACIÓN.
VEUILLEZ LIRE ATTENTIVEMENT TOUTES LES INSTRUCTIONS ET VÉRIFIER QUE
LE PRODUIT N’EST PAS ABÎMÉ AVANT DE PROCÉDER À L’INSTALLATION.
INCLUDED IN CARTON: EN EL PAQUETE SE INCLUYE: CONTENU :
Model 22C & 24C Modelo 22C y 24C Modèle 22C et 24C
One carton: Una caja: Un contenu :
Two (2) laundry tubs Dos (2) lavaderos Deux (2) cuves de lessivage
Four (4) metal legs w/levelers Cuatro (4) patas de metal c/niveladores Quatre (4) pieds en métal avec boulons de
mise à niveau
Two (2) supply lines Dos (2) líneas de suministro Deux (2) conduites d’alimentation
One (1) faucet Un (1) grifo Un (1) robinet
One (1) 1
1
/
2
" PVC P-Trap Un (1) PVC ensamble de sifón P de 1
1
/
2
" (3.8 cm) Un (1) siphon-P PVC de 1
1
/
2
po (3,8 cm)
Two (2) 1
1
/
2
" stoppers Dos (2) tapónes de 1
1
/
2
" (3.8 cm) Deux (2) bouchons de 1
1
/
2
po (3,8 cm)
One (1) roll of Teflon
®
tape Un (1) rollo de la cinta Teflon
®
Un (1) rouleau de bande Teflon
®
TOOLS AND MATERIALS REQUIRED FOR INSTALLATION:
HERRAMIENTAS Y MATERIALES PARA LA INSTALACIÓN DEL PRODUCTO:
OUTILS ET MATÉRIEL NÉCESSAIRES À L’INSTALLATION :
Pipe wrench Llave de tubo Clé à tuyau
Adjustable wrench Llave ajustable Clé à molette
Level (24" min.) Nivel (24" min.) Niveau (24 po min.)
Two (2)
1
/
4
" lag bolts & anchors Dos (2) Anclajes y tornillos de
1
/
4
" (6.35 mm) Deux (2) Tire-fonds de
1
/
4
po (6,35 mm)
avec embases
Electric drill & concrete drill bit Taladro eléctrico y broca de concreto Perceuse électrique et foret à ciment
Hacksaw Segueta Scie à métaux
Metal file or medium grit sandpaper Lima metálica o papel de lija de grano mediano Lime en métal ou papier abrasif à grain moyen