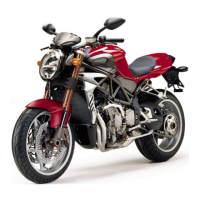
Do you have a question about the MV Agusta F4 750 and is the answer not in the manual?
Remove ignition switch assembly and disconnect initial coolant tubes.
Disconnect radiator charging, overflow, and heat exchanger tubes.
Disconnect sensors/fans and remove radiator fixing screws.
Remove fasteners from thermostat connecting and radiator tubes.
Suck out coolant, disconnect heat exchanger tube and sensor.
Disconnect fan connectors and remove radiator fixing screws.
Remove rubber band fasteners and unscrew fan unit.
Check and clean radiators, straighten bent fins.
Check fan motor efficiency using voltmeter and ampmeter.
Install electric cooling fan onto support frame and tighten nuts.
Position assembled fan onto upper radiator and tighten screws.
Verify temperature-resistant sheathing on upper fan wiring.
Position upper fan wiring and insert electrical connector into support.
Secure wiring with a strap fastener, ensuring correct lead positioning.
Assemble anti-vibration rubbers into their seats on the lower radiator.
Insert flanged bush into the anti-vibration rubber on the lower radiator.
Assemble the two radiators using screws and connect the rubber hose.
Tighten two CLIC R 96 300 band fasteners on the upper radiator.
Position fastener band head to prevent interference with fairing.
Insert upper anti-vibration rubbers and flanged bush into radiator supports.
Fix the electric lead of the lower fan using strap fasteners.
Route lower fan lead to avoid damage from fan blades or exhaust tube.
Position lead at minimum 5mm distance from fan blades to prevent damage.
Apply two band fasteners to secure the electrical lead.
Carry out pre-assembly of the radiator group fixing support.
Insert support with anti-vibration rubbers onto cooling fan support.
Mount the completed radiator group onto the motorcycle.
Check how coolant temperature sensor resistance varies with temperature.
Test sensor by immersing in heated oil and checking resistance.
Remove the connector and then the switch from the thermostat cover.
Verify thermal switch closure at specified temperature using a tester.
Remove the three fixing screws and the thermostat cover.
Remove the thermostat from the housing.
Inspect the thermostat pad for any signs of damage.
Heat thermostat in water to check opening temperature and lift.
Insert O-ring into thermostat cover seat and apply silicone grease.
Insert thermostat into cover, aligning flange hole with cover working.
Install thermostat cover assembly onto the engine.
Tighten the three fixing screws to the prescribed torque pressure.
Tighten thermal switch ensuring correct connector orientation.
Position expansion tank on frame and insert tubes into plastic clip.
Place tube near frame tube and fix with a rubber band fastener.
Fix the two rubber tubes to the frame as shown.
Insert the water pump/radiator metal connecting tube.
Insert upper and lower band fasteners for the connecting tube.
Tighten the fasteners for the metal tube/radiator using CLIC 205 pincer.
Connect the radiator filler tube and fix with a band fastener.
Assemble the rubber protection band.
Connect ignition switch from right side and fix connector to frame.
Insert thermostat/radiator connecting hose and tighten with band fastener.
Tighten the radiator fixing screw to the prescribed torque pressure.
Assemble metal tube/lower radiator hose, ensuring equal length on both sides.
Systemise radiator group and insert the lower fixing peg.
Tighten metal tube/radiator band fasteners with clip pointing downwards.
Connect the tube from the heat exchanger and tighten with band fastener.
Connect the connector of the water temperature sensor.
Connect the tube for discharging the cooling system.
Connect the two connectors of the fans situated on the right side.
Fix electrical wiring to the frame using rubber fasteners of specified dimensions.
Insert the pin for the fairing and tighten the two lateral screws.
Perform a final check of the assembled radiator group.
Assemble right air intake, left air intake, filter compartment, and fuel tank.
Top-up engine oil to the correct level if the heat exchanger was removed.
Check oil level, run engine, and check for coolant leaks.
Check and top-up coolant level, run engine, and re-check coolant level.
Complete the overall assembly of the motorcycle.
| Transmission | 6-speed |
|---|---|
| Tires Rear | 190/50 ZR 17 |
| Engine Type | Four cylinder, 4 stroke, 16 valve, DOHC |
| Power | 126 hp @ 12, 500 rpm |
| Torque | 74 Nm @ 10, 500 rpm |
| Frame | Tubular steel trellis frame |
| Front Suspension | Upside-down telescopic hydraulic fork |
| Rear Suspension | Single shock absorber with adjustable preload |
| Front Brakes | Dual 310mm discs, 4-piston calipers |
| Rear Brakes | Single 210mm disc, 4-piston caliper |
| Fuel Capacity | 21 liters |
| Seat Height | 810 mm |
| Wheelbase | 1398 mm |
| Tires Front | 120/65 ZR 17 |
