Do you have a question about the MyGenie XSonic and is the answer not in the manual?
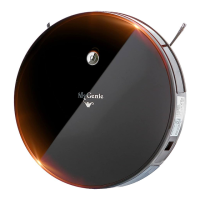
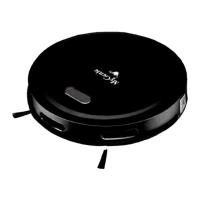
Identifies and labels the different parts of the main robot unit, including sensors and brushes.
Describes the components and setup of the charging station for the robotic vacuum cleaner.
Details the layout and functions of the remote control used to operate the robotic vacuum cleaner.
Explains the assembly and components of the dust box, including filters for trapping debris.
Outlines the structure and parts of the water tank and mop assembly for wet cleaning functionality.
Provides crucial technical specifications for the master unit, charging stand, and adapter, including voltage and power ratings.
Provides essential preparation guidelines for the cleaning area, such as removing obstacles and securing furniture.
Step-by-step instructions for initial setup, including charging preparation and installing side brushes.
Explains how to select different cleaning modes like Fixed-Point, Edge, and Return Charging for various cleaning needs.
Details the Turbo mode feature, which increases suction for heavily soiled floors or thick carpets.
Instructions on how to set the current time and date on the robotic vacuum cleaner for scheduling purposes.
Guides users through setting up a cleaning schedule for automatic operation on specific days and times.
Instructions on how to use the water tank and mop assembly for mopping functionality, including adding water and attaching the rag.
Details the process of assembling and attaching the main roller brush for effective floor sweeping and debris collection.
Step-by-step instructions for removing, cleaning, and drying the dust box and primary filter for hygiene and efficiency.
Procedures for cleaning the water rag and reservoir after mopping to maintain the mopping system.
Instructions for cleaning the main rolling brush and side brushes to remove tangled hair and debris.
Guidance on cleaning other components like universal wheels, sensors, and charging poles for optimal functionality.
Details the status indications provided by the robot's LED lights, such as charging, cleaning modes, and power levels.
Provides solutions for common error conditions indicated by red light flashes and buzzer sounds, aiding in troubleshooting.
States the duration of the product warranty, which is 12 months from the date of purchase.
Instructions on how to register the product purchase online to activate warranty benefits and receive support.
Details the steps for initiating a warranty claim, including contacting customer support via email.
This document serves as an instruction manual for the MyGenie XSonic robotic vacuum cleaner, providing comprehensive guidance on its operation, maintenance, and troubleshooting. The device is designed for domestic use, offering automated cleaning solutions for various floor types.
The MyGenie XSonic is a robotic vacuum cleaner capable of performing multiple cleaning tasks, including vacuuming and mopping. It features several cleaning modes to adapt to different environments and cleaning needs. The robot is equipped with a main brush and side brushes for effective debris collection, and a dust box for storing collected dirt. For mopping functionality, a water tank assembly with a water permeable rag can be attached. The device is designed to operate autonomously, with features such as automatic charging and scheduled cleaning.
The MyGenie XSonic offers a user-friendly experience with both manual controls on the master unit and a remote control for more detailed settings.
Getting Started: Before initial use, it is crucial to prepare the cleaning area by removing power cords, small items, and folding carpet edges to prevent entanglement. For suspended environments like staircases, protective barriers should be installed. The charging stand needs to be placed flat against a wall, ensuring a clear space of 1 meter to the left and right, and 2 meters in front, free from reflective surfaces. The adapter is then connected to the charging stand. The side brushes are easily installed by snapping them into their respective mounting ports (right brush to right port, left brush to left port).
Charging: To charge the master unit, turn on the side power switch (set to "I"). Place the master onto the charging stand, aligning the charging pole pieces. The robot will enter standby mode, indicated by flashing red/pink/blue breathing lights. A continuous blue light signifies that charging is complete. For the first use, a continuous charge of over 12 hours is recommended. It is advisable to keep the master in a charged state when not in use to ensure optimal performance for its next cleaning job.
Cleaning Modes: The robot offers several cleaning modes, selectable via the remote control, to suit different cleaning requirements:
Stopping Operation: To pause the master during operation, press the main key on the master or the "OK" key on the remote control. The master unit enters sleep mode after 10 minutes of standby, with the key light turning off.
Time and Date Settings: The remote control allows for programming the current weekday, hour, and minute.
Scheduling a Routine Cleaning:
Mopping Function: The MyGenie XSonic can be converted for mopping by replacing the dust box with the water tank assembly.
Regular maintenance is essential to ensure the longevity and optimal performance of the MyGenie XSonic. Always turn off the master and unplug the charging stand before cleaning.
Dust Box and Filter Maintenance:
Water Tank Assembly Maintenance:
Rolling Brush and Side Brushes Maintenance:
Other Assembly Maintenance:
Battery Care: If the product will not be used for an extended period, remove the battery and store it in a safe place. If the battery leaks, remove it and clean the battery compartment. The device uses a high-life battery that does not require frequent replacement. For battery replacement, contact after-sales service.
| Navigation | Laser Navigation |
|---|---|
| Noise Level | 65 dB |
| Filters | HEPA Filter |
| Dustbin Capacity | 0.6 L |
| Water Tank Capacity | 350 ml |
| Control | App |
| Dust Capacity | 0.6 L |
| Type | Robot Vacuum Cleaner |
| Cord Length | Cordless |