ENGLISH
5
SETUP
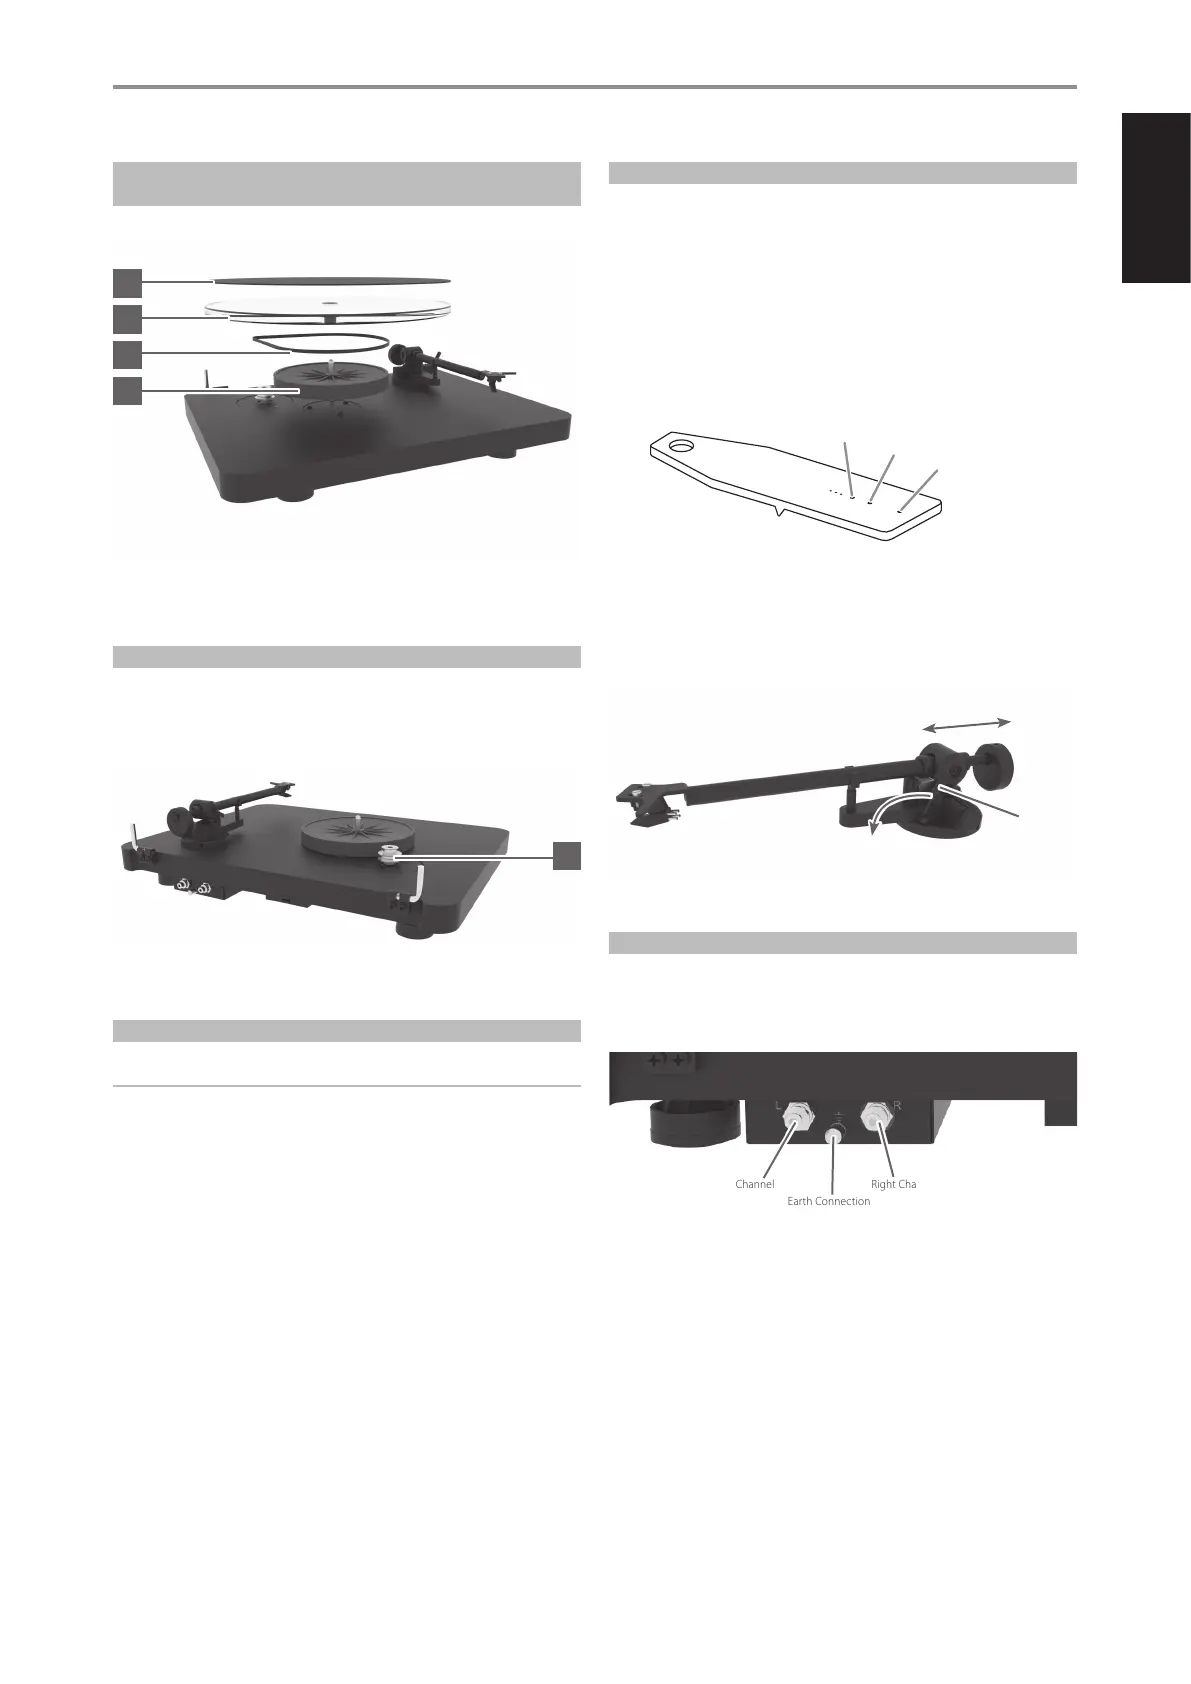
PLATTER, SUB-PLATTER, FELT MAT AND DRIVE BELT
INSTALLATION
1 Install sub-platter (3) and drive belt (5).
2 Install the platter (1) on the sub-platter (3) and put the felt mat (2) on
top of the platter.
ADJUSTING THE PULLEY HEIGHT
1 Adjust the pulley height if it taps against the platter.
2 Carefully remove platter and drive belt from the turntable.
3 Loosen the small screw and move the pulley (4) to the desired position
by using a small athead screwdriver.
4 Tighten the screw back and t the drive belt and the platter.
CARTRIDGE INSTALLATION
IMPORTANT NOTE
This has already been done for you if you purchased this turntable in a
package that included the cartridge.
1 Install the cartridge into the aluminium headshell using the appropriate
hardware included with your cartridge.
2 Connect the cartridge as indicated below
• White : left channel L+
• Red : right channel R+
• Green : right channel R-
• Blue : left channel L-
3 For correct cartridge alignment, use the supplied paper cartridge
alignment tool with two null points. Consult with your dealer if you are
not familiar with two-point setup.
VERTICAL TRACKING FORCE SETTING (VTF)
1 Conrm the exact weight of your cartridge before setting the Vertical
Tracking Force (VTF).
2 Push the counterweight carefully towards the rear end of the
counterweight support rod. Place the stylus pressure gauge onto the
platter.
3 Set the required VTF by lowering the tonearm lift lever. Place the tip of
the stylus exactly in between the two points marked 15mN and 20mN.
4 Correct pressure has been achieved if the stylus pressure gauge
becomes level. The stylus pressure gauge will either not move or tilt
down if there is insucient or excessive pressure.
5 Adjust the amount of pressure by carefully moving the counterweight
(11) along the support rod until the stylus pressure is sucient to raise
the pressure gauge to the level position. Moving the counterweight
(11) away from the cartridge will reduce pressure and towards will
increase pressure.
6 Secure the counterweight (11) using hexagonal key provided.
TONEARM OUTPUT CONNECTION
1 Connect the supplied audio cable connector (RCA-to-RCA lead) to the
RCA tonearm output located at the rear of the turntable, behind the
tonearm.
2 Connect the grounding cable on the earth connection screw.
If your amplier does not have an input suitable for phono cartridges you
will require a separate phono amplier stage for MM or MC cartridges
which is then connected between the record player and a free line level
input of the amplier.
20mN
15mN
10mN
5
4
3
1
2
Tonearm
Lift Lever
+VTF
-VTF
Left Channel Right Channel
Earth Connection
 Loading...