This document serves as a comprehensive guide for setting up and optimizing the Nakamichi Shockwafe Ultra 9.2 home theater system, focusing on speaker placement, device connectivity, and initial operation.
Function Description
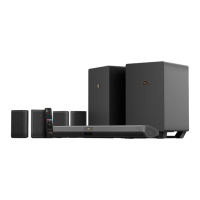
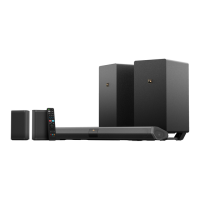
The Nakamichi Shockwafe Ultra 9.2 is a high-performance home theater sound system designed to deliver immersive audio experiences, supporting advanced formats like Dolby Audio, DTS-HD Master Audio, and DTS-X. It consists of a soundbar, two subwoofers, and four surround speakers, configurable for both dipole and 9.2 channel setups. The system aims to provide superior surround sound quality for movies, music, and other media, enhancing the overall home entertainment experience. It offers various connectivity options, including multiple HDMI inputs with ARC support, optical, coaxial, and auxiliary inputs, ensuring compatibility with a wide range of source devices and televisions. The system is controlled via a dedicated remote, allowing for adjustments to volume, input selection, sound modes, and equalization settings.
Usage Features
Soundbar & Subwoofer Placement:
- Soundbar: Should be placed centrally, with a recommended distance of 9 ft (2.5m) from the main listening position. It requires 3.2 ft (1m) of clearance on either side.
- Subwoofers: Two subwoofers are included. They should be placed on either side of the soundbar, each requiring 3.2 ft (1m) of clearance from the soundbar and 5 ft (1.5m) from the side walls. This symmetrical placement helps in achieving balanced bass distribution.
Surround Speakers Placement:
The system offers two primary configurations for the surround speakers:
- BETTER (Attached: Dipole Setup): In this configuration, the four surround speakers are paired into two units, with each unit acting as a dipole speaker.
- Placement: The two dipole units should be placed to the left and right of the main listening area, approximately 6.5 ft (2m) away.
- Orientation: The drivers of the dipole speakers should be at ear level and pointed away from the listener's sitting area.
- Angle: Recommended angles for placement relative to the listening position are between 90°-110° for both the left and right units.
- BEST (Detached: 9.2Ch Setup): This configuration utilizes all four surround speakers as individual units, creating a true 9.2 channel setup.
- Detaching Speakers: This involves detaching the two rear speakers from their dipole configuration. For the left speaker, rubber stoppers are placed into slots. For the right speaker, a catch is unscrewed, and rubber stoppers are placed into slots. A switch at the back of each rear speaker must be flipped from "DIPOLE" to "9 CH".
- Placement:
- Surround Left/Right: Two speakers are placed to the left and right of the main listening area, approximately 6.5 ft (2m) away. Their drivers should be at ear level and pointed right at the listener's sitting area. Recommended angles are between 90°-110°.
- Surround Back Left/Right: The remaining two speakers are placed behind the main listening area, also approximately 6.5 ft (2m) away. Their drivers should be at ear level and pointed right at the listener's sitting area. Recommended angles are between 90°-110°.
Connecting with a TV and other devices:
- HDMI ARC (Recommended): If your TV's HDMI IN jack is labeled ARC, connect source devices (Blu-ray player, cable box, satellite box) directly to the HDMI IN jacks (HDMI 2/3/4) on the Sound Bar. Then, connect the TV's HDMI ARC output to the Sound Bar's HDMI OUT (ARC TO TV) port. This ensures the highest quality surround sound.
- Optical (Alternative): If your TV is not HDMI ARC compatible, connect the TV's OPTICAL OUTPUT jack to the Sound Bar's OPTICAL INPUT. Source devices would then connect directly to the TV.
- Cable Insertion: Always ensure cables are firmly inserted for optimal performance.
Setting up Satellite Speakers to the Subwoofer:
- Wired Connection: The satellite speakers connect to the subwoofers via dedicated ports. The LEFT speaker connects to the LEFT port on the subwoofer, and the RIGHT speaker connects to the RIGHT port. This connection is crucial for the surround sound functionality.
Setting up the Remote Control:
- Battery Installation: Insert batteries into the remote control, ensuring correct polarity.
Turning on the TV:
- Ensure your TV is powered on before proceeding with the soundbar system.
Turning on the Shockwafe Ultra 9.2:
- Power Connection: Connect the AC power cords of the soundbar and wireless subwoofers to power outlets.
- Power Switch: Flip the power switch on the back of both subwoofers to the ON position.
- Soundbar Power: Press the power button on the remote control to turn on the soundbar.
- Indicators: Confirm that the front panel display of the soundbar lights up and the power indicator of the subwoofer is a BLUE LED.
- Source Device: Turn on your source device (e.g., Blu-ray player, cable box).
Listening to your Soundbar System:
- TV Audio: Select the desired program on your TV. If connected via HDMI ARC, the TV audio will output through the Sound Bar. If no sound, press HDMI ARC on the remote until "ARC" appears on the soundbar display.
- Input Device Audio: Select the appropriate HDMI input (HDMI 2/3/4) or Digital input (Optical/Coaxial) on the Sound Bar remote control. The input selection will appear on the soundbar display.
- Volume Adjustment: Adjust the main volume using Vol +/- on the remote. Adjust subwoofer volume using Bass +/- on the remote. Refer to the User Manual for detailed EQ adjustments.
- HDMI ARC Note: When using HDMI 2/3/4 via HDMI ARC to your TV, ensure the TV's source is switched to HDMI ARC.
Maintenance Features
Troubleshooting Guide:
The manual provides a comprehensive troubleshooting section for common issues:
Support:
- For comprehensive troubleshooting, users are directed to the Nakamichi helpdesk website.
- If problems persist, users are advised to refer to the "Help & Troubleshooting" section in the full User Manual.
- Nakamichi offers a "24HRS OR LESS RESPONSE TIME GUARANTEED" for support inquiries.
- Contact information for a SHOCKWAFE sound bar specialist is provided: email support and phone support (Mon-Fri 10am-7pm PST).
- Web support and FAQs are also available on the Nakamichi-USA website.
This detailed guide ensures users can effectively set up, operate, and troubleshoot their Nakamwafe Ultra 9.2 system for an optimal home theater experience.