Ettus E3XX Getting Started Guide ANGRYVIPER Team
3.2 Vendor Software Setup
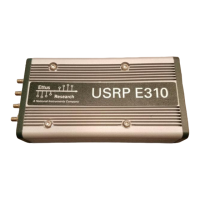
The platform that is expected to be used is the Ettus Research/National Instruments Universal Software Radio
Peripheral (USRP) E310 (or E3XX) SDR (e.g. e3xx). This Op enC PI-enabled platform provides the capability of
deploying hardware and software worke rs while using X ilinx’s 13.4 distribution of Linux.
The synthesizers and cross-compilers required to build HDL and RCC Workers for this Platform are installed by
following the instructions found in the OpenCPI FPGA Vendor Tools Installation Guide. This document assumes
that the user has installed the appropriate versions of Vivado and the Xilinx SDK.
3.3 Building Required Projects
The core, assets, and bsp_e310 projects must be built in a specific order for this platform. This section outlines
how to build the relevant projects and provides the commands to do so.
For this document, the projects should be built as follows:
1. Build core for the xilinx13_4 RCC Platform and the e3xx HDL Platform, but omit assemblies
2. Build assets for the xilinx13_4 RCC Platform and the e3xx HDL Platform, but omit assemblies
3. Build the bsp_e310 project for these same platforms
4. Build the testbias assembly from the assets project. This will be used later in this guide.
Once the HDL Platform is built in the BSP project, assemblies can be built for that HDL platform
$ cd /home/<user>/ocpi_projects/ && \
$ ocpidev build -d core --rcc-platform xilinx13_4 --hdl-platform e3xx --no-assemblies && \
$ ocpidev build -d assets --rcc-platform xilinx13_4 --hdl-platform e3xx --no-assemblies && \
$ ocpidev build -d bsp_e310 --rcc-platform xilinx13_4 --hdl-platform e3xx && \
$ ocpidev build -d assets hdl assembly testbias --hdl-platform e3xx;
Note: replace “<user>” with your username in the commands above.
Each of these build commands can also be performed via the ANGRYVIPER IDE as follows:
To perform this operation within the IDE:
1. Open the ANGRYVIPER Perspective
2. Select the asset from OpenCPI Project View
3. Import to AV Operations Panel using “>” button
4. Select the RCC and/or HDL platforms for the build (use
Ctrl for multiple selection)
5. Click “Build”
See the ANGRYVIPER Team’s Getting Started Guide for additional information concerning the use of ocpidev
and the ANGRYVIPER IDE to build OpenCPI assets.
3.4 Hardware Setup
• Ettus USRP E3XX
It is expected that this SDR package includes a power supply, micro-USB to USB cable and standard SD card
(4GB or larger).
OpenCPI has been tested on the Ettus USRP E310.
The micro-USB serial port located on the back E310 labeled CONSOLE (Figure 2) can be used to access the
serial connection with the processor.
6
 Loading...