Get to Know Your Nature's Generator Power Pod
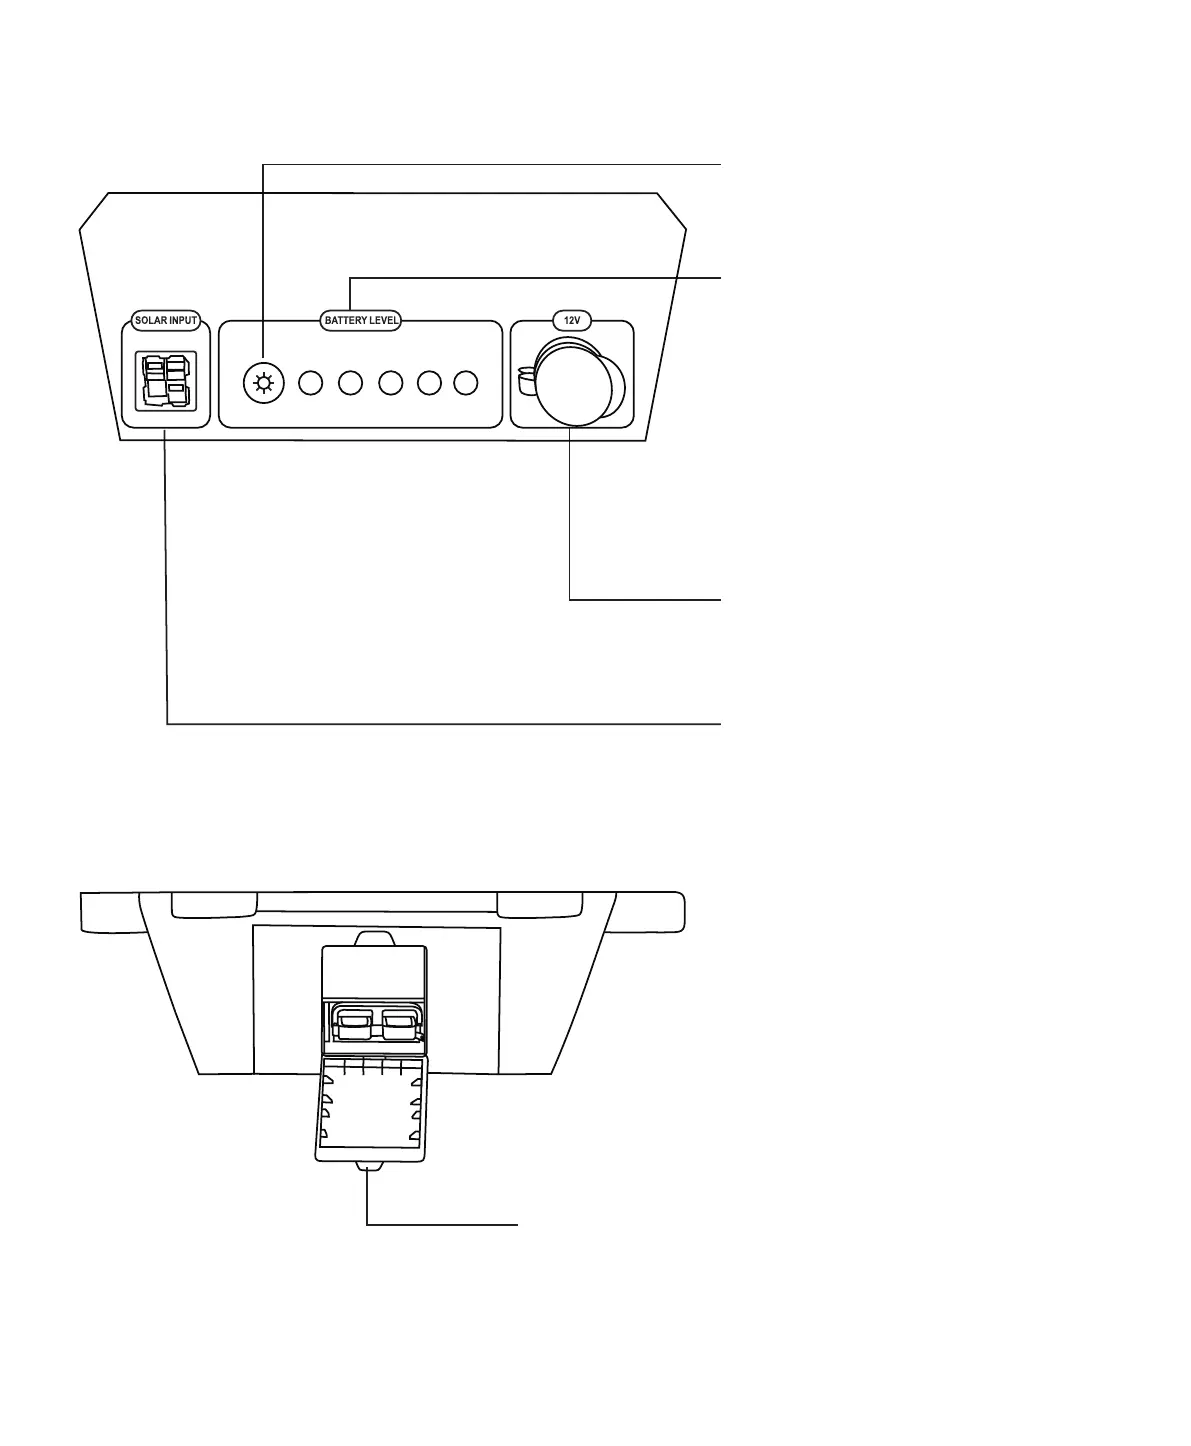
Front Panel
Solar Input:
To connect with solar panel(s).
This Anderson port is designed to be
used with up to 200 was of solar
power.
LED Light Buon:
Press it to show the baery charge l
evel.
LED Lights:
When facing the front of the Nature's
Generator Power Pod, from le to right:
the first light will show green, which
indicates a 20% charge. The second
light will show green, which indicates
a 40% charge, the third light will show
green which indicates a 60% charge
and the fourth light will show green
which indicates a 80% charge and
finally the fih light will show green
which indicates a 100% charge.
12V Port:
12V DC port is designed to provide
up to 240 was of power.
Back Panel
Expansion: Daisy chain connector. There is open
space on the top of the connector for the
expansion cable.
Visit Naturesgenerator.com for More Information
4
 Loading...