Do you have a question about the Naxa NVP-2501C and is the answer not in the manual?
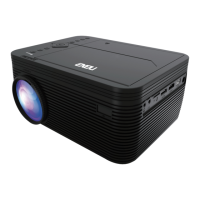
This document serves as a user manual for the Naxa 150" Home Theater 720P LCD Projector with Built-in DVD Player, model NVP-2501C. It provides comprehensive instructions for operating and maintaining the device, ensuring users can maximize its features for an immersive home theater experience.
The projector is designed to deliver a large-screen viewing experience, capable of projecting an image up to 150 inches. Its primary function is to display video content from various sources, including a built-in DVD player, external media devices, and computers. The inclusion of a DVD player makes it a self-contained entertainment unit, allowing users to play disc-based media directly without needing an additional player. This integration simplifies the setup and reduces the number of components required for a complete home theater system.
One of the key usage features is its versatility in placement. The projector can be installed in four different configurations: Front Table, Front Ceiling, Rear Table, and Rear Ceiling. The Front Table setup is the most common, offering ease of setup and portability, where the projector is placed on a surface in front of the screen. For a more permanent installation, the Front Ceiling option allows the projector to be suspended upside-down from the ceiling in front of the screen, requiring a projector mount. Similarly, Rear Table and Rear Ceiling configurations are available for situations where the projector needs to be placed behind a special rear projection screen, also requiring a mount for ceiling placement. This flexibility ensures that the projector can adapt to various room layouts and user preferences.
Adjusting the projected image is made easy with dedicated controls for focus and keystone correction. The focus adjustment stud allows users to sharpen the image by turning a knob, ensuring clarity of pixels, especially near the center of the screen. Keystone correction, managed by a trapezoidal adjustment knob, is crucial for correcting distorted images that occur when the projector beam is projected at an angle. This feature restores the image to a rectangular or square shape, providing a professional and undistorted display.
The projector offers a wide array of input options to accommodate different media sources. It includes HDMI ports for connecting modern devices like laptops, PCs, Blu-Ray players, and other HDMI-enabled sources, providing superior sound and picture quality. For older or analog devices, an AV input is available, requiring a 3.5mm to RCA audio/video cable. Computer video input is supported via a VGA port, though it's important to note that VGA connections do not support audio, meaning external computer speakers would be needed for sound. Additionally, the projector features Micro SD and USB inputs, supporting flash drives and SD cards up to 32GB, and compatible with AVI and MOV file formats for video, as well as MP3 and JPEG for audio and images. This extensive connectivity ensures compatibility with a broad range of media devices.
A notable feature is the integrated Bluetooth functionality, allowing for wireless audio output. Users can pair the projector with external Bluetooth speakers, enhancing the audio experience without the need for cables. The pairing process is straightforward: access the Bluetooth menu via the projector's menu screen, select "ON," and then activate the external Bluetooth speaker's pairing mode. An audio prompt confirms a successful connection, and the projector's sound will then be routed through the external speaker. This is particularly useful for creating a more immersive sound environment or for situations where the built-in speakers are insufficient. The manual also provides instructions for disconnecting Bluetooth devices and troubleshooting connection issues, such as resetting Bluetooth settings if automatic connection fails.
The built-in DVD player is a significant convenience. To use it, simply power on the unit, select DVD mode via the source button, open the disc cover, insert a DVD or CD with the label side facing up, and close the cover. The player will automatically scan and begin playback.
Maintenance features are also outlined to ensure the longevity and optimal performance of the device. For the projector lens, a lens cap is provided to protect it from dirt and debris when not in use. Users are instructed to remove the cap before use and reinstall it afterward. Proper disc handling for the DVD player is emphasized, including advice to avoid leaving discs near heat sources, in direct sunlight, or high humidity. Discs should be stored in their cases to prevent warping and should be handled by the edges to avoid touching the surface. Cleaning discs with a soft cloth, wiping from the center outwards, is recommended, while the use of solvents or non-CD-specific cleaners is advised against.
The remote control is a central component for operating the projector and its various functions. It features buttons for power, mute, random playback, OSD (On-Screen Display) information, angle selection for supported DVDs, subtitle mode, repeat options, Play Back Control (PBC) for VCDs, title menu access, DVD main menu access, A-B loop creation, program playback, slow motion, and setup menu access (for DVD mode). Navigation is handled by arrow keys and an OK button, while playback controls include play/pause, stop, rewind/fast forward, and next/previous track. Additional buttons for flip (to rotate/mirror the screen), audio channel switching, volume control, a numeric keypad for chapter/title selection, go-to function, and zoom for video/photos are also present. The remote requires AAA/UM4 batteries, and the manual provides clear instructions for battery installation, emphasizing correct polarity and warning against mixing old and new batteries, exposing them to excessive heat, or attempting to charge them.
Security features include parental controls for the DVD player, allowing users to set a maximum rating for movies. Movies rated higher than the set level require a password (default is 0000) to be viewed. This function only works for discs that have parental control features. The manual also explains how to reset the password and restore default settings.
Overall, the Naxa NVP-2501C projector is presented as a user-friendly and versatile home theater solution, combining a large projection display with integrated DVD playback, extensive connectivity, and convenient adjustment features, all supported by clear operational and maintenance guidelines.
| Type | led |
|---|---|
| Light Source Life | 20000 hours |
| Display | lcd |
| Color Brightness | 3600 lumens |
| Resolution | hd (720p) |
| Native Resolution | 1280 x 720 |
| Contrast Ratio | 500:1 |
| Aspect Ratio | 16:9 |
| HDR | no |
| Inputs | usb, hdmi |
| Voice Assistant | no |
| OS Compatibility | not applicable |
| Depth | 8 inches |
|---|---|
| Height | 3 4/5 inches |
| Width | 6 9/10 inches |
| Net Weight | 2.29 pounds |