12
INSTALLATION AND ADJUSTMENT
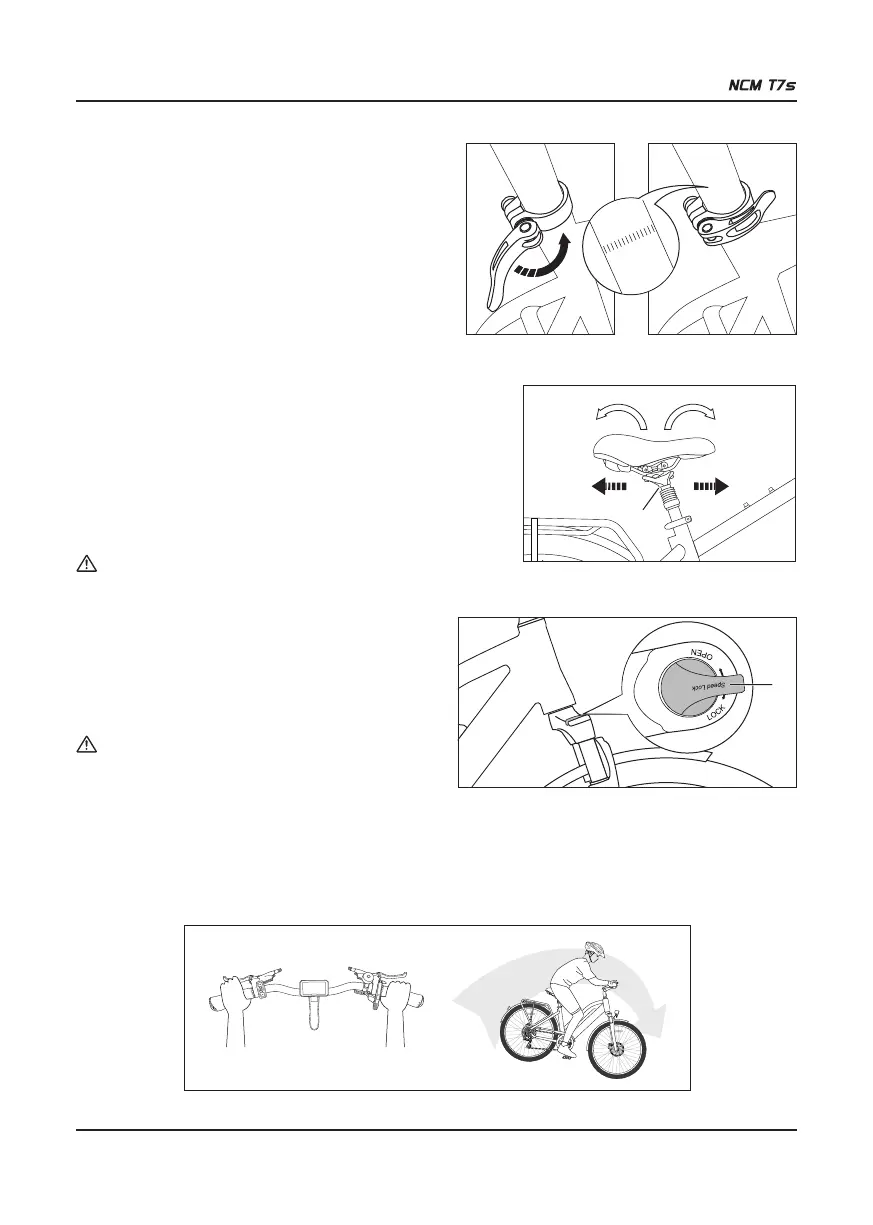
3.6 Saddle Adjustment
The saddle can also be tilted and adjusted in the forward/back
direction.
- Loosen the bolt (1) at the bottom.
- Adjust the saddle tilt by pressing down on the front or rear of
the saddle.
- Move the saddle forward or backward to adjust for arm/torso
length and desired riding position.
- Tighten the bolt (1) to secure the saddle.
3.7 Locking the Suspension Fork
- The suspension is locked with the knob (2).
- Turn the knob (2) to the locked position.
- The lock function is exclusive to the + models.
WARNING:
Do not make any further changes to the suspension fork.
WARNING:
To avoid discomfort, the saddle should generally be set as horizontal as possible.
There is a minimum insertion line marked on the seat post
(Failure to observe the minimum insertion line can result in
serious injury); please ensure the seat post is always inserted
into the seat tube beyond this line (the line must be inside the
seat tube).
- Loosen the quick release lever at the top of the seat tube,
determine the appropriate saddle height and tighten the clamp.
- The clamping force can be adjusted by adjusting the bolt on
the quick release lever.
- The quick release lever must be closed with considerable
counter pressure.
3.8 Brakes
3.8.1 General
In most countries, bicycles are made so that the left brake-lever controls the front-wheel brake; to change this, please
contact your dealer for help, Keep in mind Section 2- Important safety information.
If your bicycle has two hand brakes, apply both brakes at the same time for optimal stopping distance.
1
2