10 11
2. PreparetheRemoteControl
①
For the first time use, remove the protective tab to activate the
remote control batteries.
②
To replace battery, slide to open the battery compartment, insert new
batteries with correct polarity
(+/-) as indicated, and close the battery
compartment.
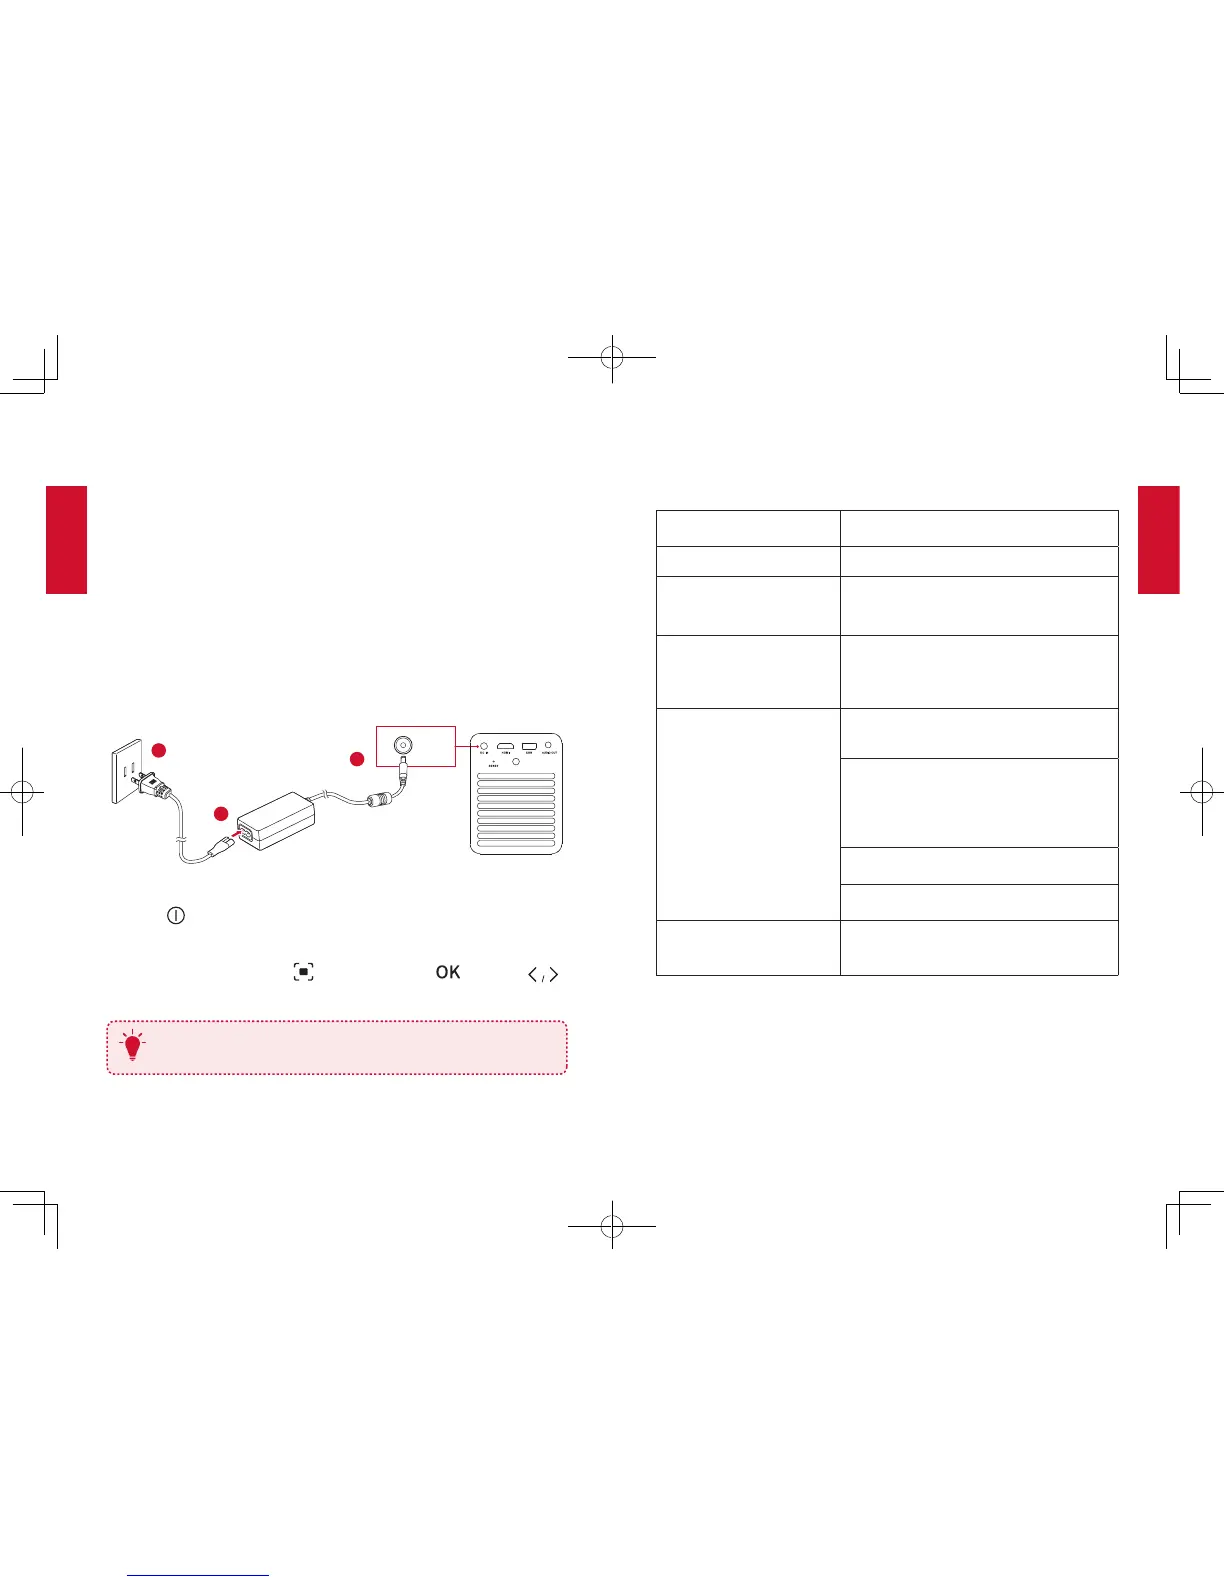
3. PowerOn
①
Connect the device to the mains by using the provided power
adapter and power cord, the built-in battery will be charged and the LED
indicators will light
on.
DC IN
2
1
3
②
Press on remote control or slide down the lens cover to power on.
③
Turn the device towards a suitable projection surface or wall.
④
To focus the image, press (or press and hold ) and then
.
Fully charge the built-in battery before using for the first time, which
will prolong the battery lifespan.
T
Settings
Finish the main settings when you power on the device for the first time.
[Image Mode]
Adjust brightness in 3 modes: Brightest /
Standard / Battery
[Auto Keystone Correction]
Enable / disable auto keystone correction.
[Keystone Correction]
Correct keystone manually. Default value is 0.
[Language]
English
[Project mode]
[Front Ceiling]: The device is hanging from
the ceiling in an upside down position. The
image is rotated by 180 degrees.
[Rear Ceiling]: The device is hanging from
the ceiling in an upside down position
behind the projection surface. The image
is rotated by 180 degrees and horizontal
mirrored.
[Front]: The device is located in front of the
projection surface.
[Rear]: The device is located behind the
projection surface.
[Recovery]
[Recovery]: All data on the built-in storage
will be erased.
[Cancel]: Quit the action.