English Suomi
❶ Connect your computer to the projector using the supplied
computer cable (VGA).
❷ Connect the supplied power cord.
❸ Slide the lens cover to the right to uncover the lens.
< Short-Throw model >
Remove the lens cap.
❹ Turn on the projector.
Press the
(POWER) button on the projector cabinet or the POWER ON button on the remote
control.
❺ Select a source.
TIP:
Press the AUTO ADJ. button to optimize an RGB image automatically.
❻ Adjust an image size and the throw angle.
[Focus]
Turn the focus ring or focus lever.
[Zoom]
Turn the zoom ring.
< Short-Throw model >
Adjusting on the displayed DISITAL ZOOM bar.
1. Press the ZOOM button on the remote control.
2. Press the ◀ or ▶ button.
[Throw angle (Tilt foot)]
1. Lift the front edge of the projector.
2. Push up and hold the Adjustable Tilt Foot Lever.
3. Lower the front of the projector to the desired height.
4. Release the Adjustable Tilt Foot Lever.
TIP:
Automatic Keystone Correction function is turned on at the time of shipment.
❼ Turn off the projector.
1. Press the
(POWER) button on the projector cabinet or the STANDBY button on the remote
control.
2. Press either the
(POWER) or the STANDBY button again.
3. Slide the lens cover to the left to cover the lens.
< Short-Throw model >
Mount the lens cap.
4. Disconnect all the cables.
❶ Kytke tietokone projektoriin mukana toimitetulla tietokonekaapelilla
(VGA).
❷ Kytke mukana toimitettu virtajohto.
❸ Liu'uta linssinsuojusta oikealle paljastaaksesi linssin.
< Short-Throw-malli >
Poista linssinsuojus.
❹ Käynnistä projektori.
Paina projektorikotelon
(VIRTA) -painiketta tai kaukosäätimen POWER ON -painiketta.
❺ Valitse lähde.
VIHJE:
Paina AUTO ADJ. -painiketta optimoidaksesi RGB-kuvan automaattisesti.
❻ Säädä kuvan koko ja heittokulma.
[Tarkenna]
Käännä tarkennusrengasta tai -vipua.
[Zoomaa]
Käännä zoomausrengasta.
< Short-Throw-malli >
Säätäminen näkyvillä olevassa DIGITAALINEN ZOOM -palkissa.
1. Paina kaukosäätimen ZOOM-painiketta.
2. Paina painiketta ◀ tai ▶.
[Heittokulma (kallistusjalka)]
1. Nosta projektorin etureunaa.
2. Nosta ja pidä kiinni säädettävän kallistusjalan vivusta.
3. Laske projektorin etuosa haluttuun korkeuteen.
4. Vapauta säädettävän kallistusjalan vipu.
VIHJE:
Automaattinen keystone-korjaustoiminto kytketään päälle toimitushetkellä.
❼ Sammuta projektori.
1. Paina projektorikotelon
(VIRTA) -painiketta tai kaukosäätimen STANDBY-painiketta.
2. Paina uudelleen joko
(VIRTA) tai STANDBY-painiketta.
3. Liu’uta linssinsuojusta vasemmalle peittääksesi linssin.
< Short-Throw-malli >
Kiinnitä linssinsuojus.
4. Irrota kaikki kaapelit.
Magyar Polski
❶ Csatlakoztassa a számítógépet a projektorhoz a mellékelt
számítógépkábel (VGA).
❷ Csatlakoztassa a mellékelt tápkábelt.
❸ Csúsztassa a lencse fedelét jobbra, a lencse takarásának
megszüntetéséhez.
< Rövid vetítési távolságú modell >
Vegye le a lencsevédő sapkát.
❹ Kapcsolja be a projektort.
Nyomja meg a
(áramellátás) gombot a projektor készülékházán vagy a távirányítón található
POWER ON gombot.
❺ Válasszon ki egy forrást.
TIPP:
Nyomja meg a AUTO ADJ. (Automatikus beáll.) gombot, hogy automatikusan optimalizálja az RGB képet.
❻ Állítsa be a képméretet és a vetítési szöget.
[Fókusz]
Forgassa el a fókuszgyűrűt vagy a fókuszkart.
[Zoomolás]
Forgassa el a fókuszgyűrűt.
< Rövid vetítési távolságú modell >
Beállítás a megjelenített DIGITÁLIS ZOOM eszköztáron.
1. Nyomja meg a ZOOM gombot a távirányítón.
2. Nyomja meg a ◀ vagy a ▶ gombot.
[Vetítési szög (Dőlésszögállító-láb)]
1. Emelje fel a projektor elülső szélét.
2. Nyomja fel és tartsa nyomva dőlésszögállító-láb kart.
3. Engedje le a projektor elejét a kívánt magasságba.
4. Engedje el a dőlésszögállító-láb kart.
TIPP:
Az automatikus trapézkorrekció funkció be van kapcsolva a gyárból való szállításkor.
❼ Kapcsolja ki a projektort.
1. Nyomja meg a
(áramellátás) gombot a projektor készülékházán vagy a távirányítón
található STANDBY gombot.
2. Nyomja meg a
(ÁRAMELLÁTÁS) és a STANDBY gombot újból.
3. Csúsztassa a lencse fedelét jobbra, a lencse takarásának megszüntetéséhez.
< Rövid vetítési távolságú modell >
Rakja fel a lencsevédő sapkát.
4. Csatlakoztassa le az összes kábelt.
❶ Podłącz komputer do projektora za pomocą dostarczonego przewodu
komputerowego (VGA).
❷ Podłącz dostarczony przewód zasilania.
❸ Przesuń osłonę obiektywu w prawo, aby odsłonić obiektyw.
<model z krótką projekcją>
Zdejmij pokrywkę obiektywu.
❹ Włącz projektor.
Naciśnij przycisk
(POWER) na obudowie projektora lub przycisk POWER ON na pilocie zdalnego
sterowania.
❺ Wybierz źródło.
WSKAZÓWKA:
Naciśnij przycisk AUTO ADJ., aby automatycznie zoptymalizować obraz RGB.
❻ Dostosuj rozmiar obrazu i kąt projekcji.
[Ostrość]
Obracaj pierścieniem ostrości lub przestaw dźwignię ostrości.
[Zoom]
Obróć pierścień zoomu.
<model z krótką projekcją>
Regulacja na wyświetlonym pasku ZOOM CYFROWY.
1. Naciśnij przycisk ZOOM na pilocie zdalnego sterowania.
2. Naciśnij przycisk ◀ lub ▶.
[Kąt projekcji (nóżka regulacji przechylenia)]
1. Podnieś przednią krawędź projektora.
2. Naciśnij i przytrzymaj dźwignię nóżki regulacji przechylenia.
3. Opuść przód projektora na żądaną wysokość.
4. Zwolnij dźwignię nóżki regulacji przechylenia.
WSKAZÓWKA:
Funkcja automatycznej korekcji zniekształcenia trapezowego jest włączona fabrycznie.
❼ Wyłącz projektor.
1. Naciśnij przycisk
(POWER) na obudowie projektora lub przycisk STANDBY na pilocie zdalnego
sterowania.
2. Naciśnij ponownie przycisk
(POWER) lub STANDBY .
3. Przesuń osłonę obiektywu w lewo, aby zasłonić obiektyw.
<model z krótką projekcją>
Załóż pokrywkę obiektywu.
4. Odłącz wszystkie kable.
© NEC Display Solutions, Ltd. 2015-2016 Ver. 2 2/16 Printed in Thailand
Select a source.
Connect your computer.
Connect the supplied
power cord.
Turn off the projector.
< Short-Throw model >
Remove the lens cap.
Turn on the projector.
x 2 times
or
or
or
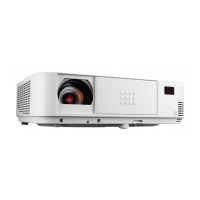
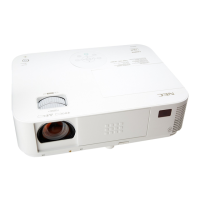
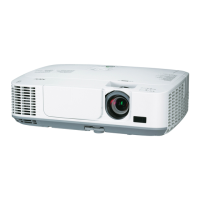
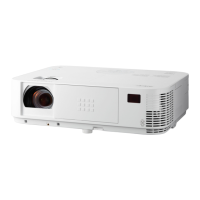
Standerd models / Full HD models M403W / M363W / M323W / M403X / M363X / M323X / M283X / M403H / M323H
Short-Throw models M353WS / M303WS / M333XS
Fn F1 F
12
2
1
3
Slide the
lens cover.
[THROW ANGLE (Tilt foot)]
Adjust an image size
and the throw angle.
< Short-Throw model >
Press the ZOOM button.
[ZOOM]
[FOCUS]
TIP:
AUTO ADJ.
COMPUTER IN
Lens cap
ImageImage Image
Adjustable
Tilt foot lever
Focus ring
< Short-Throw model >
Focus lever
Zoom ring
NOTE: The color of the POWER indicator
RED or ORANGE
< Standby >
BLUE
< Power On >
TIP: Automatic Keystone Correction function