English-7
English
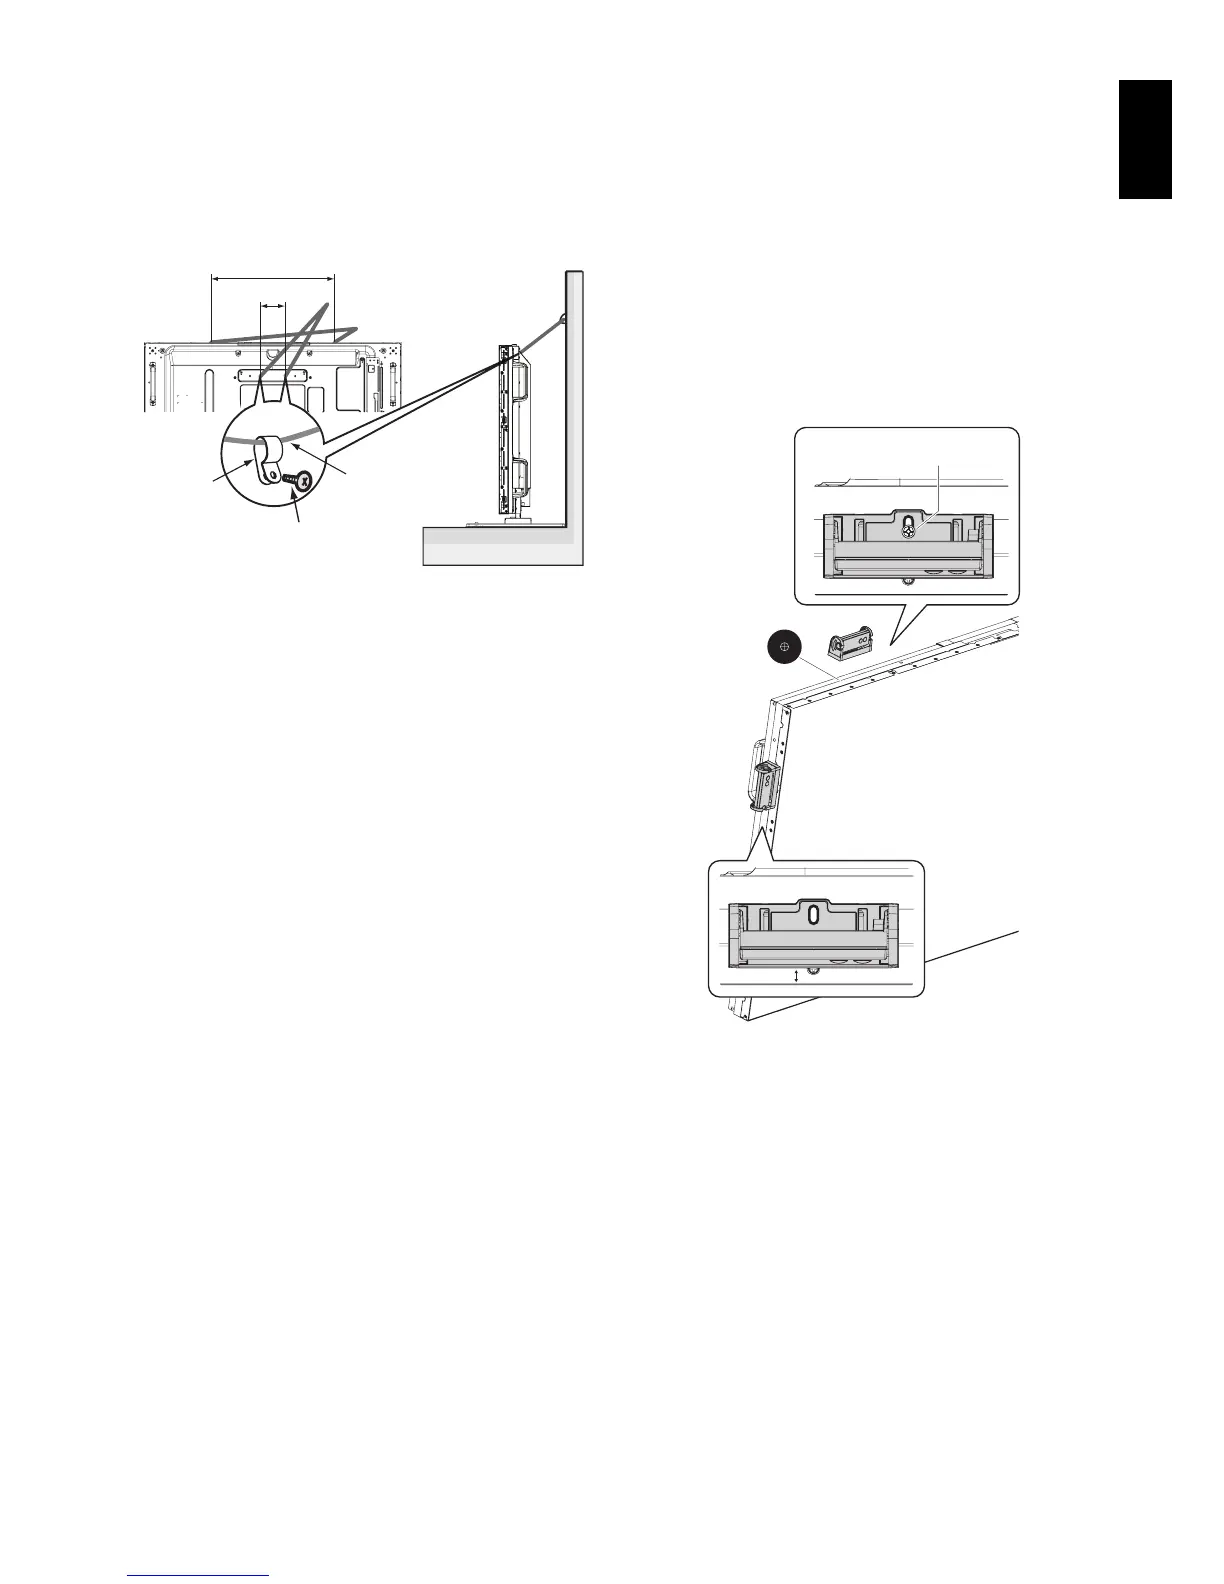
5. Prevent Tipping
When using the display with the optional table top stand
fasten the LCD to a wall using a cord or chain that can
support the weight of the monitor in order to prevent the
monitor from falling. Fasten the cord or chain to the monitor
using the provided clamps and screws.
For the X464UN/X464UNS/X464UNV, the clamps and
screws are included with the optional table top stand.
Screw (M4)
Cord or chain
Clamp
100 mm*
1
Screw Holes*
640 mm*
*: X554UN/X554UNS/X554UNV
*
1
: X464UN/X464UNS/X464UNV
Before attaching the LCD monitor to the wall, make sure that
the wall can support the weight of the monitor.
Be sure to remove the cord or chain from the wall before
moving the LCD.
X464UNS, X554UNS and X554UNV only:
Installing Optional Sensor Unit
Fixed by screw: Remove the seal, which is pasted on the
bezel you want to set, and then secure the sensor unit using
the attached screw.
Fixed by double-sided tape: You can set the sensor unit at
any side of the monitor.
NOTE: When installing the sensor on the upper and left
sides of the monitor, follow instructions below to
avoid damage to the monitor.
Installing on the upper and left side of the monitor.
Fixed by screw: Set the sensor unit close to the back side.
Fixed by double-sided tape: Set the sensor unit keeping it
8 mm away from the front edge.
Screw Position
Seal
8 mm
Double-sided tape