50
ADJUSTMENT
7 Repeat steps 3 to 6 for the other CRTs if necessary.
• Pressing the END button will bring you to the “CONVER-
GENCE” menu.
8 To exit, press END.
• Whenever the END button is pressed, the menus will sequence
in this order:
“CONVERGENCE” menu → “ADJUST” menu → Source
screen
• If the “RETURN USER MODE?” menu appears, use the
CURSOR or button to select either “YES” or “NO” and
then press ENTER. This will exit the ADJUST mode.
Items to select
• YES ......... When you try to enter the ADJUST mode again,
you will need to re-enter your passcode.
• NO ........... When you try to enter the ADJUST mode again,
you will not need to re-enter your passcode.
NOTE: Adjusting the dynamic convergence may cause the static
convergence settings to change. If this happens, adjust the
static convergence again.
RETURN USER MODE?
YES NO
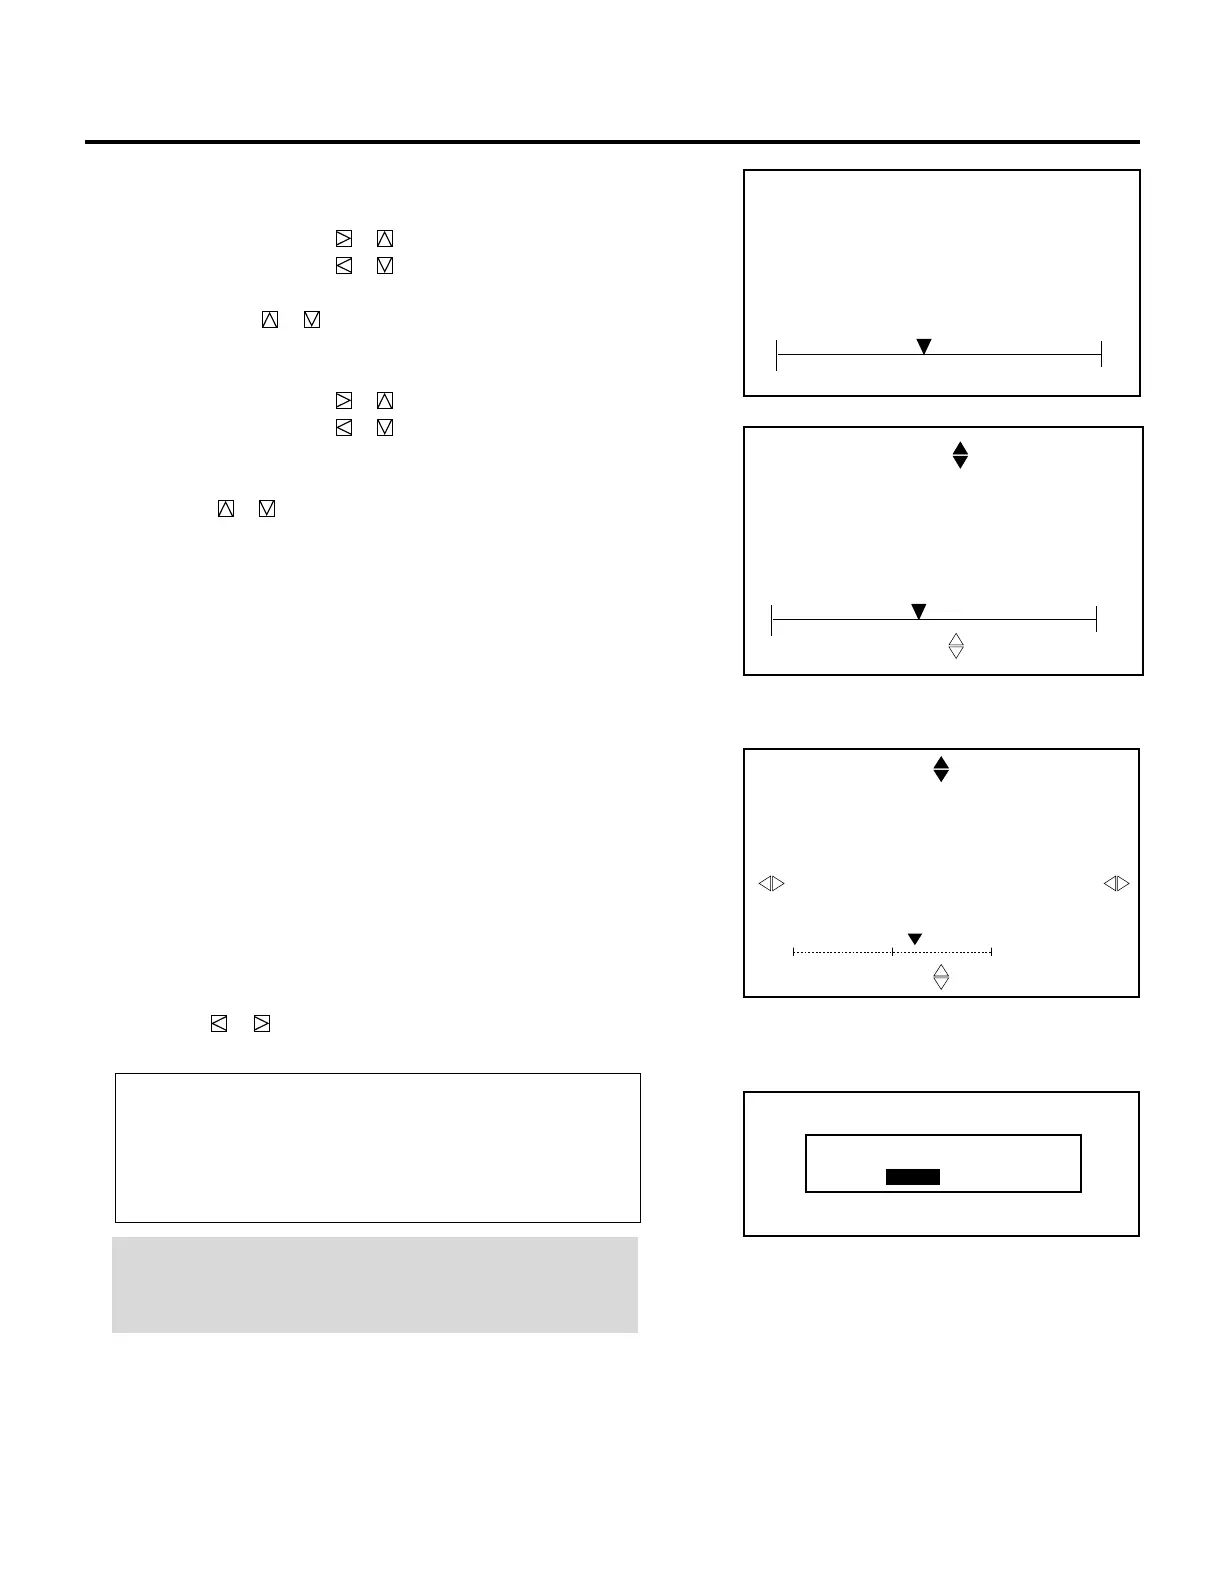
CONVERGENCE
- KEY - STONE -
CRT - R -
+10%
SCREEN -TOP-
CONVERGENCE
- LINE DIST. CENTER -
0%
CONVERGENCE
- LINE DIST. EDGE -
CRT –R–
0%
CRT –R–
SCREEN –TOP–
3) Use the CURSOR buttons to align the pattern.
When selecting "CENTER":
• Pressing the CURSOR or button increases the level.
Pressing the CURSOR or button decreases the level.
To switch to the "EDGE" screen, press and hold the CTL, then
press CUSOR or button.
When selecting "EDGE":
• Pressing the CURSOR or button increases the level.
• Pressing the CURSOR or button decreases the level.
To switch another screen, press and hold the CTL, then press
CUSOR or button.