Do you have a question about the NEC NP04WK1 and is the answer not in the manual?
Explains the meaning of symbols used in the manual for warnings and cautions.
Provides essential safety precautions regarding handling, installation, and electrical safety.
Details warnings about installation locations, vibration, humidity, dust, and temperature.
Offers advice on avoiding specific environmental conditions for optimal performance and safety.
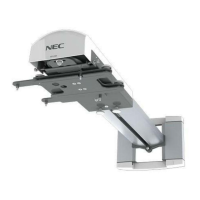
Lists all components included in the wall mount unit package for verification.
Covers initial preparations and the procedure for removing the slide arm from the unit.
Details how to securely attach the wall adapter to the structural wall material using bolts.
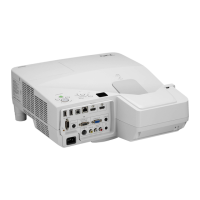
Explains the process of securing the projector to the mount plate using provided screws.
Instructions for inserting the slide arm onto the main arm unit assembly.
Guidance on tightening safety lock screws and temporarily fixing screws for adjustments.
Covers initial projector setup and adjusting horizontal orientation for a parallel image.
Procedure for adjusting the projector's tilt in the vertical direction to align the image.
Steps for adjusting the projector's tilt in the rotational direction for screen parallelism.
Instructions for adjusting the projector's forward/backward position to control image size.
Details on adjusting the arm unit's vertical position for optimal image placement on the screen.
Guidance on sliding the wall adapter horizontally to correct image alignment.
Steps to securely tighten all loosened screws and attach the wall adapter covers.
| Brand | NEC |
|---|---|
| Model | NP04WK1 |
| Category | Racks & Stands |
| Language | English |