English Suomi
[First] Remove the cable cover.
1. Loosen the cable cover screws.
2. Remove the cable cover.
① Push up the cable cover slightly to release the bottom part.
② Pull the cable cover while pushing and holding the arrow part.
❶ Connect your computer to the projector using the supplied
computer cable (VGA).
❷ Connect the supplied power cord.
Attach the cable cover and tighten the cable cover screws.
❸ Turn on the projector.
Press the
(POWER) button on the projector cabinet or the POWER ON button on the
remote control.
❹ Select a source.
TIP:
Press the AUTO ADJ. button to optimize an RGB image automatically.
❺ Adjust an image size and the position.
[TILT]
Rotate the tilt foot to adjust the left and right tilt.
[FOCUS]
Rotate the focus ring on the right side of the projector.
[DIGITAL ZOOM]
1. Press the ZOOM button on the remote control to display the DIGITAL ZOOM bar.
2. Press the ▲ or ▼ button.
❻ Correct the Keystone-type distortion.
1. Press the ▼ button on the projector cabinet or the KEYSTONE button on the remote
control to display the KEYSTONE menu.
2. Press the ▼ button to select [VERTICAL] and then use the ▲ or ▼ so that the left and
right sides of the projected image are parallel.
* When correcting the vertical keystone distortion.
❼ Turn off the projector.
1. Press the
(POWER) button on the projector cabinet or the STANDBY button on the
remote control.
2. Press either the
(POWER) or the STANDBY button again.
3. Disconnect all the cables.
[Aluksi] Irrota kaapelikotelo.
1. Irrota kaapelikotelon ruuvit.
2. Irrota kaapelikotelo.
① Vapauta alaosa nostamalla kaapelikoteloa hieman.
② Vedä kaapelikoteloa samalla kun painat ja pidät kiinni nuolella merkitystä kohdasta.
❶ Kytke tietokone projektoriin sen mukana toimitetulla
tietokonekaapelilla (VGA).
❷ Kytke projektorin mukana toimitettu virtajohto.
Kiinnitä kaapelikotelo ja kiristä kaapelikotelon ruuvit.
❸ Käynnistä projektori.
Paina projektorin rungossa olevaa
(POWER)-painiketta tai kaukosäätimen POWER ON
-painiketta.
❹ Valitse lähde.
VINKKI:
Voit optimoida RGB-kuvan automaattisesti painamalla AUTO ADJ. -painiketta.
❺ Säädä kuvan kokoa ja sijaintia.
[KALLISTUS]
Säädä vasen ja oikea kallistus kiertämällä säätöjalkaa.
[TARKENNUS]
Kierrä projektorin oikealla puolella olevaa tarkennusrengasta.
[DIGITAALINEN ZOOM]
1. Saat DIGITAALINEN ZOOM -palkin näkyviin painamalla kaukosäätimen ZOOM-painiketta.
2. Paina ▲- tai ▼-painiketta.
❻ Korjaa Keystone-tyypin vääristymä.
1. Avaa KEYSTONE-valikko painamalla projektorin ▼-painiketta tai kaukosäätimen KEYSTONE-
painiketta.
2. Valitse [PYSTY] painamalla ▼-painiketta, ja käytä sitten ▲- tai ▼-painiketta siten, että
heijastetun kuvan vasen ja oikea puoli ovat samansuuntaiset.
* Korjattaessa pystysuuntaista keystone-vääristymää.
❼ Sammuta projektori.
1. Paina projektorin rungossa olevaa
(POWER)-painiketta tai kaukosäätimen STANDBY-
painiketta.
2. Paina uudelleen joko
(POWER)- tai STANDBY-painiketta.
3. Irrota kaikki kaapelit.
Magyar Polski
[Első] Távolítsa el a kábelfedelet.
1. Lazítsa meg a kábelfedél csavarjait.
2. Távolítsa el a kábelfedelet.
① Nyomja kissé felfelé a kábelfedelet, hogy kiadja az alsó részt.
② Húzza kábelfedelet, miközben nyomva tartja a nyíllal jelölt részt.
❶ Csatlakoztassa a számítógépet a projektorhoz a mellékelt
számítógépes kábel segítségével (VGA).
❷ Csatlakoztassa a mellékelt tápkábelt.
Helyezze vissza a kábelfedelet és húzza meg a kábelfedél
csavarjait.
❸ Kapcsolja be a projektort.
Nyomja meg a
(POWER) gombot a projektor készülékházán, vagy a POWER ON gombot
a távirányítón.
❹ Válasszon ki egy forrást.
TIPP:
Nyomja meg az AUTO ADJ. gombot az RGB kép automatikus optimalizálásához.
❺ Módosítsa a kép méretét és helyzetét.
[DÖNTÉS]
Forgassa el a dőlésszögállító láb-at, állítsa be a balra vagy a jobbra dőlést.
[FÓKUSZ]
Forgassa el a fókusz gyűrűt a projektor jobb oldalán.
[DIGITÁLIS ZOOM]
1. Nyomja meg a ZOOM gombot a távirányítón, hogy megjelenjen a DIGITÁLIS ZOOM sáv.
2. Nyomja meg a ▲ vagy ▼ gombot.
❻ Javítsa ki a trapéztorzítás típusú torzítást.
1. Nyomja meg a ▼ gombot a projektor készülékdobozán vagy a KEYSTONE gombot a
távvezérlőn a TRAPÉZTORZÍTÁS menü megjelenítéséhez.
2. Nyomja meg a ▼ gombot a [FÜGGŐLEGES] lehetőség kiválasztásához, majd használja a
▲ vagy ▼ gombot úgy, hogy a kivetített kép bal és jobb oldala párhuzamos legyen.
* A függőleges trapéztorzítás kijavításakor.
❼ Kapcsolja ki a projektort.
1. Nyomja meg a
(POWER) gombot a projektor készülékházán, vagy a STANDBY gombot
a távirányítón.
2. Nyomja meg a
(POWER) vagy a STANDBY gombot újra.
3. Húzza ki az összes kábelt.
[Najpierw] Usuń pokrywę kabli.
1. Poluzuj śruby pokrywy kabli.
2. Zdejmij pokrywę kabli.
① Nieznacznie pchnij w górę pokrywę kabli, aby zwolnić dolną część.
② Pociągnij pokrywę kabli jednocześnie naciskając i przytrzymując część ze strzałką.
❶ Podłącz komputer do projektora za pomocą dostarczonego
przewodu komputerowego (VGA).
❷ Podłącz dostarczony przewód zasilania.
Załóż pokrywę kabli i dokręć śruby pokrywy kabli.
❸ Włącz projektor.
Naciśnij przycisk
(POWER) na obudowie projektora lub przycisk POWER ON na pilocie zdalnego
sterowania.
❹ Wybierz źródło.
WSKAZÓWKA:
Naciśnij przycisk AUTO ADJ., aby automatycznie zoptymalizować obraz RGB.
❺ Dostosuj rozmiar obrazu i położenie.
[NACHYLENIE]
Obróć stopkę nachylenia, aby dostosować lewe i prawe nachylenie.
[OSTROŚĆ]
Obróć pierścień ustawiania ostrości znajdujący się po prawej stronie projektora.
[ZOOM CYFROWY]
1. Naciśnij przycisk ZOOM na pilocie, aby wyświetlić pasek ZOOM CYFROWY.
2. Naciśnij przycisk ▲ lub ▼.
❻ Skoryguj zniekształcenie trapezowe.
1. Naciśnij przycisk ▼ na obudowie projektora lub przycisk KEYSTONE na pilocie, aby wyświetlić
menu ZNIEKSZTAŁC. TRAPEZ. .
2. Naciśnij przycisk ▼, aby wybrać [PIONOWE], a następnie użyj przycisków ▲ lub ▼, aby lewa i
prawa krawędź wyświetlanego obrazu były ustawione równolegle.
* Podczas korygowania pionowego zniekształcenia trapezowego.
❼ Wyłącz projektor.
1. Naciśnij przycisk
(POWER) na obudowie projektora lub przycisk STANDBY na pilocie
zdalnego sterowania.
2. Ponownie naciśnij przycisk
(POWER) lub STANDBY.
3. Odłącz wszystkie kable.
© NEC Display Solutions, Ltd. 2015–2016 Ver. 3 4/16 Printed in China
Select a source.
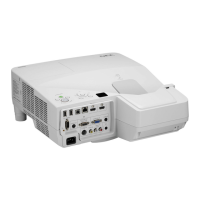
Connect your computer.
Connect the supplied
power cord.
Turn off the projector.
Turn on the projector.
× 2 times
or
or
Fn F1 F
12
Correct the Keystone distortion.
Adjust an image size
and the position.
[DIGITAL ZOOM]
Focus ring
[FOCUS]
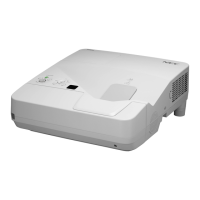
(View from the bottom)
Remove the
cable cover.
TIP:
AUTO ADJ.
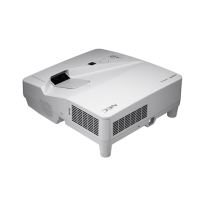
UM352W
Tilt foot
Up
Down
[TILT]
Attach the cable cover.
or
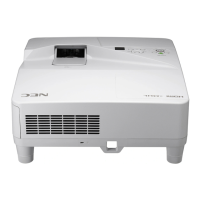
UM351W / UM301W / UM361X / UM301X / UM352W
Quick Setup Guide
NOTE: The color of the POWER indicator
RED or ORANGE
BLUE
[Standby] [Power On]
ImageImage Image
or