5
3.5 mm audio cable + RCA adapter cable
a. Plug A
e
into A
s
.
b. Plug the other end of A
e
into the RCA adapter cable (female)
A
r
.
c. Plug the other end of A
r
into your audio source device (e.g. TV
or Hi-Fi system).
Optical audio cable
a. Plug the optical audio cable A
t
into the optical audio input
A
p
.
b. Plug the other end of A
t
into your audio source device (e.g. TV
or Hi-Fi system).
4. Slide A
5
to the ON position to switch on the product.
4
If there is no audio signal from the audio source, or if the signal
is too weak for proper reception, the transmitter turns o
automatically after about 5 minutes. As soon as the audio signal
returns, the transmitter turns back on automatically.
Pairing an additional headset
You can listen to the same audio source device with more people by
connecting multiple headphones to a single transmitter.
Follow these instructions to pair additional headphones to A
8
.
1. Unplug A
y
from the power outlet.
2. Slide A
5
to the ON position to switch on the additional
headphones.
3. Press and hold the mute button A
4
for 5 seconds.
The indicator LED A
3
blinks quickly to indicate pairing mode is
active.
4. Plug A
y
into the power outlet.
A
3
lights up continuously to indicate pairing is successful.
Using the product
1. Switch on the audio source that is connected to the transmitter.
The power indicator LED A
q
lights up green.
2. Slide A
5
to the ON position to switch on the product.
A
3
lights up red.
4
Rotate the volume wheel A
2
to adjust the volume to the desired
sound level.
4
Rotate the sound balance switch A
i
to adjust the volume
balance between the left and the right earbud.
Switching between modes
Follow these instructions to switch between listening mode and
conversation mode without taking o the headphones.
1. Press the mute button A
4
to switch to ambient sound mode.
Sounds and voices picked up by the microphone are amplied
through the headphones.
• Using headphones with both ears covered while participating in
trac is discouraged and may be illegal in some areas.
• Some wireless products may interfere with implantable medical
devices and other medical equipment, such as pacemakers,
cochlear implants and hearing aids. Consult the manufacturer of
your medical equipment for more information.
• Do not use the product at locations where the use of wireless
devices is prohibited due to potential interference with other
electronic devices, which may cause safety hazards.
• This product is equipped with a non-removable internal battery.
Do not attempt to replace the battery yourself.
• Charge the battery for at least 3 hours when you use it for the rst
time.
• Do not use any charger other than that specifcally provided for
use with the product.
• The charger must only be plugged into an earthed socket-outlet.
• During charging, the battery must be placed in a well-ventilated
area.
• Do not leave a battery on prolonged charge when not in use.
• Only power the product with the voltage corresponding to the
markings on the product.
• Children of less than 8 years should be kept away.
• Cleaning and user maintenance shall not be done by children
without supervision.
• This product is not a toy. Never allow children or pets to play with
this product.
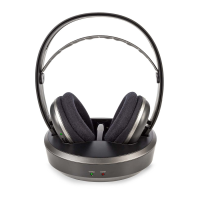
Charging the headphones
-
Charge the battery for at least 3 hours when you use it for the
rst time.
1. Slide the on / o switch A
5
to the OFF position to switch o the
product.
2. Place the headphones A
1
with the charging contacts A
7
onto
the charging pins A
9
.
The charging indicator LED A
w
lights up red to indicate that the
headphones are charging, and turns green when the battery is fully
charged.
Connecting the transmitter
1. Plug the power adapter A
y
into the power input A
o
.
2. Plug the other end of A
y
into a power outlet.
3. Choose one of the three options to connect the transmitter.
3.5 mm audio cable
a. Plug the audio cable A
e
into the audio port A
s
.
b. Plug the other end of A
e
into your audio source device (e.g. TV
or Hi-Fi system).
 Loading...