Operation
A. Installation
1. Make sure your input AC voltage conforms to the adaptor specications.
2. Only use the power adaptor provided with the VTRA3411BK. If you use your own adaptor, make
sure the output connector is micro USB and power output is DC 5V /1A.
3. If the USB port of your Source device can not support enough power current , Please connect other AC power
adaptor which is DC 5V/1A to the power connector of VTRA3411BK transmitter.
4. With direct line-of-sight, the maximum range of A/V signal transmission can reach up to about 30 metre, and
this distance would be shortened by obstacles or walls placed between transmitter and receiver. (The optimum
indoor range is less than 30 metre)
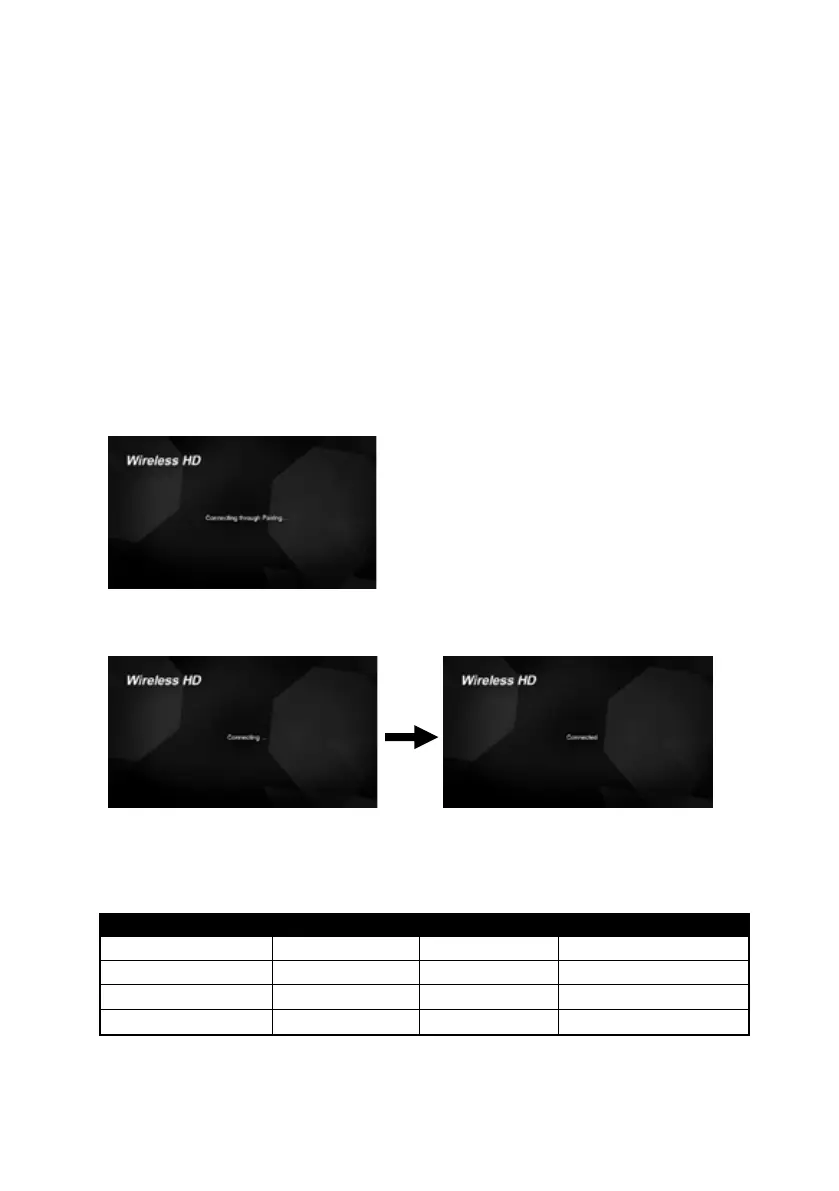
B. TX & RX PAIRING MODE
1. First Press “Pairing” key once on the Receiver BOX.
2. You will see message “Connecting through Pairing ...” on screen
3. And then Press “Pairing” key once on the Transmitter Stick.
4. Connection will be auto-established after successfully paired.
LED Indication
There are LEDs and UI for indication of System operation, for more detail please check the table bellowed.
Condition TX RX RX UI(TV Screen)
Star up (Power on) LED Solid RED LED Solid RED Startup image
Pairing(Press the button) RED LED Flashing LED solid Blue Connection through Pairing
No connection Blue LED Flashing LED solid Blue Scanning
Connection & Play LED solid Blue LED solid Blue Video
Note: To prevent overheating, please do not cover WTR-5000 Transmitter and Receiver with any object.
 Loading...