1 2 3 4 5
6
Emptying condensation
Empty container after each drying op eration!
1. Pull out condensation container keepi ng it horizontal.
2. Pour out condensation.
3. Always push container in fully until it c licks into place.
If - (Container) flashes in the display panel a What to do if..., Page 10.
Cleaning the fluff filter
Clean the fluff filter after each drying o peration.
1. Open the door, remove fluff from door /door area.
2. Pull out and fold open the fluff filter.
3. Remove the fluff (by wiping the filter with your hand).
If the fluff filter is very dirty or blocked, rinse with warm water and dry
thoroughly.
4. Close and reinsert the fluff filter.
Switching off the dryer
Turn the programme selector to (Off).
Do not leave laundry in the dryer.
Removing the laundry
The automatic anti-crease function causes the drum to move at specific interval s, the washing remains
loose and fluffy for an hour (two hour s if the additional
(Reduced Ironing) function is also selected-
depending on model).
... and adapt to individual requirements
Never start the dryer if it is damaged!
Inform your after-sales service.
Inspecting the
dryer
Sorting and loading laundry
Remove all items from pockets.
Check for cigarette lighters.
The drum must be empty prior to lo ading.
See programme overview on page 7.
See also separate instructions for “W oollens basket”
(depending on model)
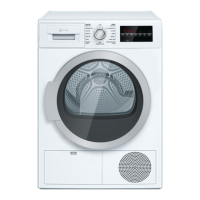
Your new dryer
Congratulations - You have chosen a modern, high-quality Neff
domestic appliance.
The condensation dryer is distinguished by its economical energy
consumption.
Every dryer which leaves our factory is car efully checked to ensure
that it functions correctly and is in pe rfect condition.
Should you have any questions, our after-sales service will be pleased
to help.
Disposal in an environmentally-responsible manner
Dispose of packaging in an environm entally-responsible manner.
This appliance is labelled in accordan ce with the European
guideline
2002/96/EG on waste electrical and elec tronic
equipment - WEEE.
The guideline provides an EU-wide frame work for the return and
recycling of old appliances.
For further information about our products , accessories, spare parts
and services, please visit: www.neff.d e
Intended use
Preparing for
installation, see Page 8
Selecting and adjusting the programme
Drying
Condensation container
Control panel
ʋfor do mestic use only,
ʋonly t o be used for drying fabrics that have be en
washed with water.
Do not leave children unsupervised near the dryer.
Keep pets away from the dryer.
Select the drying programme ...
Press the u Start/Stop
button
Make sure your hands are dry.
Hold the plug only.
Connecting the
mains plug
Drying
Information on laundry ...
Labelling of fabrics
Follow the manufacturer's care inform ation.
(Drying at normal temperature.
'cDrying at low temperature a also sel ect
(Low Heat)
)cDo not machine dry.
Observe safety instructions without fai l aPage 11!
Do not tumble-dry the following fabric s for example:
– Impermeable fabrics ( e.g. rubber-coated fabrics).
– Delicate materials (sil k or curtains made from synthetic mater ial) a they may crease
– Laundry contaminated with oil.
Drying tips
– To ensure a consistent result, sort the laundry by fabric type and drying programme.
– Always dry very small items (e.g. baby socks) together with large items of laundry (e.g. hand
towel).
– Close zips, hooks an d eyelets, and button up covers.
Tie fabric belts, apron strings, etc. to gether
– Do not over-dry easy- care laundry a risk of creasing!
Allow laundry to finish drying in the air.
– Do not dry woolens in the dryer, only use to freshen them up aPage 7, Wool finish
Programme (depending on model).
– Do not iron laundry imm ediately after drying, fold items up and leave for a while a the
remaining moisture will then be distr ibuted evenly.
– Machine-knitted fabrics (e.g. T-shirts or jerseys) often shrink the first time they are dried a
do not use the 7(Cupboard Dry Plus) programme.
– Starched laundry is not always suitable for dryers a starch le aves behind a coating that
adversely affects the drying operatio n.
– Use the correct d osage of fabric softener as per the m anufacturer's instructions when
washing the laundry to be dried.
– Use the timer prog ramme for small loads a this improves th e drying result.
Environmental protection/energy-saving tips
– Before drying, spin the laundry thoro ughly in the washing machine a the higher the spin
speed the shorter the drying time will be (consumes less energy), also spin ea sy-care
laundry.
– Put in, but do not exce ed, the maximum recommended quantit y of laundry a
programme overview aPage 7.
– Make sure the room is w ell ventilated during drying.
– Do not obstruct or sea l up the air inlet.
– Keep the air cooler cl ean apage 6 “Care and cleaning”.
Drum
All buttons are sensitive and only
need to be touched lightly.
Only operate the dryer with
the fluff filter inserted!
Air inlet
Fluff filter
Drum interior light
(depending on model)
Maintenance
flap
Care and cleaning
Dryer housing, control panel, air cooler, moisture sensors
– Wipe with a soft, damp cloth.
– Do not use harsh cleani ng agents and solvents.
– Remove detergent and cl eaning agent residue immediately.
– During drying, water may co llect between the door and seal.
This does not affect your dryer's function s in any way.
Clean the protective filter 5 - 6 times a year
or if v
(Filter) flashes after cleaning the fl uff filter.
Air cooler / protective filter
When cleaning, only remove the protect ive filter. Clean the air cooler
behind the protective filter once a year.
– Allow the dryer to cool.
– Residual water may leak out, so place an absorbent towel
underneath the maintenance door.
1. Unlock the maintenance door.
2. Open the maintenance door fully.
3. Turn both locking levers towards each another.
4. Pull out the protective filter/air cooler.
Do not damage the protective filter or air cooler.
Clean with warm water only. Do not use any hard or sharp-edged
objects.
5. Clean the protective filter/ air cooler thoroughly,
Allow to drip dry.
6.
Clean the seals.
7. Re-insert the protective filter/air cooler,
with the handle facing down.
8. Turn back both locking levers.
9. Close the maintenance door until the lock clicks into place.
Moisture sensors
The dryer is fitted with stainless steel m oisture sensors. The sensors
measure the level of moisture in the laundry. After a long period of
operation, a fine layer of limescale m ay form on the sensors.
1. Open the door and clean the moisture sensors with a damp sponge
which has a rough surface.
Do not use steel wool or abrasive materi als.
Programme end once lights up in the display.
Interrupt programme removing or adding laundry.
The drying cycle can be interrupted for a brief period so that laundry may be added or removed.
The programme selected must then be resumed and completed.
Never switch the dryer off before the dryi ng process has ended.
Drum and door may be hot!
1. Open door, the drying process is interrupted.
2. Load or remove laundry and close door .
3. If required, select a new programme a nd additional functions.
4. Press the uStart/Stop button. The remaining time i s updated after a few minutes.
Contents Page
ʋPre paration . . . . . . . . . . . . . . . . . . . . . . 2
ʋSetti ng the programmes . . . . . . . . . . . . .2
ʋDr ying . . . . . . . . . . . . . . . . . . . . . . . . 3/4
ʋInform ation on laundry . . . . . . . . . . . . . . 5
ʋCa re and cleaning . . . . . . . . . . . . . . . . . 6
ʋProg ramme overview . . . . . . . . . . . . . . . . 7
ʋInst allation . . . . . . . . . . . . . . . . . . . . . . . . 8
ʋFros t protection / Transport . . . . . . . . . . . 8
ʋTechni cal data . . . . . . . . . . . . . . . . . . . . 9
ʋOp tional accessories . . . . . . . . . . . . . . . . 9
ʋWh at to do if... / After-sales service . . . .10
ʋSaf ety instructions . . . . . . . . . . . . . . . . 11
Additional
functions
Programme selector
Time
remaining
Display panel
dccccc+ccc!/b drying, iron dry, cupboard dry, fluff/finished
- (Container) Empty the condensation container.
v (Filter) Clean the fluff filter and/or air cooler a page 4/6.
ˎh:min
End of programme in 1*-24 hours (Press butto n several times if required)
(*depending on the selected programme, e.g. duration 1:54h a 2h. Can
always be selected to the next full hour .)
Only when switched off!
Select On/Off for a acoustic signal at e nd of programme. ʋ3(Buzzer)
Reduced temperature for delicate fabrics ' that require a
longer drying time; e.g. for polyacrylics, po lyamide,
elastane or acetate.
ʋ(Low Heat)
Reduces creasing and extends the anti-creasing phase
once the program has ended.
ˣ(Reduced
Ironing)