Install Ink Tanks & Printhead:
6
th
step5
th
step
Load Printer Software:
- Remove the Fluidic Cap Protectors.
- Open the Ink Tank Door & release the Tank Latches.
-Inserttheveinktanksintotheirslots(latchesaremarked)labelsideup.
- Pull tanks back about an inch then re-insert to make a good connection. Close
latches, ensuring both sides snap into place.
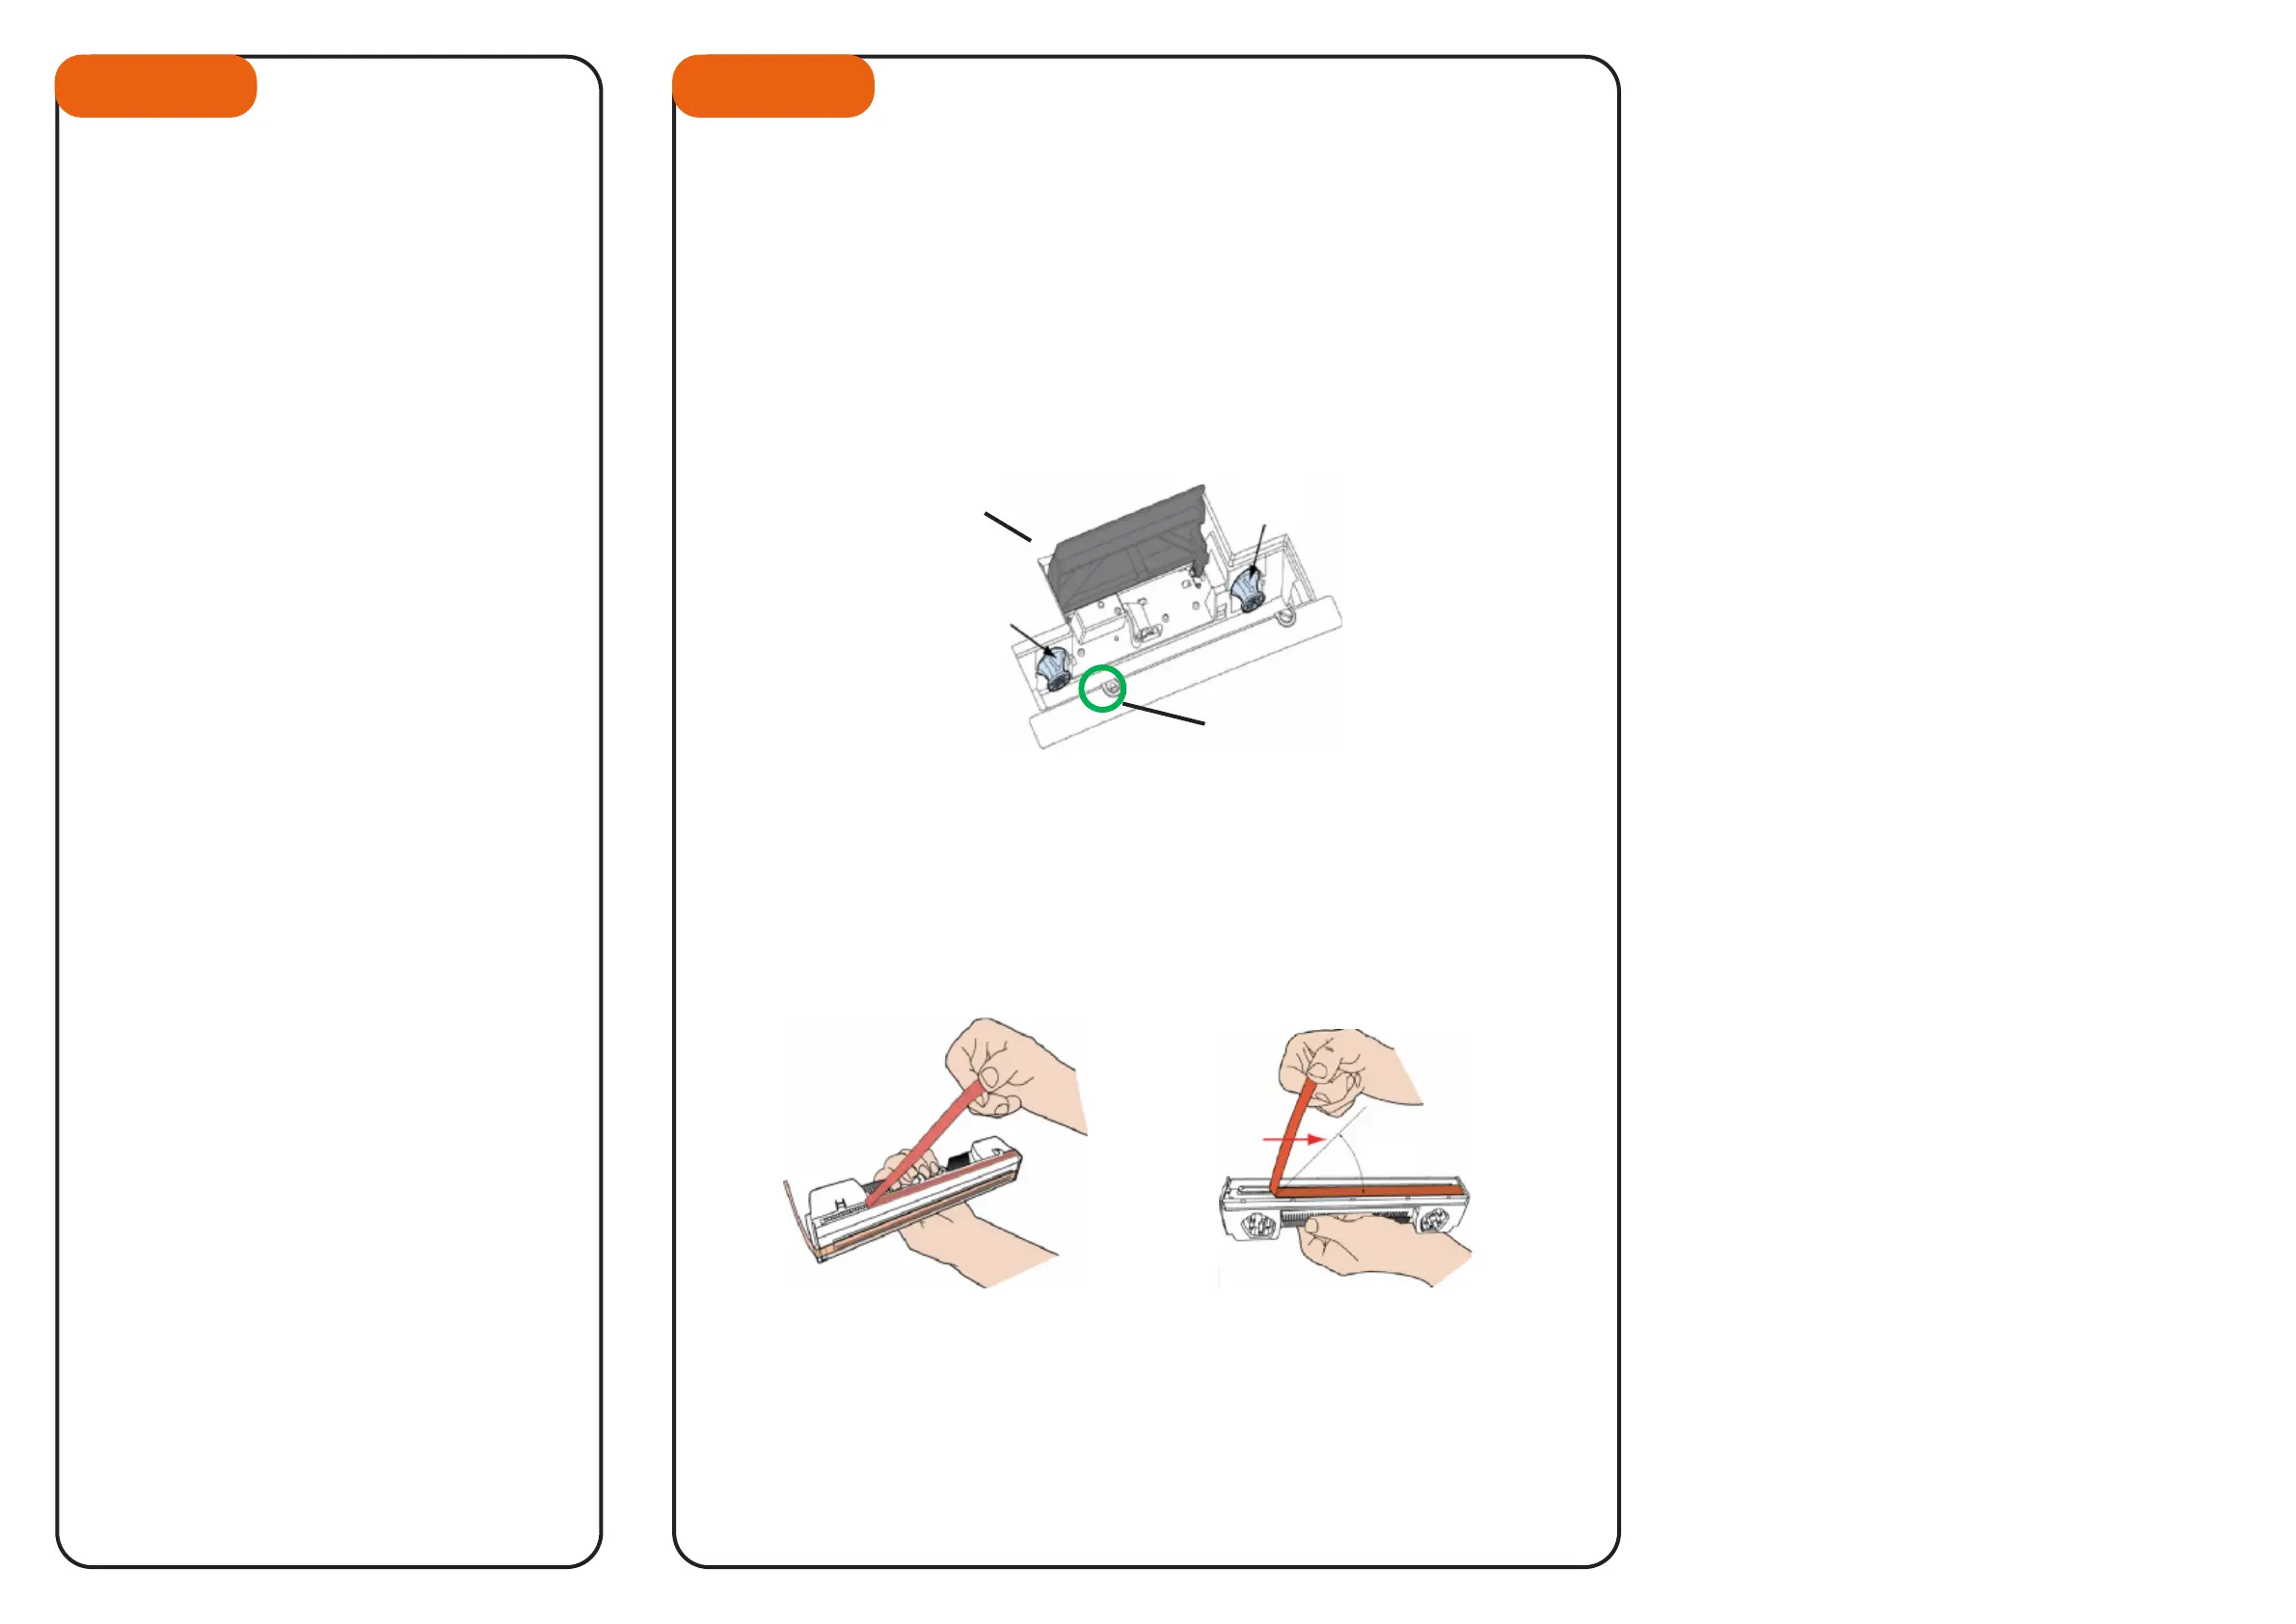
- Remove the Printhead from its packaging.
- Gently remove the protective tape.
- Wet one of the included lint-free wipes with a good amount de-ionized water
and wipe the Print-head nozzles. Be careful to not wet the contacts.
- Insert the cartridge on an angle so the ink ports face the ink couplings and
click it forward into place. Once the cartridge is installed, close the Printhead
latch. The printer will prime the Printhead with ink automatically. This process
will take a few minutes.
Please refer to the Operator’s Guide for additional instructions to run the
Printhead Conditioning Routine & Start Printing!
Fluid cap protector
Fluid cap protector
Printhead Latch
Printhead Release Button
No less than 45°
- At this time, locate your USB Printer Cable
in the accessory box. From the Operation
CD Main Menu, choose the option that
says Install Printer Software and follow the
instructions on screen.
- When the installer program says to connect
the printer to the computer, plug the USB
cable into the printer, then your computer.
Continue to follow the prompts, and accept
any messages from Windows asking if you
wish to continue the installation. If your
rewallasksforpermission,grantaccess
to the software.
- Once complete, you will see the M Series
Driver in your list of available printers.
Also installed is the Toolbox (look for the
Memjet folder on the Start Menu), which
gives you advanced control of your printer.
- Open the top cover on the printer.
- Press the Printhead Release Button (located as shown).
- This will unlock the Printhead latch.
WARNING! Never attempt to open the Printhead latch manually when in
the closed/ locked position. Severe damage will result. Use the Printhead
Latch Release button from the Printhead latch release button.
2/14

 Loading...


