EasyManua.ls Logo

Nespresso D300 - User Manual

Nespresso D300
11 pages
Print Icon
To Next Page IconTo Next Page
Loading...
Réf: D300USA/V2/Sept04
Instructions for use
UL-Household
CUL-Household
UL-Commercial
D300
IMPORTANT
SAFEGUARDS
When using electrical appliances, basic safety
precautions should always be followed,
including the following:
Read all instructions carefully.
Do not touch hot surfaces. Use handles or
knobs.
To protect against fire, electric shock and
personal injury do not immerse cord, plugs,
or appliance in water or other liquid.
Close supervision is necessary when any
appliance is used by or near children.
Unplug from outlet when not in use and
before cleaning. Allow to cool before putting
on or taking off parts, and before cleaning
the appliance.
Do not operate any appliance with a
damaged cord or plug or after the appliance
malfunctions, or has been damaged in any
manner. Return appliance to NESPRESSO Club
for examination, repair or adjustment.
The use of accessory attachments not
recommended by the appliance manufacturer
may result in fire, electric shock or personal
injury.
Do not use outdoors.
Do not let cord hang over edge or table or
counter, or touch hot surfaces.
Do not place on or near a hot gas or electric
bumer, or in a heated oven.
Always attach plug to appliance first, then
plug cord into the wall outlet. To disconnect,
turn any control to “off”, then remove plug
from wall outlet.
Do not use appliance for other than intended
use.
Use extreme caution when disposing hot
steam.
Do not put fingers inside capsule housing,
due to the sharp needle that is there to pierce
the capsule.
Question and Answer IconNeed help?

Do you have a question about the Nespresso D300 and is the answer not in the manual?

Summary

Important Safeguards

General Safety Instructions

Machine Preparation

Start Up Procedure

Programming the Machine

Making Espresso

Setting Cup Filling Quantity

Using Steam

General Cleaning

Descaling the Machine

Cleaning the Capsule Cage

Detailed steps for removing, cleaning, and reassembling the capsule cage using provided tools.

Troubleshooting Common Problems

Espresso & Milk Issues

Troubleshooting tips for espresso not being hot enough or milk not frothing properly for cappuccinos.

Machine Operation Issues

Solutions for pump noise, coffee not flowing, or coffee running down the capsule holder sides.

Overview

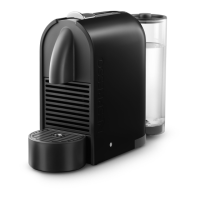
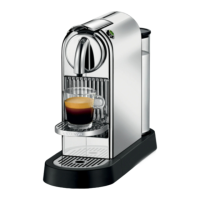
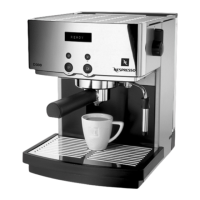
The Nespresso D300 is a coffee machine designed for both household and commercial use, capable of preparing espresso, hot water, and frothed milk for cappuccino. It operates by using Nespresso coffee capsules, ensuring a consistent and high-quality coffee experience.

Function Description:

The primary function of the Nespresso D300 is to brew espresso from pre-portioned coffee capsules. Users can select between two cup sizes: small and large, with factory-set filling levels that can be customized. Beyond coffee, the machine also provides hot water for other beverages like tea or bouillon and features a pivotal steam/hot water nozzle with an integrated frothing attachment for heating liquids and creating cappuccino foam. The machine incorporates an automatic scaling control system, which requires users to set the correct water hardness for optimal performance and maintenance. A digital display guides users through various operations, programming, and alerts.

Important Technical Specifications:

  • Water Tank Capacity: 1.2 liters (maximum).
  • Power Supply: Requires connection to a grounded electrical socket. Voltage must match the technical specifications plate on the bottom of the unit.
  • Cord Set: A short power-supply cord is provided to reduce risks, but longer detachable cords or extension cords can be used with care, ensuring the electrical rating matches the appliance and it's a grounding-type 3-wire cord.
  • Water Hardness Settings: Four levels (1-4) for German and French hardness degrees, ranging from 1-7° German (1.79-12.53° French) to 24-30° German (42.96-53.7° French). The factory setting is programmed to level 3.
  • Maximum Deactivation Time (AUTO OFF): 15 hours.
  • Maximum Steam Withdrawal Time: 8 minutes.

Usage Features:

  • Preparation:
    • Water Filling: The removable water tank (a) is lifted by its lid (1), filled with fresh, cold tap water (2), and then re-inserted with light pressure (3) before closing the lid (4). Daily water changes and weekly tank cleaning are recommended.
    • Initial Cleaning/Start-up: Before first use, the machine should be cleaned. This involves connecting the power plug, placing an empty capsule holder (d) in the spout ring (e) and turning it from left to right until the handle faces forward (4). Receptacles are placed under the capsule holder and steam/hot water nozzle (j) (5). The machine is started by pressing the power key (c) (6). The display will show "FILL WATER." The steam/hot water knob (h) is turned to position (7) to draw about 0.5 liters of water. After resetting the knob to "0," "READY" appears. For coffee system cleaning, the key (11) is pressed five times, allowing the factory-preset quantity of water to flow.
    • Preheating: For optimal coffee quality, the machine should be preheated daily with an empty capsule holder, and the system rinsed before the first and after the last espresso. Cups can also be preheated using the steam/hot water nozzle or by stocking them on the cup heating plate (b).
    • Espresso Preparation: After preheating, the capsule holder is removed. A Nespresso capsule is inserted head downwards (10). The capsule holder is replaced and tightened. A preheated cup is placed under the coffee outlet. Depending on the desired cup size (large or small), the key (11) or (11) is pressed. The machine automatically stops when the desired filling level is reached. The used capsule is then removed (12).
  • Hot Water Preparation: The water tank is filled, and the machine is started. Once "READY" appears, a receptacle is placed under the hot water nozzle. The switch is turned to the right towards position (13). "WATER" appears on the display. Once the desired quantity is obtained, the switch is returned to its initial position.
  • Steam Use (Frothing Milk/Heating Liquids):
    • Before making steam, the used capsule should be removed from the capsule holder to prevent clogging.
    • The water tank is filled, and the machine is started by pressing the power key (c). "WAIT STEAM" appears, followed by "STEAM READY" when the operating temperature is reached.
    • For heating liquids, the special foaming device (j) is lifted 3-5mm using the plastic handle. The nozzle is directed towards the grid, and the knob (h) is slowly turned to position (14) to allow water to flow into the drip tray. Once steam emerges, the nozzle is pivoted and immersed deeply into the liquid, ensuring no liquid penetrates the foaming device from above. Circular movements from bottom upwards heat the liquid.
    • For cappuccino foam (16), cold skimmed milk is poured into a narrow, tall, clean receptacle. The steam/hot water nozzle is introduced under the milk surface, and a circular movement is imparted to the receptacle until thick foam forms. The nozzle is then fully immersed until the milk is warm.
    • To end steam preparation, the rotary knob is turned in the other direction. The nozzle should be cleaned immediately with a damp cloth after use. If no more steam is needed, the "Steam" function is deactivated by pressing the steam key again. If "TOO HOT" appears, the machine needs to cool down or be purged by drawing off warm water until "TAP CLOSE" and then "READY" appear.
  • Programming:
    • Accessing Programming Mode: With the machine connected to power, press the key (9) for approximately 3 seconds until "TIME" appears. To exit, press the key (9) until "READY" or "WAIT" appears.
    • Navigation: Press the key (9) to cycle through programming points. Use the key (11) or (11) to access and modify settings.
    • Setting Time: When "TIME" appears, press (11) or (11). The time display flashes. Adjust hours with (11) or (11), confirm with (9). Minutes then flash; adjust with (11) or (11), confirm with (9). (Note: Function deactivated by default; if disconnected, time must be reprogrammed).
    • AUTO ON/OFF: Similar to time setting, navigate to "AUTO ON" or "AUTO OFF" using (9). Adjust the desired start/stop time with (11) or (11) and confirm with (9). (Note: AUTO ON is deactivated by default; if disconnected, time must be reprogrammed).
    • Water Hardness Control: Navigate to "WATER HARDNESS" using (9). Use the enclosed test tab to determine water hardness, then select the corresponding level (1-4) using (11) or (11) and confirm with (9).
    • Displaying Number of Cups: Navigate to "CUPS" using (9). The number of cups brewed will flash.
    • Displaying Descaling Operations: Navigate to "DECALC" using (9). The number of descaling operations performed will flash.
    • Setting Language: Navigate to "LANGUAGE" using (9). Use (11) or (11) to select the desired language (D/F/I/E/NL/Sp/Port) and confirm with (9).
    • Customizing Cup Filling Quantity: Place a cup under the coffee outlet. Press the key (11) or (11) until "ENOUGH COFFEE?" appears. Release the key. When the desired level is reached, press the key again. This setting is memorized even after power failure.

Maintenance Features:

  • Cleaning:
    • Drip Tray and Grill: After approximately 20 coffees or steam use, residual water is discharged into the drip tray. Remove the grill and empty the drip tray (17). Clean with non-abrasive dishwashing liquid. Ensure the back section of the drip tray with the integral float is correctly positioned when replacing.
    • Capsule Holder: Rinse frequently with hot tap water or by inserting it empty into the spout ring and letting water run through while slightly loosening and re-tightening it (18). A specially conceived cleaning product is available from NESPRESSO Club. Dishwasher cleaning is not recommended.
    • Steam/Hot Water Nozzle: Clean with a damp cloth after each use. If blocked, unscrew with a coin, remove residue with a needle, and clean the integrated frothing attachment. Rinse all parts in hot water (19). Ensure O-ring joints are properly in place when re-connecting (20).
    • Capsule Cage: This part is screwed into the bottom of the thermoblock. To clean:
      1. Turn off the machine, remove the water tank, drip tray, and grill.
      2. Allow the machine to cool down.
      3. Turn the machine upside down (21).
      4. Use the hexagonal key (l) on the capsule holder (d) (22) to unscrew the capsule cage counterclockwise (23).
      5. Finish unscrewing by hand (24).
      6. Rinse the capsule cage under running water (25).
      7. Use the cleaning tool (k) to clean the two holes on either side of the water spout and the water entry point of the capsule cage using the spiral end (26). Exercise caution as improper handling can cause injury.
      8. Blow through the capsule cage in the direction of the arrow (27) to remove deposits. Repeat cleaning and blowing.
      9. Coat the threads of the capsule cage with lubricant (28) and ensure the stopper (A), spring (B), and O-ring joint (C) are properly in place (29).
      10. Manually screw the capsule cage back into the spout ring using the hexagonal key. Do not use the capsule holder for this.
  • Descaling:
    • Regular descaling is recommended based on regional water hardness to maintain machine function and espresso quality.
    • Contact NESPRESSO Club for specially conceived descaling products.
    • A hexagonal key and cleaning tool are provided for descaling.
    • WARNING: Never use vinegar, as it can damage the machine's joints.
  • Troubleshooting:
    • Espresso not hot enough: Preheat cups and the capsule holder.
    • Loud pump noise: Ensure water tank is filled and properly in place.
    • Milk not frothy enough: Clean steam nozzle and frothing attachment. Use only cold, whole milk.
    • Coffee not flowing: Ensure capsule holder is properly in place, water tank is filled, and capsule cage is not blocked. Clean and descale the machine if necessary.
    • Coffee runs down sides of capsule holder: Ensure capsule holder is properly in place and clean the capsule holder.
  • Service: Any servicing other than cleaning and user maintenance should be performed by an authorized service representative. Do not immerse the base in water or attempt to disassemble the machine. The cord or any defective element must be replaced exclusively by NESPRESSO Club. Do not open the machine yourself.

Nespresso D300 Specifications

General IconGeneral
BrandNespresso
ModelD300
CategoryCoffee Maker
LanguageEnglish

Related product manuals