EasyManuals Logo

Netduma R2 User Manual

Netduma R2
20 pages
To Next Page IconTo Next Page
To Previous Page IconTo Previous Page
Page #7 background imageLoading...
Page #7 background image
7.
Quickstart Guide (1 of 3)
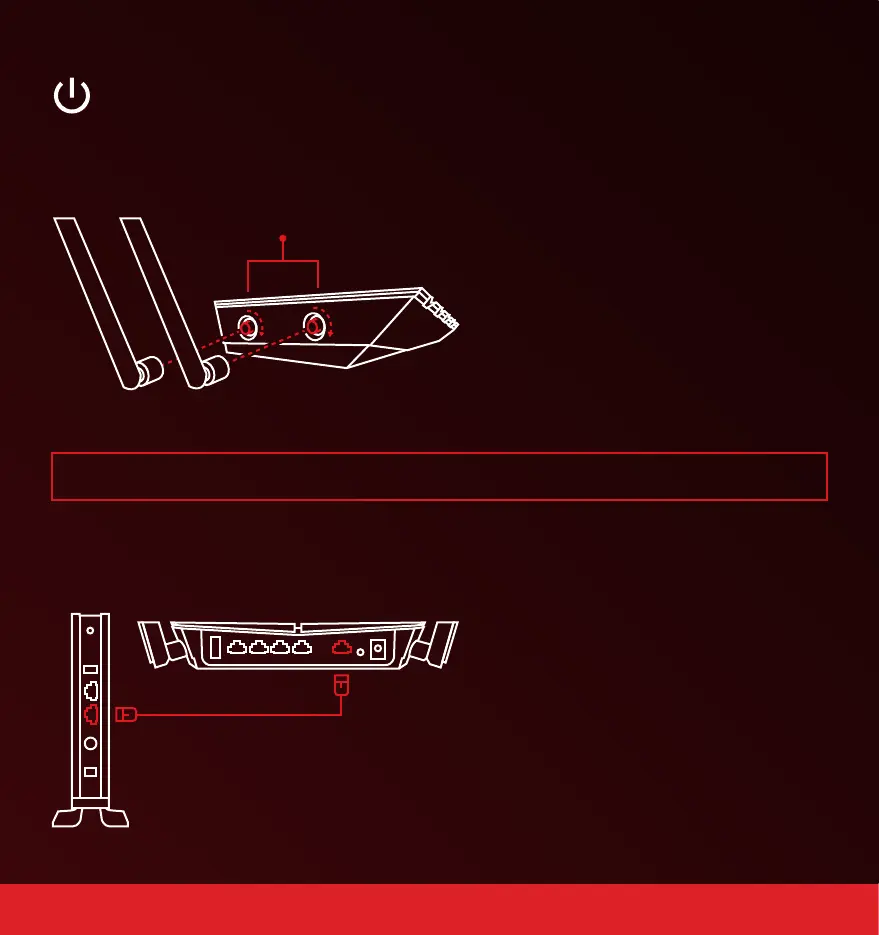
Step 1: Attaching Antennas
Threaded Antenna Posts
A) Screw the four antennas onto the threaded
antenna posts.
B) For the best Wi-Fi performance, position
the antennas vertically.
A) Turn off the Modem / Router provided by
your Internet Service Provider. (ISP).
B) Connect one end of the Ethernet cable into
the Internet Port of the Netduma R2, which is
located on the rear of the router.
C) Connect the other end of the Ethernet cable
to your ISP’s Modem / Router.
TIP : For the best Wi-Fi signal, position your router out in the open.
Step 2: Plugging In
Internet
Port
Modem / Router
Provided by your ISP
Netduma R2
CAT-6 Ethernet Cable

Questions and Answers:

Question and Answer IconNeed help?

Do you have a question about the Netduma R2 and is the answer not in the manual?

Netduma R2 Specifications

General IconGeneral
RAM512 MB
Flash Memory128 MB
Wi-Fi Standards802.11a/b/g/n/ac
Frequency Bands2.4 GHz, 5 GHz
USB Ports1 x USB 3.0
Maximum Data Rate1200 Mbps
2.4 GHz Speed300 Mbps
5 GHz Speed867 Mbps
Processor ModelMediaTek MT7621AT
Operating SystemDumaOS
Ethernet Ports5 x Gigabit (1 WAN, 4 LAN)
QoSDumaOS QoS
Antennas3 x External