Product ManualXG-7100
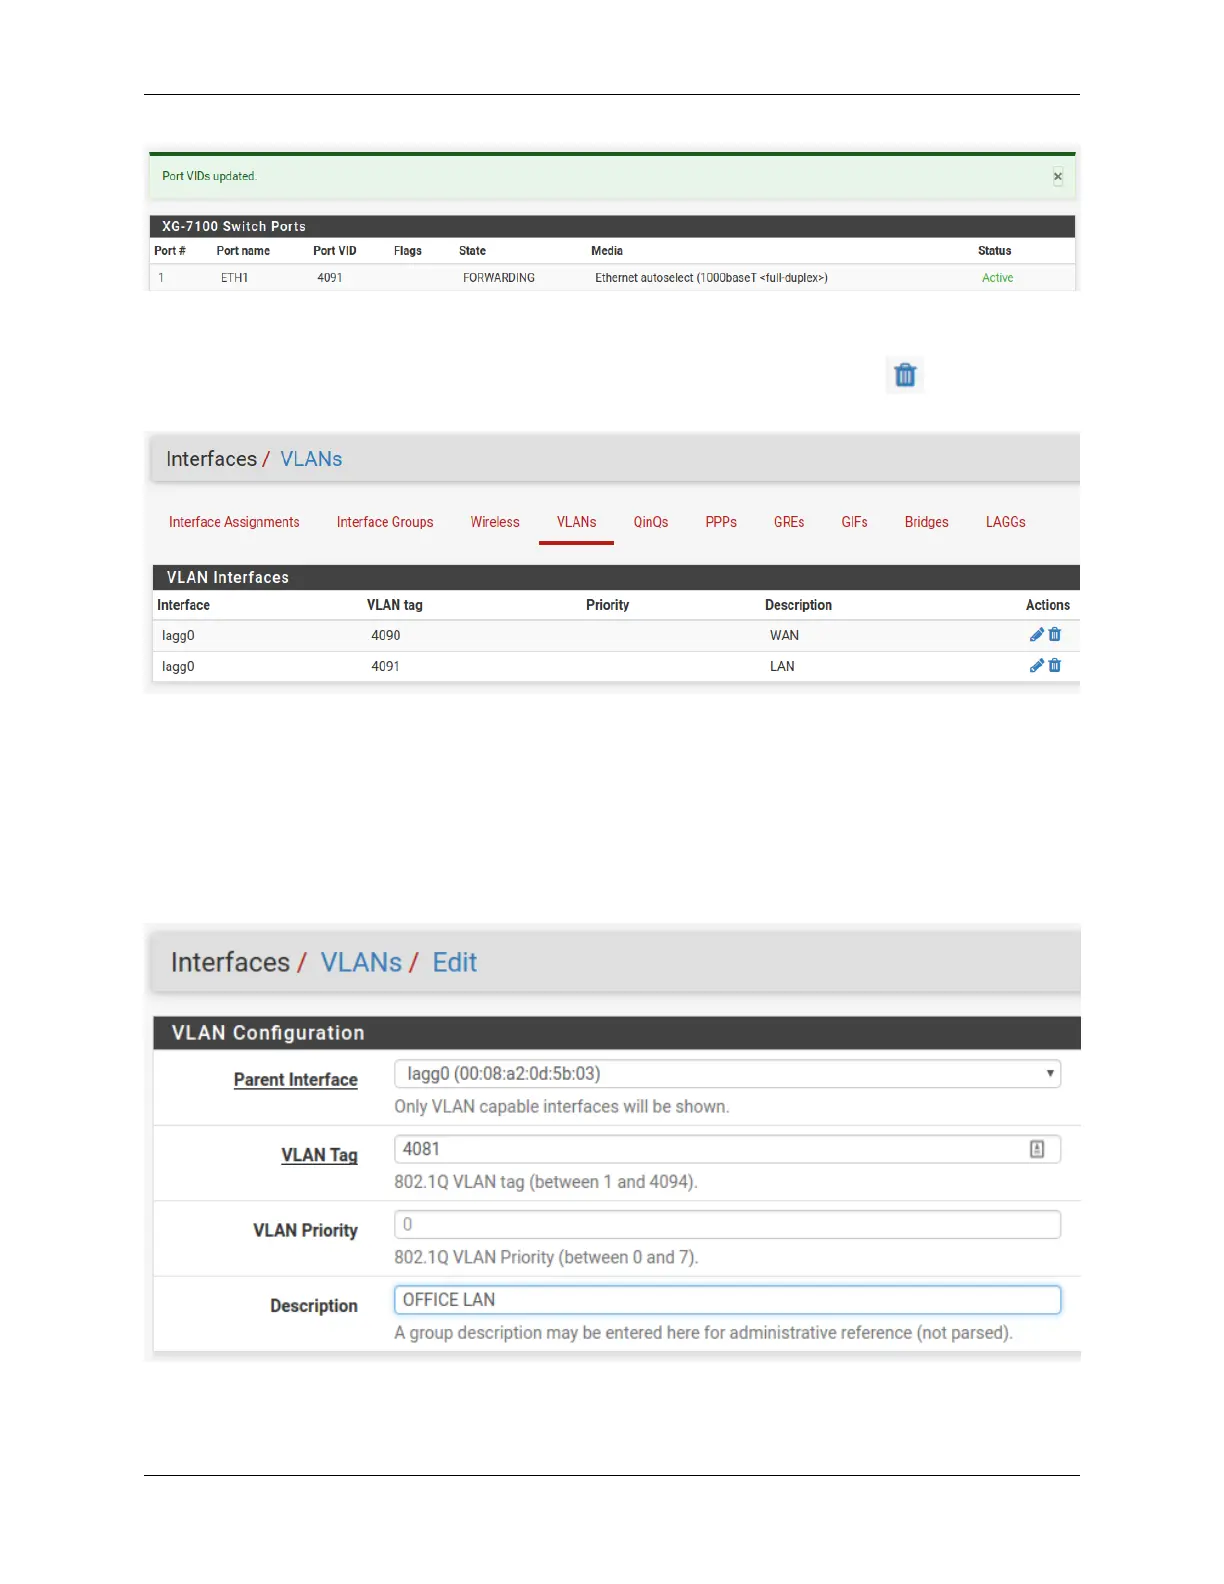
At this point, everything should be configured properly. ETH1-8 will act as a single LAN switch. One final step that
should be performed is to remove the old VLAN 4090 from pfSense. So far VLAN 4090 was only removed from
the switch. To remove the old VLAN, go to Interfaces -> Assignments -> VLANs and use on the 4090 row to
remove this VLAN interface:
2.5.2 Two LAN switches
In this scenario, the LAN switch from the previous example will be split into two LAN switches.
A new LAN network should be created in pfSense first. Similar to the existing LAN interface, another VLAN interface
should be used so the switch can segment traffic appropriately.
Create a new VLAN with lagg0 as the parent under Interfaces -> Assignments -> VLANs:
Once the VLAN has been created, it should look something like this:
2.5. Switch Configuration Examples 18
 Loading...