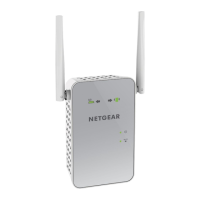
This document is a Quick Start guide for the NETGEAR Nighthawk X4 AC2200 WiFi Range Extender, Model EX7300. It provides instructions on how to set up and use the extender in both extender mode and access point mode, along with troubleshooting tips and frequently asked questions.
Function Description:
The NETGEAR WiFi Range Extender is designed to increase the coverage and improve the signal quality of an existing WiFi network. It achieves this by boosting the existing WiFi signal and repeating it over longer distances, effectively extending the range of a WiFi router or access point. This helps eliminate dead zones and provides a stronger WiFi signal in hard-to-reach areas within a home or office. The extender can operate in two primary modes: Extender Mode and Access Point Mode.
In Extender Mode, the device acts as a repeater, taking an existing WiFi signal from a router or access point and rebroadcasting it to expand the network's reach. This is ideal for users who want to improve their current WiFi coverage without running new Ethernet cables. The extender creates two new WiFi networks, typically named by appending "_2GEXT" and "_5GEXT" to the existing WiFi network name, for the 2.4 GHz and 5 GHz bands respectively. Devices can then connect to these extended networks using the same password as the original router.
In Access Point Mode, the extender functions as a new WiFi hotspot. This mode requires a wired Ethernet connection from the extender to a router's LAN port or a remote Ethernet LAN jack. In this configuration, the extender joins the existing local area network (LAN) via the Ethernet cable and then broadcasts a new WiFi signal, effectively creating a new wireless access point. This is useful for situations where a wired connection is available, and a new WiFi network is desired in a specific area.
Usage Features:
The extender offers a straightforward setup process, primarily through two methods: Wi-Fi Protected Setup (WPS) or the NETGEAR installation assistant.
Setup via WPS:
- Placement: Initially, the extender should be placed in the same room as the WiFi router for the initial setup to ensure strong signal proximity.
- Power On: Plug the extender into an electrical outlet. The Power LED should light green after about 100 seconds. If not, the Power On/Off button can be pressed.
- WPS Connection: Press the WPS button on the extender, which will cause the WPS LED to blink.
- Router WPS: Within two minutes, press the WPS button on the existing router or access point.
- Confirmation: The WPS LED on the extender will light solid green, and the Router Link LED will light up, indicating a successful connection to the existing WiFi network.
- Relocation: After the initial connection, the extender can be unplugged and moved to a new location, ideally about halfway between the router and the area with a poor WiFi signal.
- Optimal Placement: The Router Link LED serves as a visual guide for optimal placement. A solid green indicates the best connection, while solid amber indicates a good connection. If the LED is red or off, the extender needs to be moved closer to the router.
- Connecting Devices: Once the extender is optimally placed, WiFi-enabled devices can connect to the new extended WiFi networks (e.g., MyNetworkName_2GEXT, MyNetworkName_5GEXT) using the original router's password.
- Client Link LED: The Client Link LED indicates the connection quality between the extender and the WiFi-enabled device. Solid green or amber means a good connection, while red indicates a poor connection, suggesting the device needs to be moved closer to the extender.
Setup via NETGEAR Installation Assistant:
- Connection: Connect a device (computer, mobile device) to the extender either via an Ethernet cable to the extender's Ethernet port or wirelessly by connecting to the extender's default WiFi network (NETGEAR_EXT). The Client Link LED will light up upon successful connection.
- Web Browser: Launch a web browser and navigate to www.mywifiext.net. This will display the New Extender Setup page.
- Account Creation: Click "NEW EXTENDER SETUP" and complete the account creation fields.
- Mode Selection: Click "WIFI RANGE EXTENDER" to proceed with extender mode setup. The extender will scan for available WiFi networks.
- Network Selection: Select the desired WiFi network to extend. Users can choose to extend both 2.4 GHz and 5 GHz bands or specific ones.
- Password Entry: Enter the existing WiFi network's password (passphrase or security key).
- Extender Network Details: Set a network name (SSID) and password for the extender's new WiFi networks. It is recommended to use a different SSID than the router's for clarity.
- Device Connection: Connect the WiFi-enabled device to the newly created extender WiFi network using the new SSID and password.
- Confirmation: Click "CONTINUE" to confirm the connection and then "NEXT" to proceed to registration.
- Registration: Complete the registration fields. Registration is necessary for NETGEAR telephone support.
- Relocation and Optimization: Similar to WPS setup, unplug and move the extender to an optimal location, using the Router Link LED as a guide.
Access Point Mode Setup:
- Switch Setting: Set the Access Point/Extender switch on the device to "Access Point."
- Power On: Plug the extender into an electrical outlet. The Power LED should turn green.
- Wired Connection: Use an Ethernet cable to connect the extender's Ethernet port to a router's Ethernet LAN port or a remote Ethernet LAN jack with LAN access.
- WiFi Hotspot: The extender will then join the LAN and create a new WiFi hotspot.
- Connecting Devices: On a WiFi-enabled device, connect to one of the new WiFi extender networks (NETGEAR_EXT for 2.4 GHz or NETGEAR_5GEXT for 5 GHz). The Client Link LED will light up.
- Web Browser Setup: Launch a web browser, go to www.mywifiext.net, and click "NEW EXTENDER SETUP."
- Account Creation: Complete the account creation fields.
- Network Configuration: Set the network name (SSID), security option, and password for the new access point networks.
- Final Connection: Connect the WiFi-enabled device to the new access point WiFi network. Click "CONTINUE" and then "NEXT" to register.
Ethernet-Enabled Device Connection:
After the extender is connected to the existing WiFi network (in either mode), wired devices can be connected to the extender's Ethernet port using an Ethernet cable. These devices will then be able to access the network through the extender's WiFi connection.
Maintenance Features:
The extender includes several features for monitoring and managing its operation:
- LED Indicators: Various LEDs provide visual feedback on the extender's status:
- Router Link LED: Indicates the connection quality between the extender and the router/access point (Solid green: best, Solid amber: good, Solid red: poor, Off: no connection).
- Client Link LED: Indicates the connection quality between the extender and connected WiFi-enabled devices (Solid green: best, Solid amber: good, Solid red: poor, Off: no connection).
- Power LED: Shows the power status (Solid amber: booting, Solid green: powered on, Off: powered off).
- WPS LED: Indicates WiFi security status (Solid green: security enabled, Blinking green: WPS connection establishing, Off: security not enabled).
- Access Extender Settings: Users can log in to the extender's settings page (www.mywifiext.net) after installation to view or change settings. This requires entering the email and password set up during the initial configuration.
- Factory Reset Button: A physical "Factory Reset" button is available on the device. Holding this button for at least five seconds until the Power LED blinks amber will restore the extender to its factory default settings. This is useful for troubleshooting or reconfiguring the device from scratch.
- Troubleshooting: The guide provides solutions for common issues, such as the installation assistant repeatedly asking for the network password (often due to poor extender placement) or inability to access the installation assistant (suggesting DHCP issues or invalid IP address).
- MAC Filter Management: For users with MAC filters, wireless access control, or ACL enabled on their router, the guide explains how to manage translated MAC addresses to ensure devices connected through the extender can obtain an IP address and access the internet. This involves disabling the filter temporarily, connecting devices, retrieving the virtual MAC addresses from the extender's settings, and then adding them to the router's filter table before re-enabling the filter.
- Support Resources: NETGEAR provides online support at www.netgear.com/support, including user manuals, downloads, and a community forum. Regulatory compliance information is also available on their website.