Your Remote Control Guide
For Patients in the Trial and Implant Phase
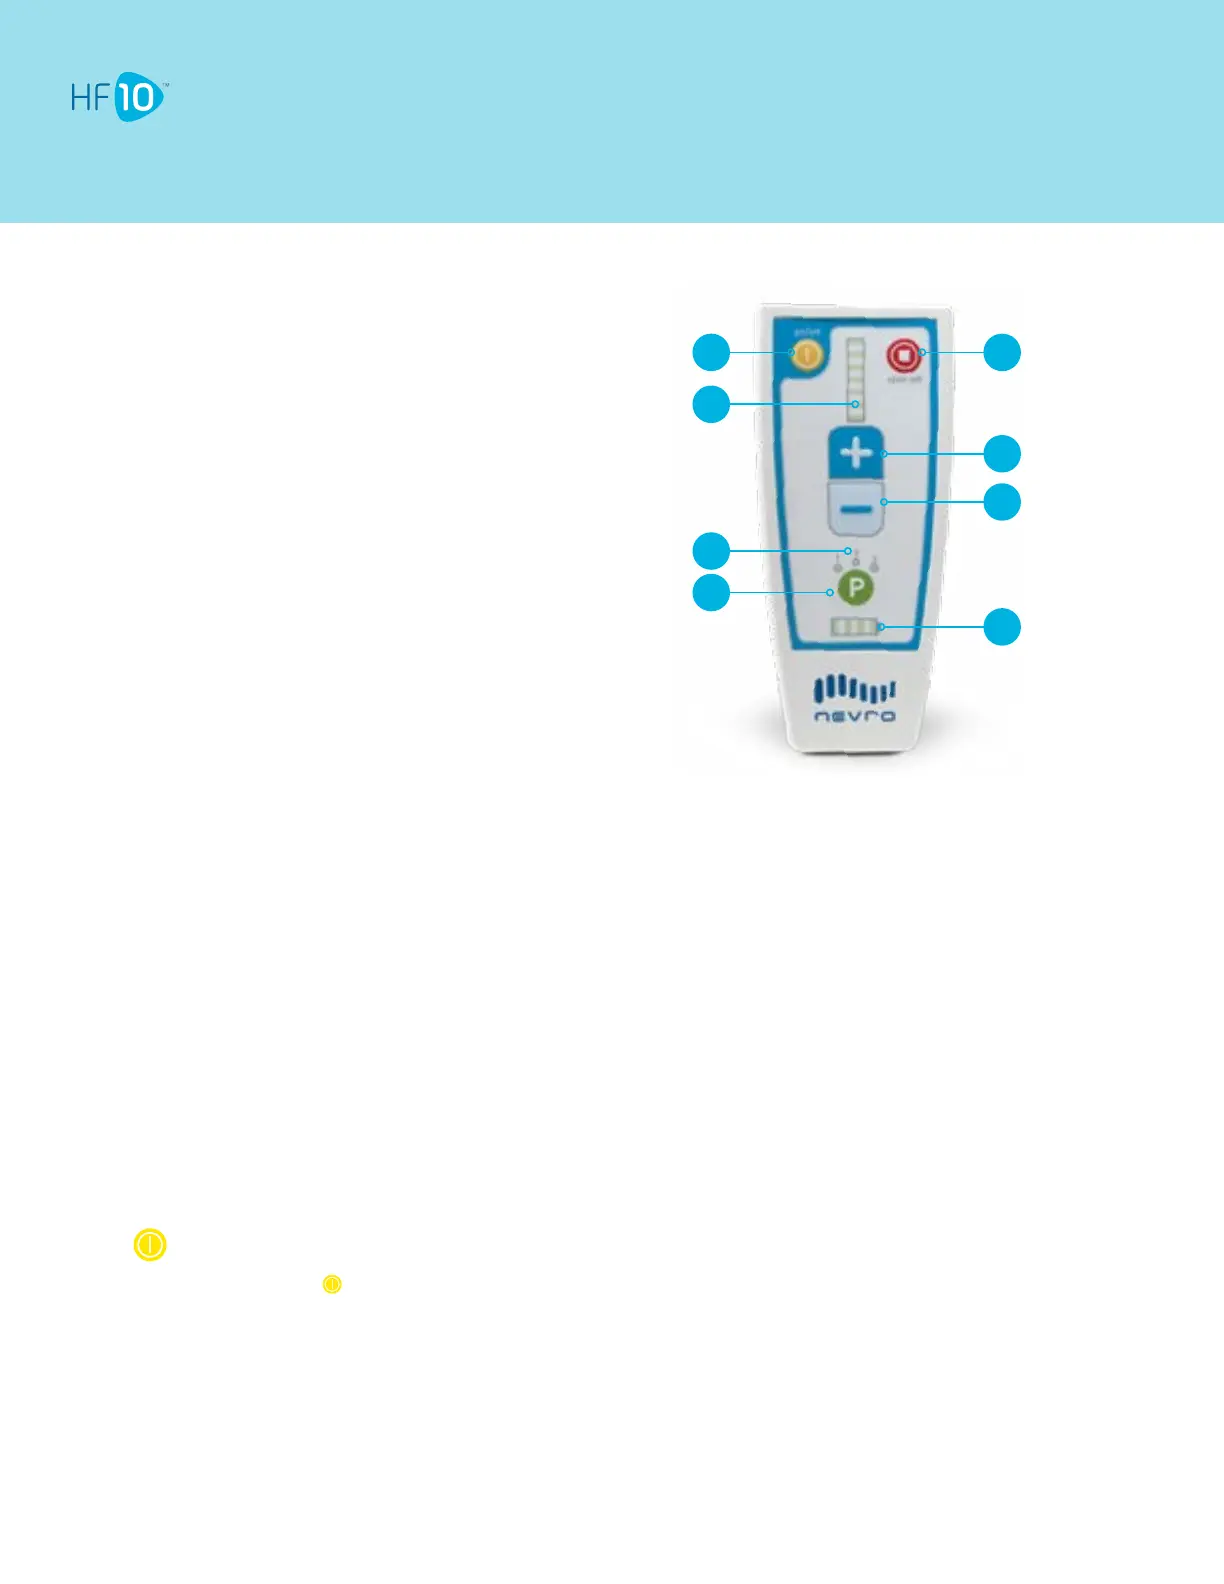
1. Remote Control ON/OFF Button
2. Stimulation Level Indicator
3. Program Indicator
4. Program Selection Button
5. Stimulation OFF Button
6. Stimulation Start/Increase Button
7. Stimulation Decrease Button
8. Battery Level Indicator
(Charge level of Trial Device)
1 5
6
7
8
2
3
4
Guidance on using your Remote Control will be provided by your HF10 representative. You may not need to make any
programming changes during the temporary trial. To achieve optimal relief, make sure you work closely with your HF10
representative.
Tips
Replace the batteries in the Remote Control if any of the following situations arise:
• The Remote Control beeps 6 times when turned on.
• The Remote Control will not turn on.
The Remote Control uses 2 AA batteries, alkaline only. DO NOT USE lithium or rechargeable batteries.
When the Battery Level Indicator shows 2 bars or fewer, the batteries in the Trial Device need to be replaced. See Trial
Device Guide.
Turning the Remote Control ON
Press and hold until you see lights turn on and hear a beep.
• You may need to press for up to 5 seconds.
• If the Remote Control syncs with the Trial Device, your Program Indicator (1, 2, or 3) will light up. You’ll also see lights
on the Stimulation Level Indicator indicating HF10 is ON.
• If the Remote Control cannot sync with the Trial Device, you will hear 3 beeps and the lights on the Remote Control will
turn OFF.
• Repeat these until you have a link with the Trial Device. Moving the Remote Control closer to the Trial Device will help.
• Other buttons on the Remote Control will respond only when the Remote Control is ON and linked to the Trial Device.
 Loading...