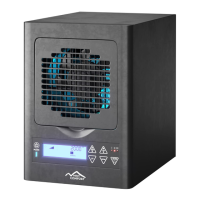
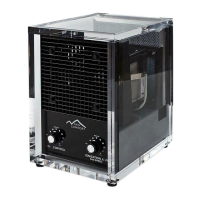
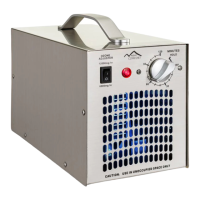
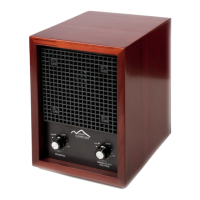
The New Comfort CH3000/BL3000 is a 6-stage air purifier designed to replicate the clean, fresh air found outdoors within an indoor environment. This device offers a comprehensive approach to air purification, utilizing multiple technologies to address a wide range of airborne pollutants.
Function Description
The core function of the CH3000/BL3000 is to purify indoor air through a multi-stage filtration and treatment process. This includes:
- Negative Ion Generation: The unit incorporates negative ion generation technology, which helps to clump together airborne particles, making them easier to filter out of the air.
- Adjustable Ozone Generation: It features adjustable ozone generation, which is effective in neutralizing odors and killing various microorganisms. The ozone output can be controlled across five grades, and the unit can adjust ozone output up to 3500 sq ft. It's crucial to note that ozone should only be used in unoccupied spaces due to potential health effects from excessive accumulation.
- Activated Carbon Deodorization: An activated carbon filter is included for effective deodorization, trapping and removing a wide array of unpleasant smells from the air.
- UV Bulb & Photo-Catalytic Filter: The device utilizes a UV bulb in conjunction with a photo-catalytic filter (TiO2). This combination is designed to kill viruses, bacteria, and mold, further enhancing the air purification process.
- Washable HEPA Filter: A washable HEPA filter is integrated to eliminate small particles and dust from the air, capturing up to 99.97% of airborne particulates.
- Washable Permanent Pre-Filter: A washable permanent pre-filter is the first line of defense, capturing larger particles and extending the life of subsequent filters.
The unit operates with an adjustable fan speed control, offering five different speeds to manage air circulation and purification intensity. It also includes a remote control for convenient operation from a distance of up to 10 meters.
Usage Features
The CH3000/BL3000 is designed for user convenience and control, offering several features to optimize its operation:
- Control Panel and LCD Display: The device features a user-friendly control panel with push-buttons and an LCD display that shows the machine's current work status, including fan speed, coverage area, and timing reminders.
- Power Control: A power button allows users to easily turn the unit on or off. When in standby mode, pressing the power button starts the air purifier.
- Fan Speed Adjustment: The fan button allows users to cycle through five fan speeds. Each press of the fan button also changes the coverage area by 200 sq ft.
- Purify Setting (Ozone Output): The "PURIFY" button offers five different settings (1-5, with 0 meaning stop) to adjust the ozone output. Similar to the fan, each press changes the coverage area by 200 sq ft. It's important to remember that the purify function (ozone) does not work when ozone is off.
- UV Light Control: A dedicated UV button turns the UV light on or off.
- Ozone Control: An "OZONE" button allows users to optionally turn the ozone generation on or off. The manual emphasizes that the purify function is dependent on ozone being active.
- AWAY Mode: This mode allows the air purifier to work at maximum settings. It includes a timer function for automatic shut-off, with options for 0.5 hour, 1 hour, 2 hours, or returning to manual mode. LEDs indicate the timing mode (I for 0.5H, II for 1H, III for 2H). This mode is particularly useful for treating unoccupied spaces with higher ozone levels.
- Timer Function: A general timer can be set to automatically turn off the unit. Users can adjust the timer in 0.5-hour increments, with the LCD showing the countdown.
- Sleep Mode: The remote control offers a sleep mode that turns off the LCD light and deactivates the negative ion, UV, and ozone functions. This mode has two settings for coverage area (1200 sq ft and 1000 sq ft) and can be exited by pressing any button.
- Placement Recommendations: To maximize purification, the unit should be placed as high as possible or tilted upward to better oxidize and purify floating pollutants. Suggested locations include nearest to the worst pollutant source, near a cold-air return in an air circulation system, or in the most frequently used area for maximum benefit. The rear of the unit should always have at least six inches of open area for unrestricted airflow.
- Safety Features: The unit has a grounding type plug to reduce the risk of electric shock. It also includes a safety switch that prevents the unit from powering on if the back cover is not fully installed and snapped into place. A fuse is incorporated for electrical protection.
Maintenance Features
Regular maintenance is crucial for the CH3000/BL3000 to ensure proper operation and longevity. The manual outlines several maintenance procedures:
- Pre-Filter/HEPA Filter Cleaning:
- Filters can be cleaned by removing them and vacuuming heavy particulate from the screen.
- Alternatively, filters can be removed, washed in cool water, and gently brushed with a toothbrush to remove particulate. They must be completely dry before re-installation.
- All filters are washable except for the charcoal filter.
- Ozone Plate Cleaning: For maximum performance, ozone plates may need to be washed in warm water. They must be allowed to properly dry before installation. If ozone plates are cracked or broken, they require replacement.
- Fan Blade and Front Grill Cleaning:
- The front grill can be removed by pulling out the bottom, lifting it approximately 30 degrees when the latch releases, and then pulling it away from the unit in a parallel motion.
- The fan blade and front grill can be wiped with a damp washcloth.
- The fan itself requires no maintenance, but if it squeaks, a drop of lightweight machine oil may be applied to the fan shaft.
- To reinstall, place the top latch of the grill into the front panel opening and push the bottom latch into the bottom slot.
- Fuse Replacement: A fuse holder is located on the back of the unit next to the power cord. To replace or check the fuse, press the clip and pull the holder straight out. If the fuse is blown, replace it with a standard replacement fuse (no more than 1.0 Amp for 120V models) and press the assembly straight in until it latches. The unit will not operate if the fuse holder cap is not installed correctly.
The manual emphasizes the importance of unplugging the unit before performing any maintenance to prevent electric shock. It also warns against operating the unit without proper installation, as this may void the warranty.