Package Contents:
• Newer Technology miniStack v3 Enclosure
• External Power adapter
Input 100-240V, Output +12V/3A, +5V/3A
Hard Drive Screws
• Power Cord
• USB 2.0 A-B Interconnect Cable
• 1394b 9-9 Pin Interconnect Cable
• 1394a-b 9-6 Pin Interconnect Cable
Hard Drive Installation:
1. Begin by removing the 4 Phillips screws from the bottom
of the Newer Technology miniStack v3 enclosure. Remove the
aluminum drive carrier from inside of the Newer Technology
miniStack v3 enclosure.
Please observe all static safe
precautions before proceeding.
Discharge any excess static
electicity safely before removing
any electronic component from it’s
protective anti-static bag.
4
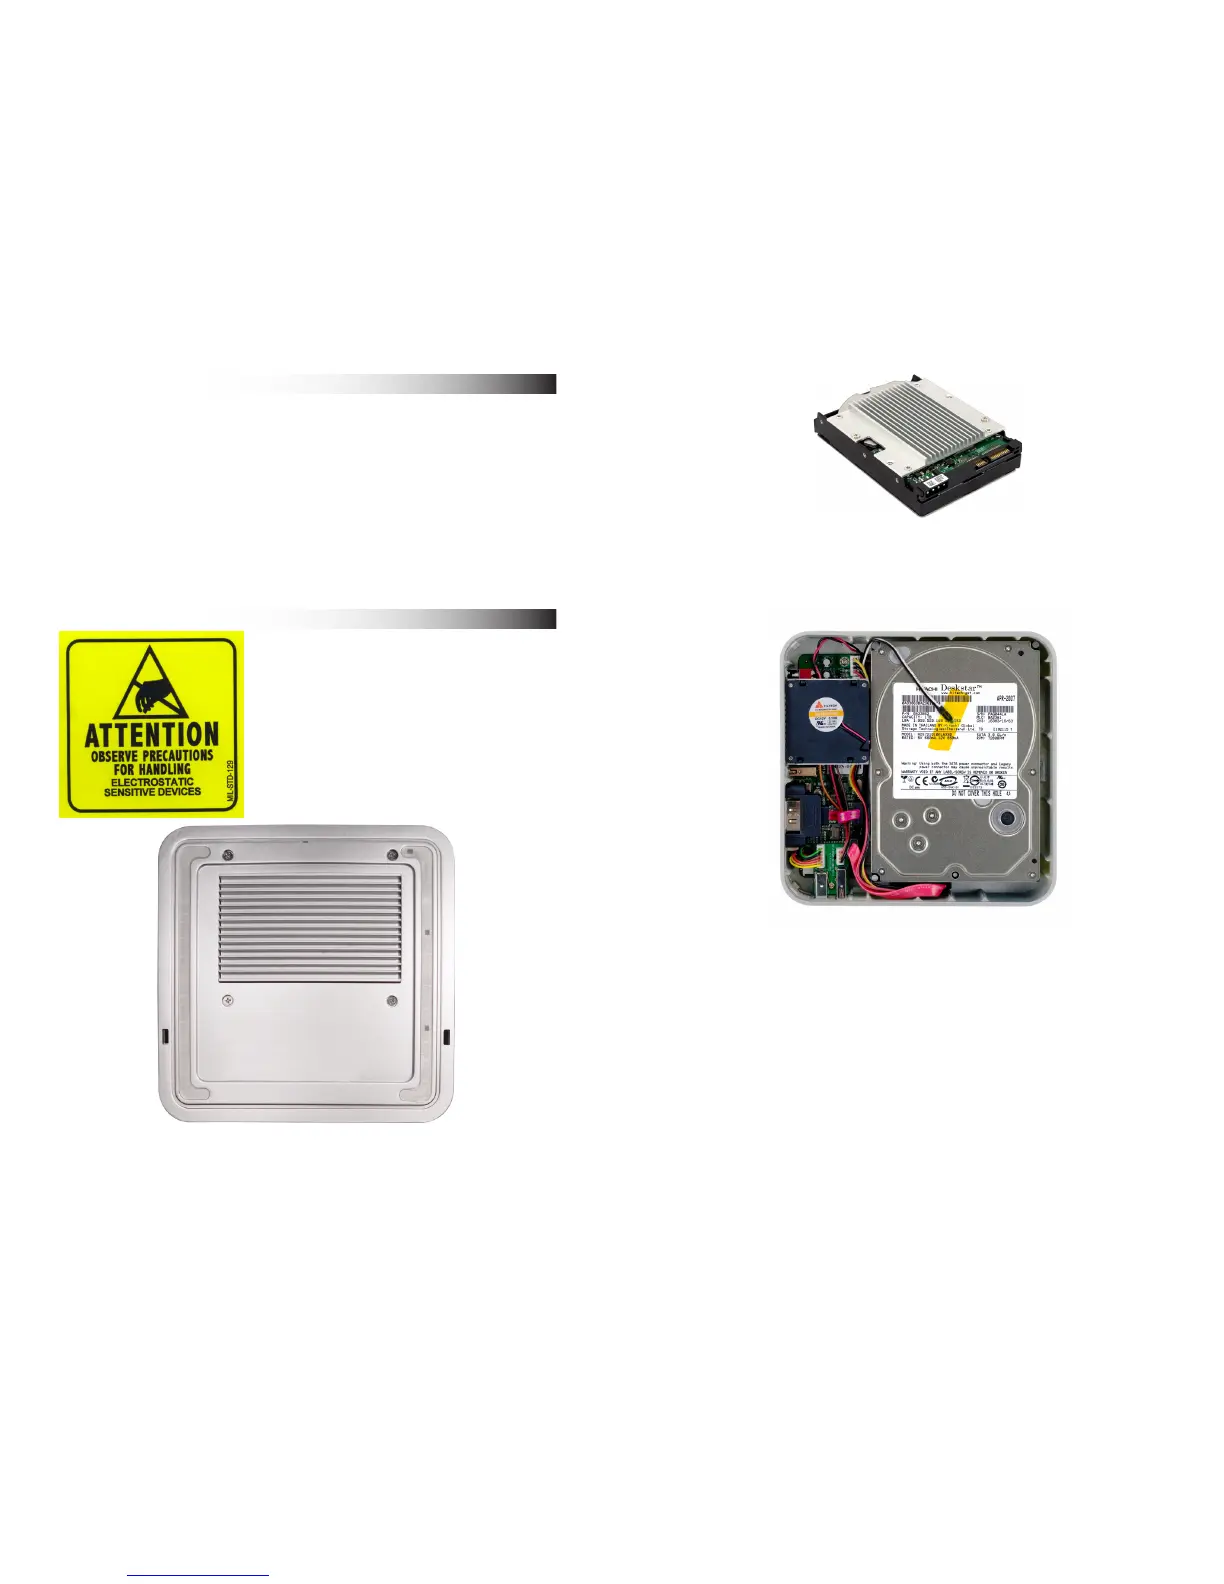
2. Place your SATA drive onto the mounting bracket as shown.
The connecting cables need to be positioned to the left, with the
opening in the drive bracket to the top. Once inserted properly
into the bracket, insert the 4 Phillips screws to fasten it securely.
3. Place the drive and bracket inside the Newer Technology
miniStack v3 enclosure, routing the power and SATA cables to
avoid pinching them. The SATA cable will need to be tucked
around the corner of the hard drive at an angle once it’s set into
the drive enclosure.
Take the black and white wire at the top of the enclosure in this
picture and tape the thermal probe (the blue portion of the
wire) onto the center of the hard drive using the enclosed piece
of tape. Once the drive is inserted, replace the 4 Phillips screws
on the bottom of the enclosure to fully secure the drive carrier.
Make sure that all wires are as at as possible and place the
plastic top onto the drive enclosure. Be sure before continuing
that there are no bulges in the top cover.
5
 Loading...

