4
8
M6*35 Bolt
X8
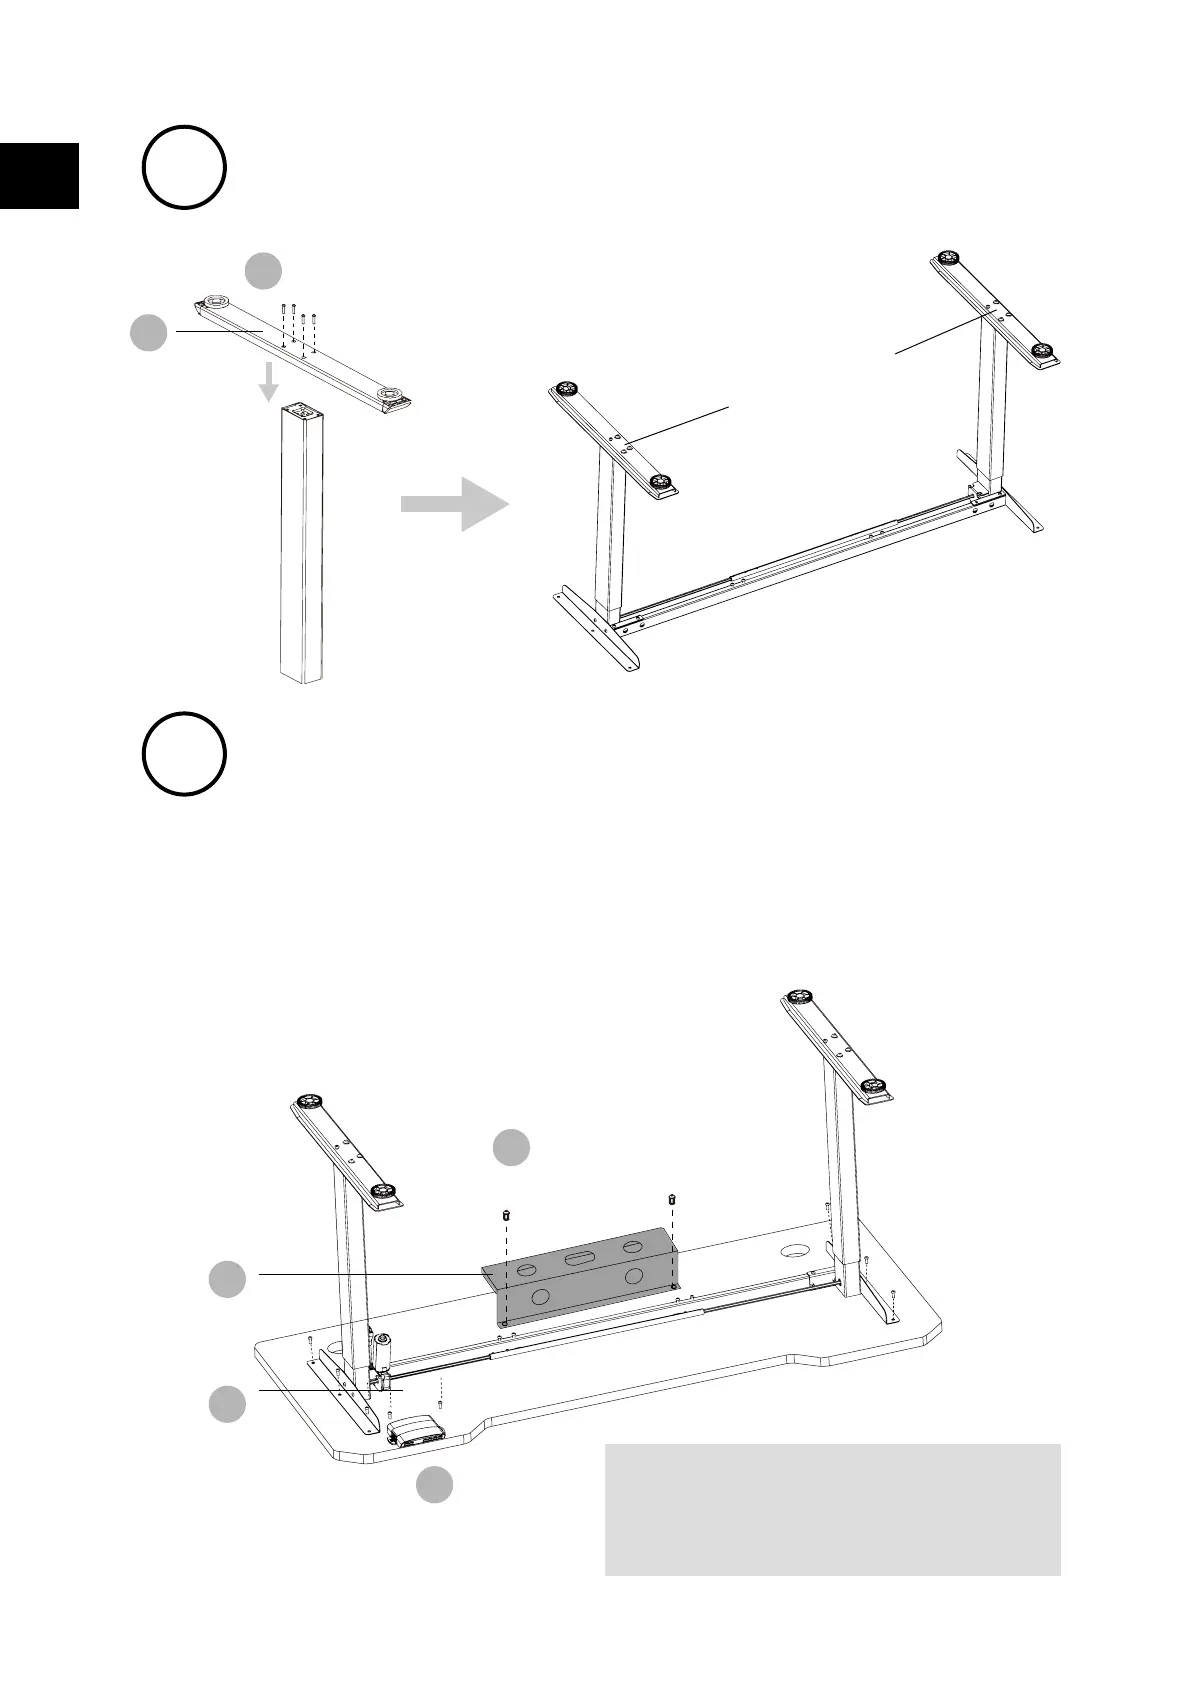
1
Fasten the bolts
5
7
M6*12 Bolt
X8
9
ST4*10 Screw X2
12
4
Line up the screw holes on the feet
and columns.
Install the desktop
NOTE: Avoid excessive tightening bolts
• Check both side of desktop before placing the base on the boom side of the desktop.
Adjust the suitable width. It is suggested that the two sides of the frame side brackets are
2~4inch 15cm~10cm from the edge of the desktop and fasten screws
• As shown below, connect related parts, including control box, extension cable and power
cord
• Check all bolts and screws. Make sure all bolts and screws are tightened
Mounting holes are reserved on the back of the desktop. Please
adjust the width of the table frame according to the position of the
mounting holes.
The frame width is adjustable: 42 inches~59 inch, which is suitable
for dierent desktop width
EN