Do you have a question about the Newskill Belenor Pro and is the answer not in the manual?
Read the enclosed manual thoroughly before assembling to avoid damage or personal injury.
Adhere to indoor use, dry environment, and supervision rules for safe operation.
Assemble in a flat area, keep children away, avoid sitting on or under the desk.
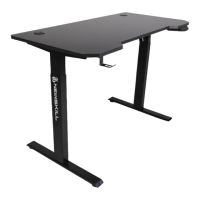
List of all parts included in the package with their corresponding numbers and quantities.
Insert the hexagonal drive shaft into the column, ensuring proper seating and alignment.
Install the connecting rod between columns, aligning holes and tightening bolts.
Attach the side brackets to each column using bolts, avoiding excessive tightening.
Line up screw holes on feet and columns, then fasten the bolts securely.
Place desktop, adjust width, connect control box, cables, and ensure all fasteners are tight.
Mount the control box on the desktop edge and tidy cables with clips.
Complete the assembly by attaching any remaining components like the earphone holder.
Reset the desk by holding the down key until specific displays appear, then pressing down again.
Control desk height by pressing and holding the 'up' or 'down' keys until the desired height is reached.
Save preferred heights by pressing 'S', then a number key (1, 2, or 3).
The desk will move back when an obstacle is detected, displaying 'E-2'.
Set upper and lower height limits by entering a specific mode and adjusting.
Switch between centimeters and inches for height display via setup menu.
Adjust displayed height values by pressing number keys in amendment mode.
Check motor connection if 'E-3' and 'rES' are displayed; unplug and reconnect cables.
Restore the control unit to factory default settings by pressing 'S' until 'FAC' is shown.
Guide to understanding error codes (rES, Ovr, E-2, Dut, E-4, E-3) and their solutions.
| Brand | Newskill |
|---|---|
| Model | Belenor Pro |
| Category | Indoor Furnishing |
| Language | English |