Do you have a question about the Nexa FS-558/RF and is the answer not in the manual?
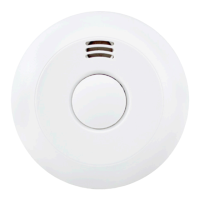
The Nexa FS-558/RF is an optical smoke alarm designed for wireless connection in series, providing early warning in the event of a fire. It detects smoke particles and features a built-in temperature sensor to enhance its fire detection capabilities. This device is intended for use in single-family homes, with each home in multi-occupancy buildings requiring its own smoke alarms. It is not suitable for non-residential buildings and should not be considered a substitute for a full alarm system required by law. The smoke alarm detects combustion particles but does not react to flames or gas. It is designed to emit an alarm signal when a fire is developing and should be tested weekly and replaced every ten years.
For optimal early warning, Nexa recommends installing smoke alarms in every room and on all floors, excluding kitchens, bathrooms, and garages where cooking smells, steam, or exhaust fumes could trigger false alarms. In a single-level home, the alarm should be positioned in the entrance hall between living and sleeping areas, as close as possible to living areas, and audible in bedrooms. For multi-storey homes, an alarm should be placed in the stairwell at ground level, another above the top floor landing, and one on the ceiling in the basement. These positions cover the basement level but exclude crawl spaces and unfurnished attics.
When installing on a ceiling, the smoke alarm should be in a central location to leverage the rising and spreading nature of hot smoke. Avoid corners or areas where air circulation is poor. The device should be at least 30 cm away from light fittings or interior fixtures that might obstruct smoke or heat, and at least 1 meter away from any wall. If ceiling mounting is not feasible, wall mounting is an option. In this case, the upper edge of the smoke alarm should be at least 15 cm and no more than 30 cm from the ceiling, avoiding deep corners. For sloping ceilings or those leading to a ridge, the detector should be installed 90 cm horizontally from the highest point, as still air under the ridge can prevent smoke from reaching the device.
Installation involves removing the mounting plate by rotating it counterclockwise, inserting two AA/LR6 batteries with correct polarity, and then testing and programming the smoke alarm. The mounting plate is then installed in the chosen location on the ceiling, and the smoke alarm is placed on the plate and rotated clockwise until it clicks into place. A final press of the test button confirms correct operation.
The smoke alarm features a test button for verifying its functionality. It is crucial to test alarms both before and after installation to ensure they are working. Only the test button should be used; never use a naked flame, as this can damage the device. Weekly testing is recommended. For interlinked alarms, hold down the test button until all alarms have emitted a signal, which may take up to 30 seconds.
The FS-558/RF is equipped with RF transmitter and receiver for wireless interconnection. To program the alarms, one unit is designated as the master unit (marked with an 'M' for easy identification). The master unit sends out a radio code to other slave units during programming. To initiate programming, press and hold the master unit's test button for about 15 seconds until its LED indicator lights up solidly. The master unit remains in programming mode for approximately 30 seconds. While the master unit is in programming mode, press and hold a slave unit's test button until its LED lights up solidly (1-3 seconds), then release and press it again. Both master and slave unit LEDs will blink quickly for 2 seconds, confirming interconnection. This process is repeated for all slave units. Programming is exited by pressing the test button on the master unit until its LED indicator goes out.
To delete programming (resetting), press and hold the test button on the device for about 20 seconds until the LED indicator flashes quickly, then release it. The LED will then light up solidly. While the LED is solid, press the test button twice. A short beep confirms successful reset. This process is repeated for all devices to be reset. Due to potential wireless communication interference, weekly testing of fire detectors is important to ensure proper communication between devices.
In normal operation, the smoke alarm's LED flashes every 40 seconds, indicating correct battery and device function. If smoke is detected, a loud, pulsing alarm will sound, and the red LED will flash until the smoke clears. The FS-558/RF emits different audible signals for smoke detection and temperature increases, allowing identification of the trigger. Smoke detection results in three long audible signals followed by a pause, while a temperature increase triggers three short audible signals followed by a pause. Interconnected devices receiving a signal from a triggered alarm will emit two short audible signals followed by a pause.
The smoke alarm features a combined test and pause button. The pause function allows temporary silencing of the alarm for 10 minutes in case of a false alarm. After 10 minutes, the alarm resets to normal sensitivity. If needed, the pause function can be reactivated. For interlinked systems, pressing the test/pause button on the device that triggered the alarm will pause all connected devices.
False alarms can be caused by various factors. Smoke alarms react to smoke particles, but also to dust, moisture, pollen, or insects. To avoid false alarms, position the smoke alarm at least 2 meters away from bathrooms, laundry rooms, or other areas with high ambient humidity. Regular vacuuming of the smoke alarm, using a plastic nozzle to avoid damaging electronics, helps remove dust and dirt. Avoid installing smoke alarms in draughty locations or close to windows, doors, ventilation systems, fans, air ducts, and heat pumps, as these can cause dust particles to enter the detection chamber. Rapid temperature variations, such as those near frequently opened windows or doors, can cause condensation in the detection chamber. Smoke alarms should be placed in locations with consistent and stable temperatures. Incorrect positioning in an unstable indoor environment, close proximity to electrical devices (EMC), and lighting can also lead to false alarms. It is recommended to position smoke alarms at least 5 meters away from fireplaces, stoves, or other heaters, 2 meters from ventilation ducts, heat pumps, and air conditioning, and 1 meter from lamps and fluorescent tubes.
Battery replacement frequency depends on the battery type. It is advisable to replace batteries annually, ideally on a specific date. To replace batteries, rotate the smoke alarm counterclockwise to remove it from the mounting plate, remove old batteries, insert new ones with correct polarity, and then place the smoke alarm back on the mounting plate, rotating it clockwise until it clicks into place. Finally, press the test button to confirm functionality.
The smoke alarm comes with a three-year limited warranty against manufacturing faults, valid from the date of purchase. Batteries are not covered. Warranty liability is limited to the value of a corresponding smoke alarm. Defective units should be returned to the dealer with a problem description. A receipt confirming the purchase date is required for warranty claims.
Maintenance and cleaning are essential for optimal performance. The smoke alarm should be cleaned regularly, at least twice a year. Vacuum the exterior along the opening to the optical chamber to remove dust or dirt. Do not attempt to open the hatch to clean the inside of the smoke alarm, as this will void the warranty.
The device is mainly made of recyclable materials. Packaging and device contents should not be disposed of with household waste but must be recycled according to EU Directive 2002/96/EC on waste from electrical and electronic equipment (WEEE). For more information on waste disposal, contact your dealer or local authority.
The Nexa Bridge and FS-558/RF smoke alarm can be integrated to create an automated system. This allows for functionalities such as sending notifications to your mobile phone, activating sirens, or switching on lights when the smoke alarm is triggered.
| Power Source | Battery |
|---|---|
| Battery | 9V |
| Connectivity | RF |
| Radio Frequency | 433.92 MHz |
| Test Button | Yes |
| Operating Temperature | 0°C to +40°C |
| Sensor Type | Optical |
| Alarm Volume | 85 dB |