Get Ready to Drive - How to set up Nexar in your car | Road dash cam & Interior dash cam
Remove the interior dash cam mount’s sticker
and aach it to the windshield next to the road
dash cam. Remove the lens sticker.
Check the Nexar app to make sure it has a good
view of the inside of your car.
You’re all set and ready to go. Both dash cams will
automatically sta recording as you sta driving.
2 .
Plug one end of the long charging cable
into the po at the top of the mount and
the other end into the USB charger. Plug the
USB charger into your car’s power socket.
Sta the car. You should see a green light
indicating that the dash cam is on and a blinking
blue light indicating it is waiting to be paired
with the Nexar app.
Pick an installation area on your windshield and
make sure it’s clean. We recommend placing
the road dash cam behind the rearview mirror.
Remove the sticker from the camera’s lens.
Remove the mount’s sticker, press it
against the windshield and rotate the
knob clockwise.
5 .
6 .
7 .
8 .
9 .
Make sure all drivers download the
Nexar app and pair it with the dash cam.
Shared car?
Download the Nexar app.
For iPhone: nxr.cm/ios
For Android: nxr.cm/android
Open the app and enable all necessary
seings when prompted.
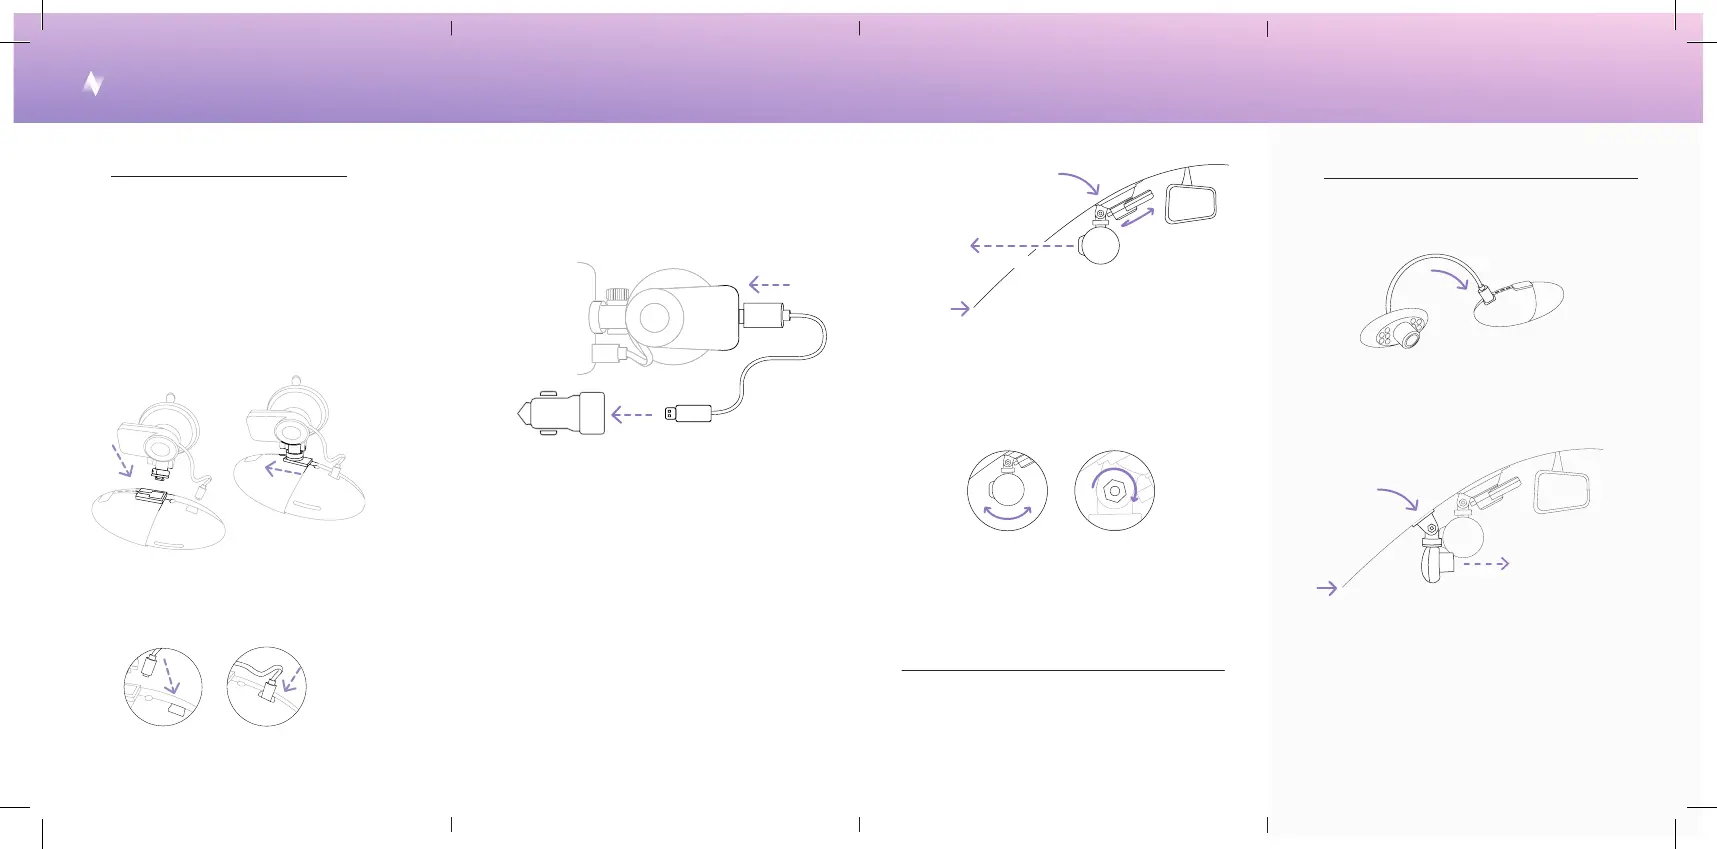
Aach the road dash cam to the mount by
sliding it sideways onto the rotating head.
1 .
2 .
3 .
3 .
10 .
11 .
Set the camera’s angle and adjust the screw
at the side of the rotating head to secure it in
place.
Follow the instructions in the app to pair your
phone with the dash cam. Check the camera’s
view in the app.
Connect the interior-facing dash cam’s cable
into the “Add-on” po of the road dash cam.
1 .
How to install the interior dash cam add-on
How to install the road dash cam
4 .
Plug the mini USB cable from the mount
into the camera’s power po .
a
b
a
b
Suction cup mount
Lens towards the road
Windshield
a b
Lens towards the
inside of the car
Sticker
mount
Windshield
b
a
 Loading...