EasyManua.ls Logo

Nexar Beam - User Manual

Nexar Beam
9 pages
Print Icon
To Next Page IconTo Next Page
Loading...
Get Ready to Drive
How to set up Nexar in your car
5 min
Question and Answer IconNeed help?

Do you have a question about the Nexar Beam and is the answer not in the manual?

Summary

Get Ready to Drive

Download the Nexar App

Download the Nexar app for iPhone or Android devices.

Choose and Mount Your Device

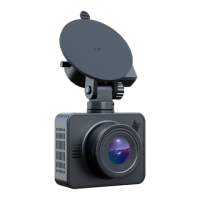
Select your preferred mount type and follow the provided installation instructions.

Secure the Mount Base

Align the suction cup or sticker disk to the mount docking base and slide to secure.

Attach Docking Base to Camera

Align the docking base assembly into the camera's top slot, ensuring USB-C faces the rear.

Select Optimal Mounting Location

Choose a clean windshield area, preferably behind the rearview mirror, for installation.

Pair Phone with Dash Cam

Follow in-app instructions to pair your phone with the dash cam and check the camera view.

Fine Tuning Cable Management

Overview

This document describes the Nexar dash cam system, focusing on its setup, features, and maintenance. Nexar aims to enhance road safety by providing a smart dash cam system that records and connects drivers, offering real-time information and incident protection.

Function Description

The Nexar dash cam system is designed to record driving footage, identify incidents, and save clips to the cloud. It works in conjunction with the Nexar app, which connects users to other Nexar drivers to provide real-time road information. The system automatically turns on and off with your car, ensuring continuous recording during your drives. Its primary function is to reduce the chance of collisions and make roads safer for everyone by leveraging a network of connected drivers.

Usage Features

Getting Started (Setup): The setup process involves several steps to get the Nexar dash cam ready for use in your car.

  1. Download the Nexar app: Available for iPhone (nxr.cm/ios) and Android (nxr.cm/android).
  2. Enable settings: Open the app and grant all necessary permissions when prompted.
  3. Select your mount: The system offers two mounting options:
    • Mount with sticker disk: This option uses an adhesive disk for attachment.
    • Mount with suction cup: This option uses a suction cup for attachment.
  4. Align and secure the mount:
    • For the suction cup or sticker disk, align it to the notches at the bottom of the mount docking base and slide to secure it.
    • For the docking base assembly, align the 3-notch into the open slot at the top of the camera. The USB-C power input should face the rear of the vehicle when mounting.
  5. Connect the USB-C cable: Plug the provided USB-C cable into the base.
  6. Choose an installation area: Select a clean spot on your windshield, ideally behind the rearview mirror.
    • Mount with Suction Cup: Unlock the lever to create suction, apply pressure to the desired location, and then lock the lever to secure the mount.
    • Mount with Sticker Disk: Apply pressure to ensure the adhesive attaches firmly to the location.
  7. Align the camera: Remove the adhesive backing from the selected mount and align the camera to face the front of the vehicle.
  8. Power on and pair:
    • Start your car. The dash cam should show a steady green light (on & active) and a blinking blue light (waiting to be paired).
    • Remove the sticker from the camera's lens.
    • Follow the in-app instructions to pair your phone with the dash cam and check the camera's view.

Light Indicators: The dash cam provides visual cues through its light indicators:

  • Steady green light: Indicates the dash cam is on and active.
  • Blinking red light: Indicates an upgrade is in progress.
  • Steady red light: Indicates a faulty camera.
  • Blinking blue light: Indicates the dash cam is waiting to be paired with the app.
  • Steady blue light: Indicates the dash cam and app are paired.

Hiding the Cable (Fine Tuning): To ensure a neat installation and prevent interference, the cable can be hidden:

  1. Sit in the passenger seat.
  2. Gently pull down the edge of the fabric at the top of the windshield.
  3. Use two fingers or the installation tool to push the cable behind the ceiling fabric. (Alternatively, provided cable clips can be used.)
  4. Open the passenger-side door.
  5. Insert the cable into the door's seal.
  6. Hide the remaining cable under the passenger's floor mat.
  7. Bring the cable as close to the power socket as possible and connect it to the USB charger.

Important Note on Cable Hiding: This method is intended only for vehicles where curtain airbags are NOT installed in the window frame. It should NOT be used in vehicles with curtain airbags, as it could interfere with their operation and be extremely dangerous. If unsure about airbag locations, do not use this method.

Shared Car Feature: If multiple drivers use the same car, ensure all drivers download the Nexar app and pair it with the dash cam to utilize its full functionality.

Maintenance Features

Safety Tips and Care: Proper care ensures the longevity and safe operation of your Nexar dash cam.

  • Automatic On/Off: The dash cam automatically powers on and off with your car, so no manual intervention is needed for daily operation.
  • Operating Temperature: The dash cam is designed to function within a temperature range of -4° to 158° F (-20° to 70° C).
  • Battery Safety: Improper battery changing can lead to an explosion of the device. It is crucial to handle the battery with care and follow any specific instructions regarding battery replacement, if applicable.
  • Cleaning: When cleaning the device, avoid harsh chemical solvents. Instead, use a damp paper towel or a soft cloth.
  • Fire Safety: Keep the dash cam away from fire to prevent damage or hazards.
  • Self-Repair: Do not attempt to repair the dash cam yourself if it is not working. For assistance, contact Nexar support at support@getnexar.com or visit their Help Center at getnexar.com/faq.

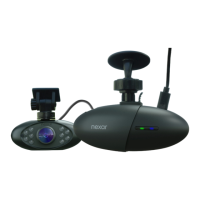
In the Box Components: The Nexar dash cam package includes:

  1. Dash cam with internal SD card
  2. Mount docking base
  3. Sticker disk for docking base
  4. Suction cup for docking base
  5. USB charger
  6. USB power cable
  7. Installation tool & cable clips

Dash Cam Components (External): The dash cam features several external components for its operation:

  1. Mount slot
  2. Power & GPS port
  3. Reset button
  4. Power button
  5. Micro SD card slot
  6. Microphone
  7. Heat dissipation holes
  8. Speaker
  9. Camera lens
  10. Power indicator light
  11. WiFi indicator light

Nexar aims to provide a comprehensive and user-friendly experience, ensuring drivers feel protected and informed on the road.

Nexar Beam Specifications

General IconGeneral
Resolution1080p Full HD
Field of View135 degrees
ConnectivityWi-Fi, Bluetooth
GPSBuilt-in
App CompatibilityNexar App (iOS and Android)
G-SensorYes
Loop RecordingYes
Night VisionYes
Parking ModeYes
StorageMicroSD card up to 128GB

Related product manuals