Page 3 of 4
C
o
n
t
a
c
t
C
l
o
s
u
r
e
I
n
t
e
g
r
a
t
i
o
n
requirements:
- Two n
o
r
m
a
l
l
y
o
p
e
n
relays
- 750ms momentary pulse commands
The lift uses one relay for “extend”, and one relay for “retract”.
- Make sure that the B
L
U
E
common wire runs between both relays with a jumper wire
that you supply.
- When programming your control system, ensure that the relays use a momentary
pulse of 750 milliseconds or more.
- The relays C
A
N
N
O
T
latch. They must function similar to a light switch that always
reverts back to neutral position.
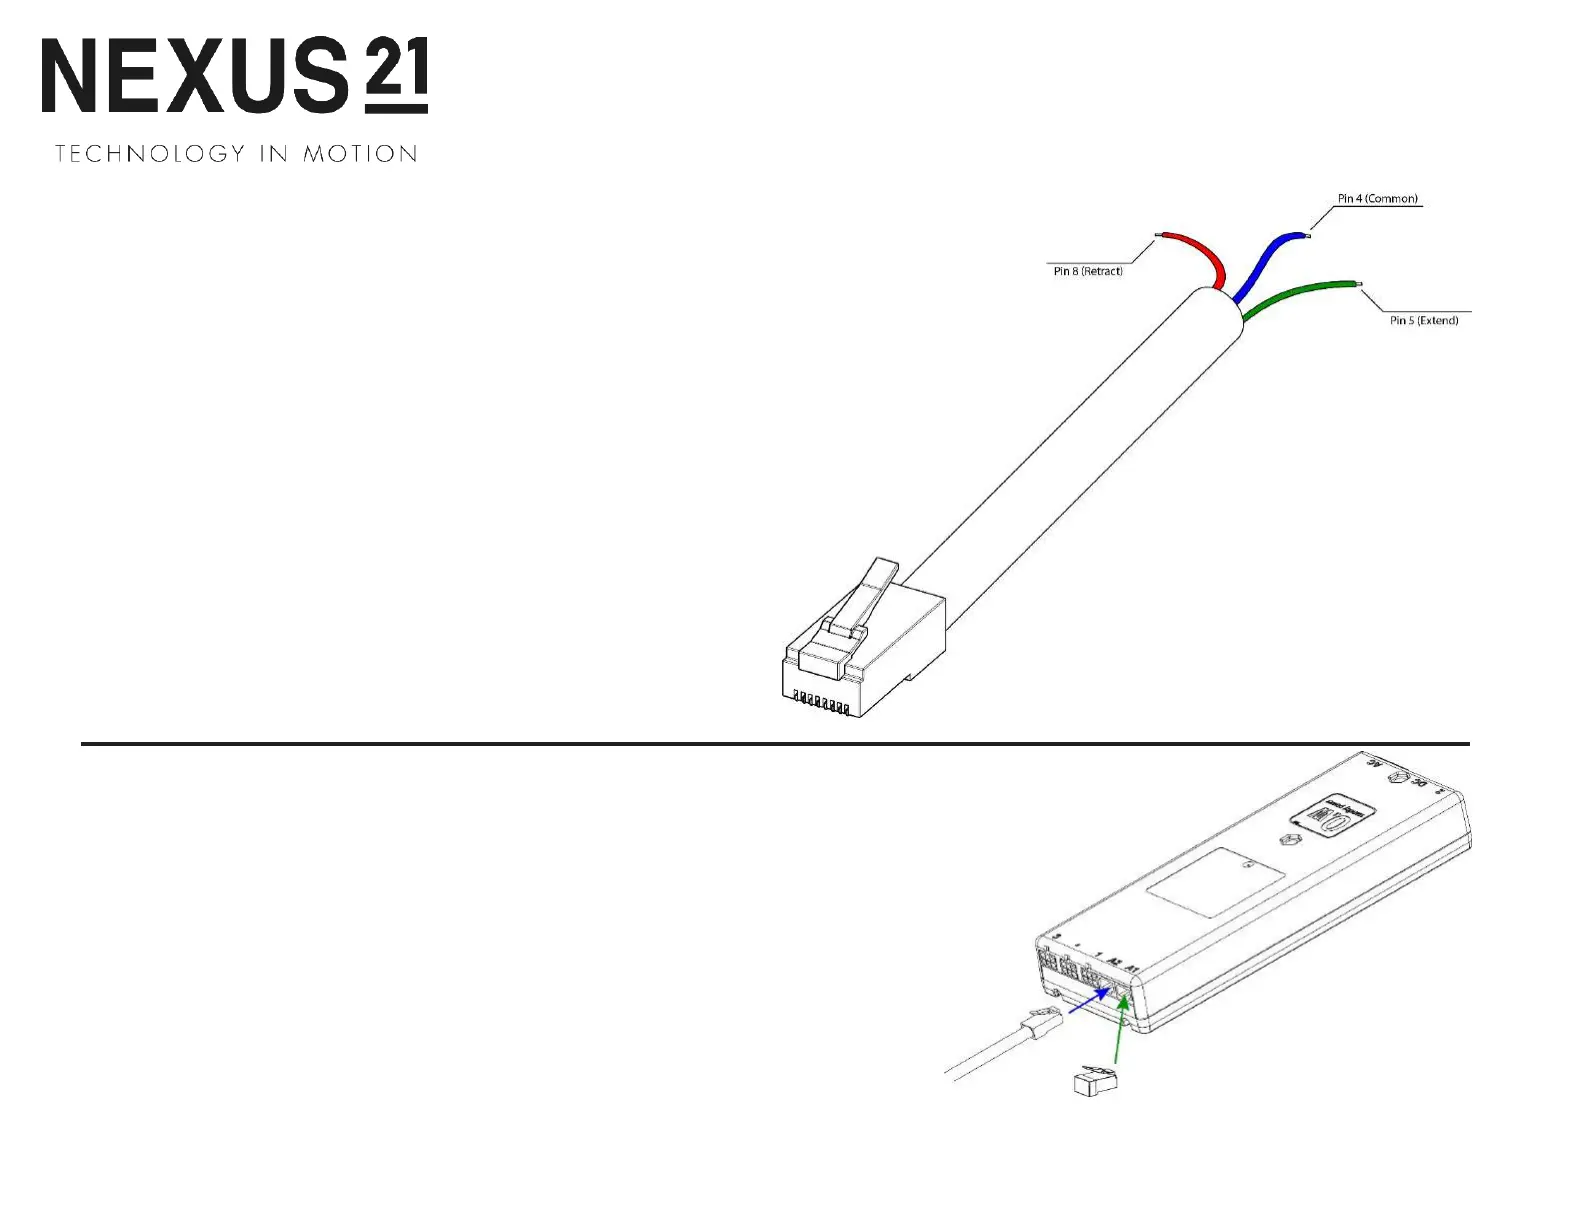
- Connect the RJ-45 plug of the Contact Closure Cable to the Nexus 21 Lift Control
Box using port A1. (Ports A1 and A2 can be used interchangeably.)
A. Connect the Contact Closure Cable
Connect your Contact Closure Cable to port A1 or A2 on the Control Box.
B. Setting a Height Limit (Optional)
Use the Backup Switch to run your system to the desired extended position,
then plug the Height Limit Insert into the Control Box.
Note:
This will set the maximum extension for your system, to reset this,
remove the Height Limit Insert and repeat these steps.
Contact Closure User Guide
BLUE – Common (Pin 4 on RJ-45)
GREEN – Extend (Pin 5 from RJ-45)
RED – Retract (Pin 8 from RJ-45)
32