50
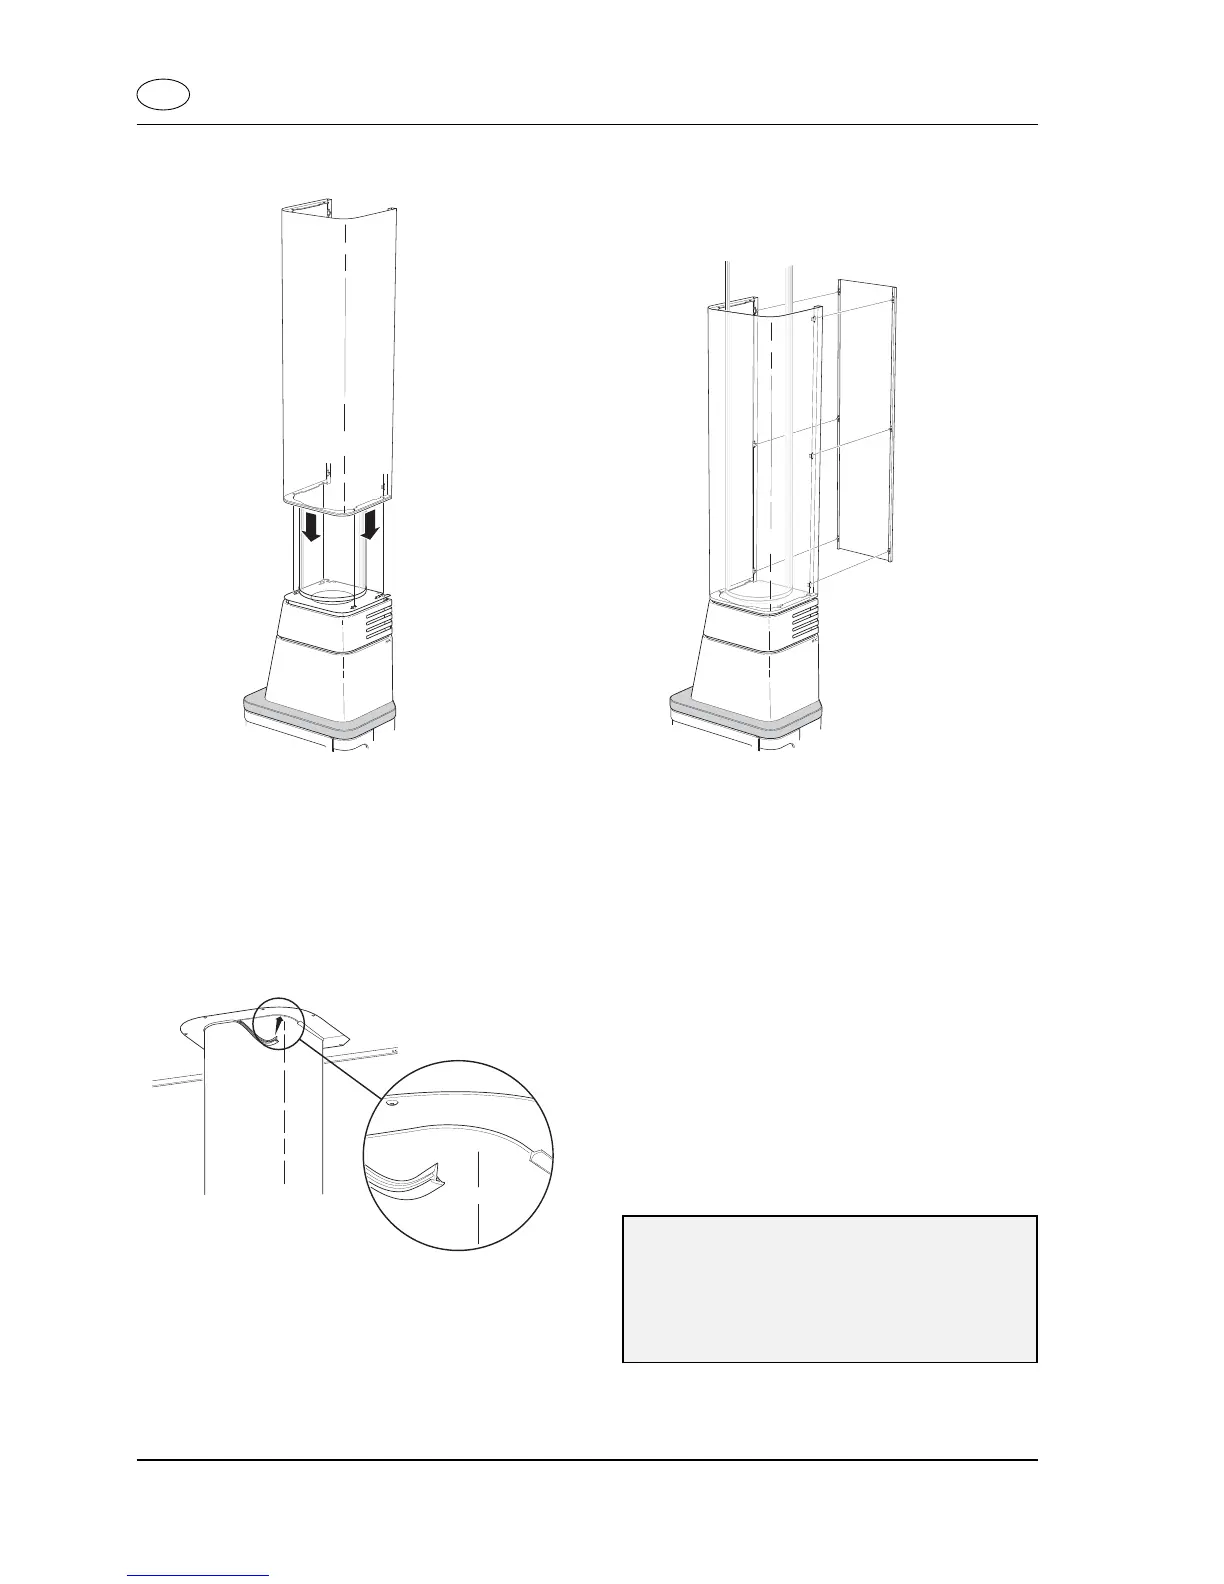
Slide the chimney mantle up through the hole in the
ceiling and then lower it down onto the locating pins on
the sealing plate. Fit the rear panel. If the height of the
room means that the chimney mantle consists of more than
one section, follow the instructions in the section headed
“Installing an extension mantle”.
Fit the front and rear sections of the ceiling insulation,
leaving a gap of 5 mm between the insulation and the
chimney mantle. Start with the rear section. Make sure
that the insulation is pushed up so it is touching the
ceiling. Press the rubber sealing strip into the gap around
the chimney mantle. Turn the sealing strip as shown in the
illustration above.
Important!
The installation must be approved by a qualified
inspector before the stove is made ready for use.
Read through the lighting and operating instructions for
the Handöl 20 series carefully before lighting the stove
for the first time.
GB
 Loading...