49
Top-flue connection through the ceiling
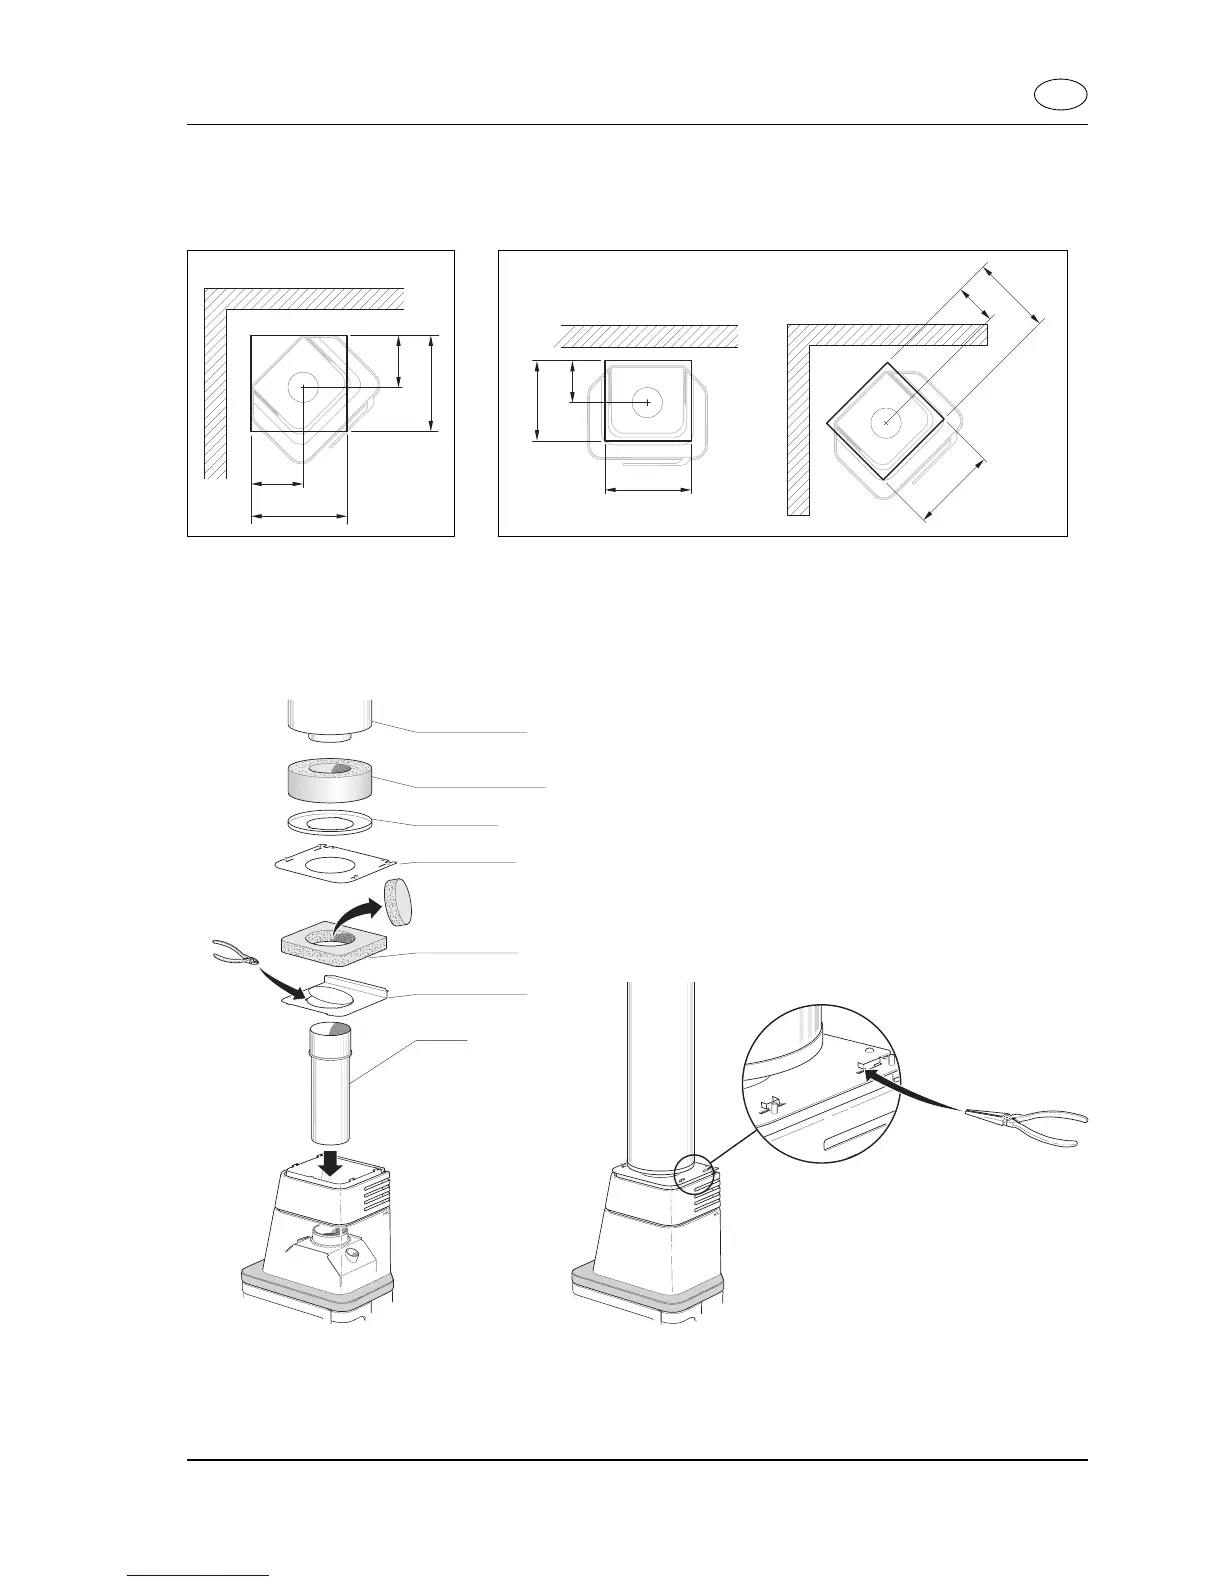
Follow the instructions below when making a hole in the ceiling. When installing a chimney, always refer to the instructions
supplied by the chimney manufacturer.
260
480
260
480
When the ceiling is flat, the hole in the ceiling shall measure 400x430 mm
with the sides of the hole parallel to the sides of the stove, both for installations
against a straight wall and in a corner.
When the ceiling slopes and the stove
is located in a corner of the room, the
horizontal projection of the hole in
the ceiling shall be 480x480 mm and
the hole shall be aligned parallel with
the walls.
400
210
430
Sloping ceiling, corner location
Flat ceiling
430
400
210
Stand the stove on the fl oor-plate. The insulation and the
insulation retainer are supplied from the factory ready for
rear-fl ue installation. Lift off the sealing plate, insulation
and insulation retainer, cut out the punched plate in the
insulation retainer and remove the centre piece of the
insulation.
The follow sequence describes the installation procedure for connecting the stove to the Premodul chimney system.
Fit the start section of the flue (the flue-base) to the connecting collar. Make sure that the packing round the collar is not
moved from its intended position. Then follow the sequence shown in the illustration. The retaining plate should rest on the
ridge around the flue-base. Secure the sealing plate in place against the stove hood by using pliers to bend the lugs on the
hood. Continue the installation of the chimney modules through the hole in the ceiling.
Startrör
Isoleringshållare
Avtätningsplåt
Isoleringsskiva
Stoppbricka
Övergångsisolering
Skorstensmantel
GB
Flue casing
Transitional insulation
Retaining plate
Sealing plate
Insulating panel
Insulation retainer
Start section (Flue-base)
 Loading...