Do you have a question about the Nibe PV Series and is the answer not in the manual?
This manual describes installation and service procedures for implementation by specialists.
The installation is only permitted to be performed on roof surfaces or support structures with sufficient carrying capacity and strength.
Safety regulations for working on roofs and similar structures must be followed.
Estimate annual insolation using map and diagram for optimal solar panel placement.
Secure roof brackets in trusses using wood screws (3x, 2x lower groove, 1x upper groove).
Secure each roof bracket with 6 x stainless steel construction screws, divided between the two grooves (screws not supplied).
Drill holes in the roof tile or use existing holes. Install the screw pin in the truss sufficiently deeply.
Install mounting on roof and attach L profile with M10 bolt, washer, and nut.
This applies for the installation of felt on a wooden roof, such as a garage roof. Consult a certified roofer.
Mounting rails are secured in the roof brackets with T bolts and locking nuts (8 mm).
Position first solar panel on rail and attach assembly clamp 5mm from rail end.
Electrical work requires supervision by a qualified electrician and adherence to safety regulations.
Install MC-4 DC connectors: strip cable, twin strands, and insert until click.
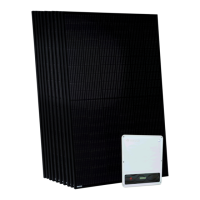
For assembly and installation, consult the quick guide. For more information about the inverter, consult the enclosed manual.
Illustrates the process of fitting the wall bracket for the inverter.
Fit the inverter on the wall bracket according to the diagram. The inverter must also be earthed.
Illustrates how to connect the inverter switch using copper wire and crimping.
Lightning protection affects installation; consult applicable laws and regulations.
| Brand | Nibe |
|---|---|
| Model | PV Series |
| Category | Solar panel |
| Language | English |