Step 2) Press and release the Yellow Learn Button on the receiver inside the Apollo Box (see Figure 1).
The Red LED Indicator next to the Learn Button will turn on.
Remove the Green and White wires from terminal number 3 and 4 on the receiver (see Figure 1) and move them to
terminal numbers 5 and 6
on the receiver (see Figure 3).
Programming Instructions For NICE Transmitter (Remote)
To NICE FLOX2R Receiver
Press and release the Yellow Learn Button on the receiver inside the Apollo Box (see Figure 1).
The Red LED Indicator next to the Learn Button will turn on.
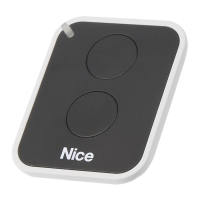
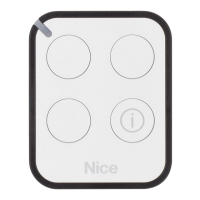
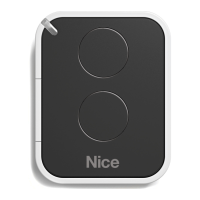
While the red light on the receiver is turned on, press and hold the Primary Button on your 2 Button Transmitter (see
Figure 2) until the light on the Receiver turns off, then release the Transmitter Button. Wait 1 second and then press
and release the Primary Transmitter Button again. The receiver light will blink 3 times indicating the Transmitter is
programmed. You are finished. Repeat these steps for programming additional Transmitters.
Programming and Wiring Instructions For Secondary Button Used To Control Other
Gate Within Close Proximity To Gate Controlled By Primary Button
Step 3)
While the red light on the receiver is turned on, press and hold the Secondary Button on your 2 Button Transmitter (see Figure 2)
until the light on the Receiver turns off, then release the Transmitter Button. Wait 1 second then press and release the Secondary
Transmitter Button again. The receiver light will blink 3 times indicati
ng the Transmitter is programmed. You are finished. Repeat
these steps for programming additional Transmitters.
Figure 2
Primary Button
Secondary Button
Learn Button
Red LED
Indicator
Figure 1
Figure 3
Nice ON2E/A
Nice FLOx2R
Nice FLOx2R