ROBO
3
VERIFICHE E
PRELIMINARI
I GB
F D
E
CHECKING
AND PRELIMINARY
PROCEDURES
CONTRÔLES
PRÉLIMINAIRES
CONTROLES Y
PRELIMINARES
A) Leer atentamente las
instrucciones.
B) Antes de efectuar la
instalación, comprobar que
la estructura de la cancela
sea robusta y adecuada.
C) Comprobar que la
cancela, durante todo su
movimiento, no presente
puntos de roce y que no
exista peligro de
descarrilamiento.
D) Comprobar la presencia
de los costados de
seguridad.
A) Lire attentivement les
instructions.
B) Avant de passer à
l’installation, s’assurer que
la structure de la grille soit
solide et appropriée.
C) S’assurer que la grille
n’ait pas de points de
frottement durant tout le
mouvement et qu’il n’y a pas
de danger de déraillement.
D) S’assurer que les côtés
de sécurité sont présents
A) Read the instructions
carefully.
B) Before starting
installation, ensure that the
structure of the gate is
sturdy and appropriate.
C) Ensure that there is no
point of friction during the
entire movement of the gate.
and that there is no danger
of derailment.
D) Ensure that the safety
side panels are present.
A) Leggere attentamente
le istruzioni.
B) Prima di passare all'in-
stallazione, accertarsi che
la struttura del cancello sia
solida ed appropriata.
C) Accertarsi che il cancel-
lo, durante tutto il suo movi-
mento, non subisca punti di
attrito e che non vi sia peri-
colo di deragliamento.
D) Accertarsi della presen-
za dei franchi di sicurezza.
A) Lesen Sie die
Anleitungen aufmerksam
durch.
B) Vor der Installation
sicherstellen, daß die
Struktur Ihres Tors solide
und für die Montage
geeignet ist.
C) Sicherstellen, daß das
Tor während der gesamten
Bewegung auf keine
Reibpunkte trifft und keine
Entgleisungsgefahr
besteht.
D) Stellen Sie die Präsenz
der Sicherheitsflanken
sicher.
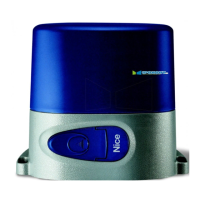
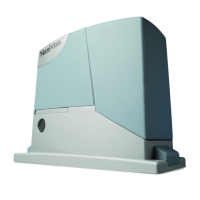
1) Colonnina.
2) Fotocellula.
3) Selettore a chiave o
tastiera digitale.
4) Cartello di avvertenza.
5) Lampeggiatore.
6) Antenna.
7) Robo.
8) Linea di alimentazione.
9) Staffe per finecorsa.
10) Cremagliera.
I
GB F D
E
1) Colonne de support
2) Cellule photoélectrique
3) Sélecteur à clé et clavier
digital
4) Panneau
d’avertissement
5) Clignotant
6) Antenne
7) Robo
8) Ligne d’alimentation
9) Pattes de fin de course
10) Crémaillère
1) Säule
2) Fotozelle
3) Wahlschalter mit
Schlüssel oder Tastfeld
4) Hinweisschild
5) Blinklampe
6) Antenne
7) Robo
8) Speisungsleitung
9) Anschlagbügel
10) Zahnstange
1) Columnita.
2) Fotocélula.
3) Selector de llave o
teclado digital.
4) Placa de advertencia.
5) Luz intermitente.
6) Antena.
7) Robo.
8) Línea de alimentación.
9) Bridas para fin de
carrera.
10) Cremallera.
1) Column
2) Photocell
3) Key selector or digital
keypad
4) Warning sign
5) Flashing light
6) Aerial
7) Robo
8) Power supply line
9) Stroke end brackets
10) Rack
2x1,5
QUADRO D' INSIEME -
OVERALL PICTURE
- CADRE GÉNÉRAL -
ÜBERSICHTZEICHNUNG
- ESQUEMA DE CONJUNTO
2x1
3x1,5
4x1
3x1
1xRG 58
PRÜFUNGEN
UND VORBEREITEN
DE ARBEITEN