EasyManua.ls Logo

Nice ROBO

Nice ROBO
12 pages
To Next Page IconTo Next Page
Loading...
ROBO
V. 010
MANUALE
ISTRU ZIO NI
E CATALOGO
RICAMBI
LIVRET
D’INSTRUCTIONS
ET CATALOGUE
DES
RECHANGES
INSTRUCTIONS
MANUAL
AND SPARE
PARTS
CATALOGUE
ANLEITUNGSHEFT
UND
ERSATZTEIL-
KATALOG
Motoriduttore
elettromeccanico
per cancelli
scorrevoli
Electromechanical
gearmotor for
sliding gates
MANUAL DE
INSTRUCCIONES
Y CATÁLOGO
DE RECAMBIOS
Motorreductor
electromecánico
para cancelas
correderas
Elektromechanischer
Antrieb für
Gleittore
Mototréducteur
électromécanique
pour portails
coulissants
I
GB
F D
E
QUESTO LIBRETTO È DESTINATO SOLO ALL'INSTALLATORE.
L'installazione dovrà essere effettuata solamente da per so na le professionalmente qualifi cato in conformità a quanto previsto
dalla legge n° 46 del 5 marzo 1990 e successive mo di che ed integrazioni e nel pieno rispetto delle norme UNI 8612.
All manuals and user guides at all-guides.com
all-guides.com

Other manuals for Nice ROBO

Question and Answer IconNeed help?

Do you have a question about the Nice ROBO and is the answer not in the manual?

Nice ROBO Specifications

General IconGeneral
Max Gate Weight600 kg
Max Gate Length12 m
Maximum Gate Weight600 kg
Maximum Gate Width12 m
Opening Speed12 m/min
Closing Speed12 m/min
Safety FeaturesObstacle detection, Photocell input
Control TypeRemote control, Keypad
Battery BackupYes (optional)
Power Supply230V AC, 50Hz
Operating Temperature-20°C to +55°C
Protection LevelIP44
Motor Voltage24V DC
Motor TypeDC, Brushless

Summary

Preliminary Checks and Procedures

Overall Product Diagram and Parts Identification

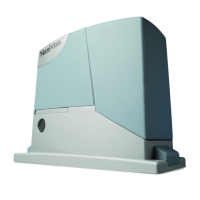
Exploded view diagram of the ROBO unit with a list of numbered components for identification.

Product Dimensions

Overall Dimensions Diagram

Diagram illustrating the physical dimensions and measurements of the ROBO unit.

Manual Operation

Step-by-Step Manual Operation Guide

Instructions on how to manually operate the ROBO unit using the key and handle mechanism.

Base Plate Installation

Base Plate Mounting Instructions

Details on how to securely install the base plate, including fixing methods and cable passage.

Gearmotor Installation

Mounting and Securing the Gearmotor

Procedures for fitting the gearmotor, connecting the rack, and ensuring secure installation.

Mechanical Friction Adjustment

Adjusting RO1020 Mechanical Clutch

Guide for adjusting the mechanical friction of the RO1020 gearmotor using a screwdriver.

Clutch Adjustments

Electric Clutch Adjustment (RO1010)

Procedure for adjusting the electric clutch of the RO1010 model via its integrated transformer.

Electronic Clutch Adjustment (RO1000 RO1024)

Instructions for adjusting the electronic clutch of RO1000/RO1024 models with the control unit.

Spare Parts Catalog

Exploded View Diagram and Parts Identification

Diagram showing all components of the ROBO unit with corresponding part numbers for identification.

Warranty and Service Record

Installed Components Description

Section to record details of installed control box, radio, and safety devices for warranty purposes.

Related product manuals