CAUTION: For your safety and proper operation of this fixture, read all of this
instruction carefully before installing, and keep this instruction sheet for future
usage.
1. This fixture is to be installed by only a qualified electrician.
2. This fixture is to be used at 120V AC/60Hz power supply only.
3. This fixture is designed for use in a circuit protected by a fuse or circuit breaker.
4. Turn off the power supply at the fuse or circuit breaker box before you install this
fixture.
5. Turn off the power supply again when you perform maintenance.
6. Double check all connections to be sure they are all tight and correct.
7. Operation environment: able to be installed indoors under dry and ventilated
environment. It should NOT be installed under damp location or environment with
high temperature. Installation of this fixture should be kept away from other electrical
devices.
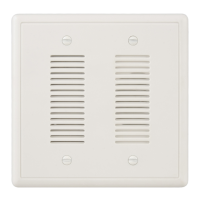
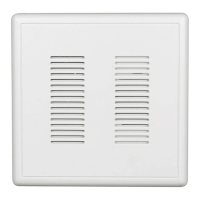
1. Pre-install the dual voltage box ( Model#SC200DV or equivalent, not
provided) before installation of this device.
2. Input Voltage: 120VAC/60Hz, output voltage: 9VAC/500mA, please separate for
wiring. Please refer to FIG.B for wire connection.
3. Check again and re-confirm if the wire connection is correct. Then install this
device in the dual voltage box according to FIG.A.
4. Secure the faceplate on the dual voltage box with mounting screws (4) with a
screwdriver.
5.
6. Make sure following up all installation instructions correctly before turning on the
power supply.
7. Turn off the power supply and contact the distributor for assist in any case of
current leakage, unusual noise or smell, smoking during usage of this fixture.
1. Turn off the power supply before cleaning the fixture surface.
2. Clean the oil mark or dirt away from the fixture surface with a dry duster cloth.
Turn off the power supply before examination and repair of the fixture.
1. In case of the door chime volume too small and with noise upon pressing the
chime button, please contact the distributor for assist.
2. In case of no sound upon pressing the chime button, please examine if the wire
connection is correct and firm. If there is still no sound after confirmation the above,
please contact the distributor for assist.
3. Re-order the special model of chime button from the distributor in case of
breakage of chime button coming with the fixture.
4. Re-order the special model of faceplate from the distributor in case of breakage of
the faceplate coming with the fixture.
IMPORTANT SAFETY INFORMATION
WARNING: RISK OF SHOCK
INSTALLATION INSTRUCTIONS
NOTE
MAINTENANCE
CARLON
Connect front & rear buttons to door chime’s 4-pin jack output according to FIG.B.
RECESSED DOOR CHIME KIT