Questions? Reach out to our Support Team:
support@nicoyalife.com
1-877-673-6777 Ext. 2
www.nicoyalife.com
Connect with us on social media:
@Nicoya_Life
@NicoyaLifesciences
/nicoya-lifesciences
@nicoyalifesciences
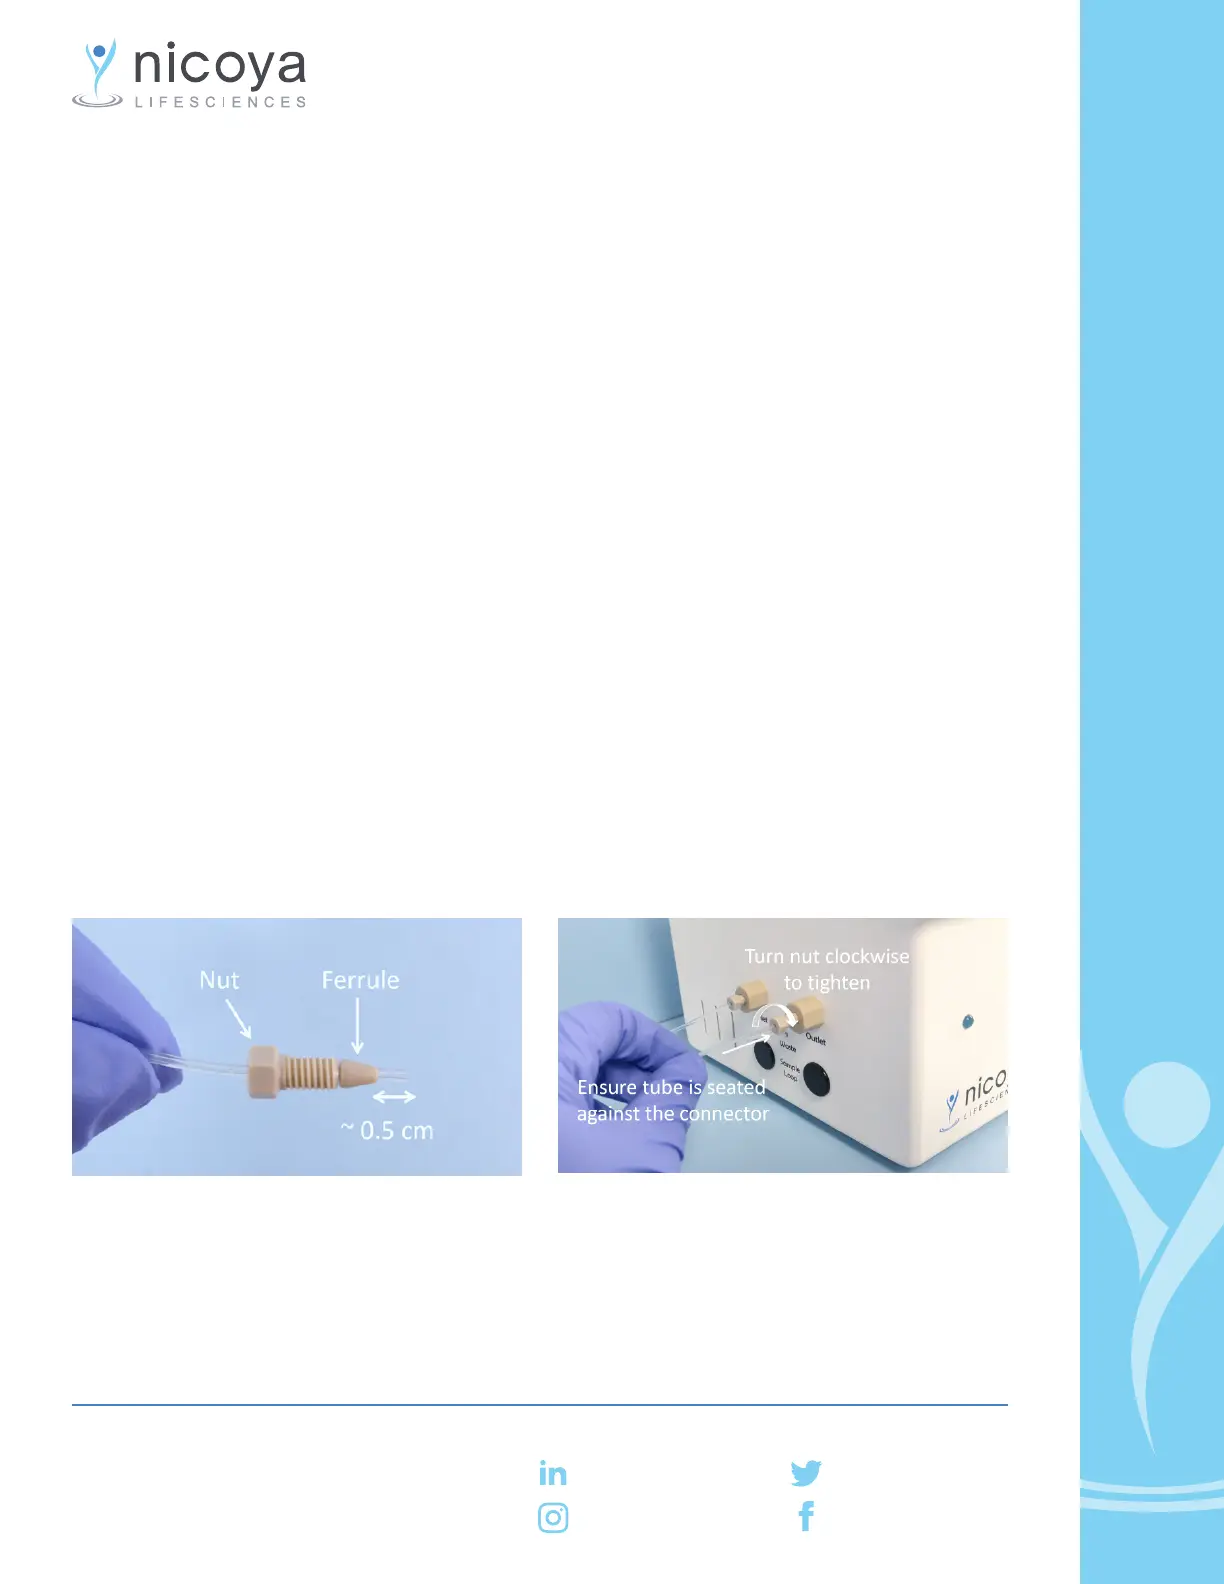
1. Locate the bag labelled Outlet Tube. The bag should contain a fluidic tube, nut and ferrule.
2. Slide the nut onto the Outlet Tube with the thread of the nut oriented towards the end of the
tube as shown in Figure 2.
3. Slide the ferrule onto the same end of the Outlet Tube with the tip of the cone facing the end
of the tube. Leave approximately 0.5 cm of tubing sticking out the end of the ferrule as shown
in Figure 2.
4. Place the end of the Outlet Tube containing the nut and ferrule into the port on the left side of
the OpenSPR labelled “Outlet” and push it in firmly ensuring that the tube is fully seated against
the back of the connector as shown in Figure 3.
5. Ensure the tube is firmly seated against the connector and proceed to tighten the nut by
twisting it clockwise. Tighten firmly by hand (do not use tools to tighten).
6. Gently pull back on the Outlet Tube to ensure the fluidic connection is secured. If the tube
comes out, unscrew the nut and repeat the installation from Step 2 onwards.
7. Once the Outlet Tube is installed, it is recommended that it remains in place, only to be
removed for servicing.
Note: The Inlet Tube is pre-installed in your unit and is not removable except for servicing.
Figure 2. Proper order and positions of Nut and
Ferrule.
Figure 3. Push tube in firmly to ensure it is fully
seated while tightening the nut.
Installing Outlet Tubing
 Loading...

