0478-0111-02
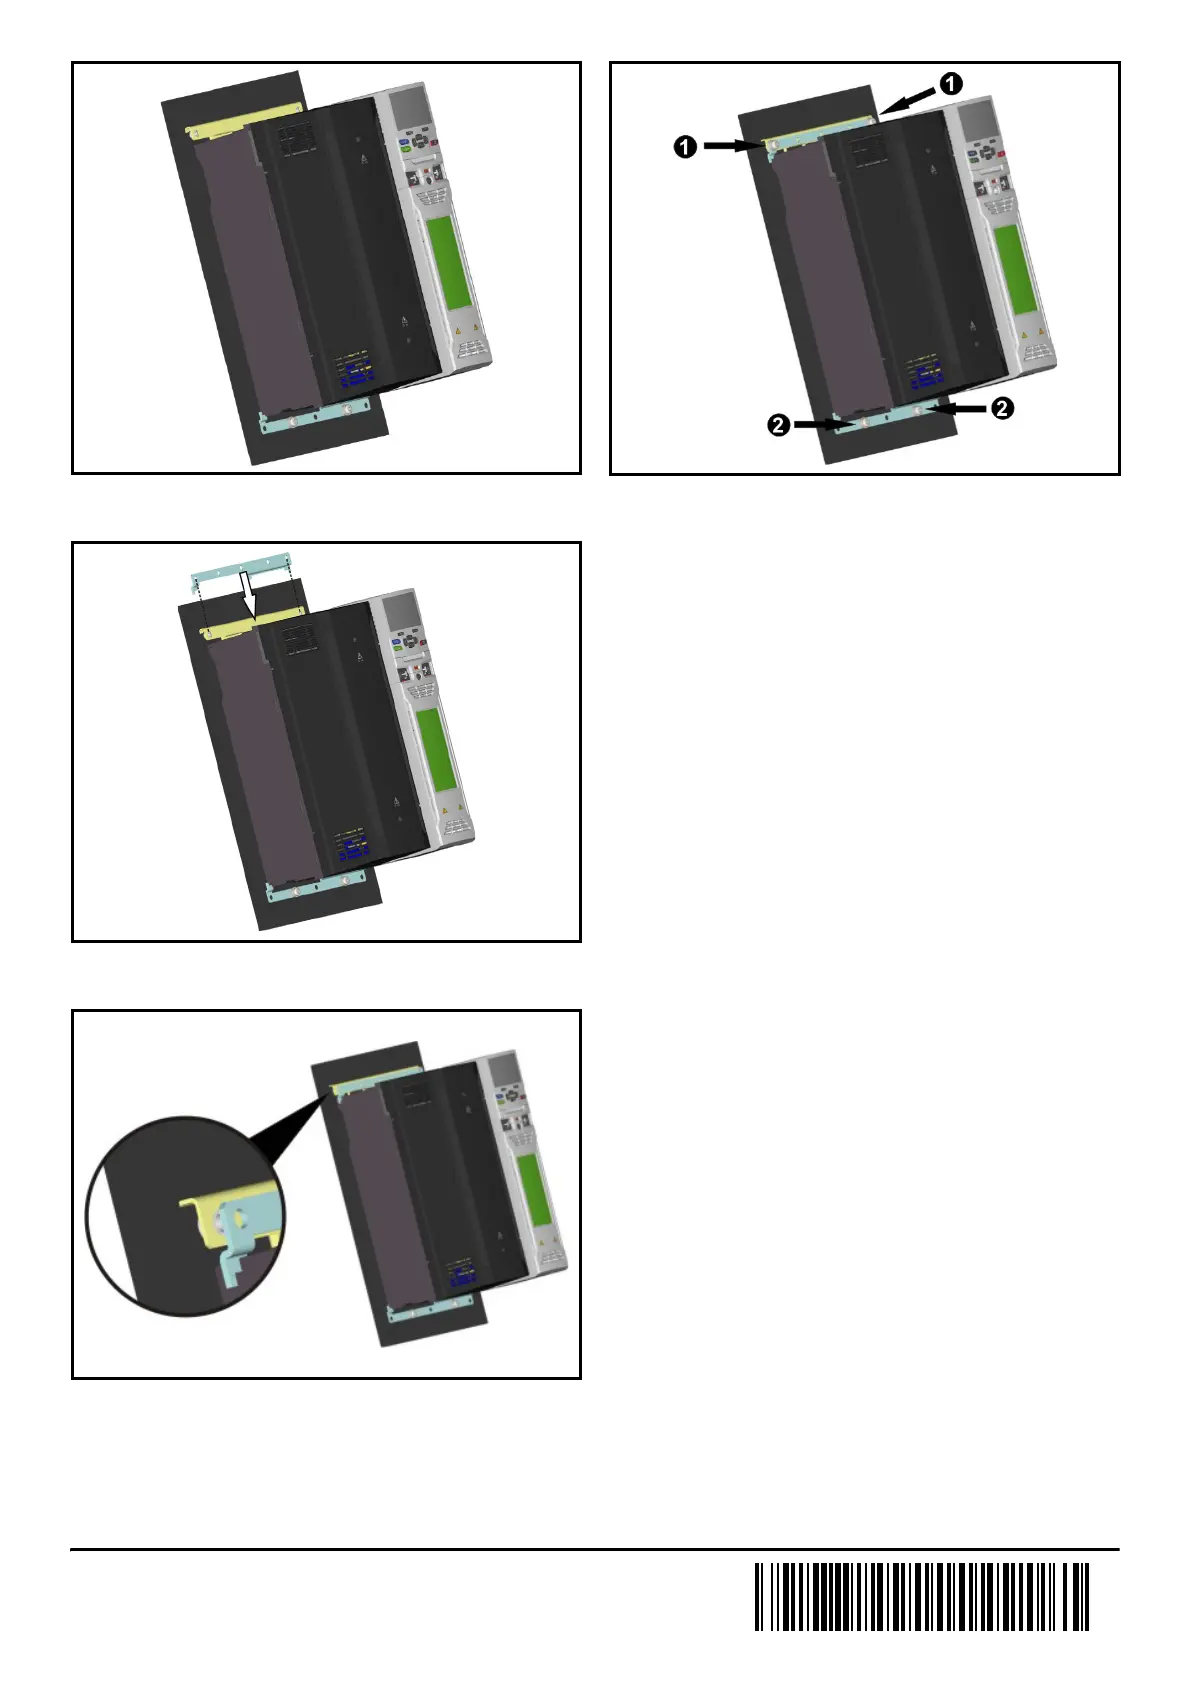
Figure 1-3 Locating the drive to the backplate
Lower the drive on to the bottom standard mounting bracket so that the drive
chassis tabs slot into the bracket. Ensure the drive is supported at all times.
Figure 1-4 Installing the Retro fit mounting bracket 2 - Part 1
Locate the Retro fit mounting bracket 2 into the drive chassis upper
mounting slots.
Figure 1-5 Installing the Retro fit mounting bracket 2 - Part 2
Locate the Retro fit mounting bracket 2 into the drive chassis slots as
highlighted above.
Figure 1-6 Securing all brackets
1. Secure the drive to the mounting bracket using the provided M5
fasteners, these should be tightened to a maximum torque of 3 N m
(26 Ib in).
2. Tighten the M6 screws on the bottom mounting bracket to 3 N m (26
Ib in).
 Loading...
