EasyManua.ls Logo

NightStick XPR-5542 - User Manual

NightStick XPR-5542
2 pages
Print Icon
To Next Page IconTo Next Page
Loading...
Instruction Manual
XPR-5542
US PATENT 9,713,217
THE XPR-5542 IS APPROVED FOR USE
2575
E 467756
INTRINSICALLY SAFEÉ
ID 5012927
CLASS I DIV 1 GRPS A-D T4
CLASS II & III DIV 1 GRPS E-G
CLASS I ZONE 0 GRP IIC T4
CLASS II ZONE 20 IIIC T135ºC
Ex ia IIC T4 Gb
DEMKO 16 ATEX 1815
IECEx UL 16.0168
-20ºC ≤ Tamb ≤ +40ºC
3.7V/Cell 5500-BATT
U
m
= 4.75V
II 2 G Ex ia IIC T4 Gb
Bayco Products, Inc. XPR-5542
Ex ia FLASHLIGHT FOR USE IN HAZARDOUS LOCATIONS
UL listed for use with Bayco Li-ion Battery Pack 5500-BATT
Wylie, TX 75098
WARNINGS - INTRINSICALLY SAFE
y Warning: To prevent ignition of a hazardous atmosphere, do not locate the charger for
this product in the hazardous environment. The charger for this product must be located in
an area known to be non-hazardous ONLY.
y Warning: To prevent ignition of a hazardous atmosphere, do not attempt to charge this
product in the hazardous environment. This task must ONLY be performed in an area
known to be non-hazardous.
y Warning: Lithium-ion batteries must be used and charged properly. Improper use can
result in serious injury, re, or death.
y Warning: Use only the included and approved 5500-BATT rechargeable battery pack
from Bayco Products.
y Warning: Do NOT attempt to use any other rechargeable or non-rechargeable batteries
with this light.
y Warning: To prevent ignition of a hazardous atmosphere, do not open the lens bezel in
the hazardous environment. This task must ONLY be performed in an area known to be
non-hazardous.
y Warning: When exchanging the rechargeable battery pack, use only the approved 5500-
BATT rechargeable battery pack from Bayco Products.
y Warning: To prevent ignition of a hazardous atmosphere, the rechargeable battery pack
must only be exchanged in an area known to be non-hazardous.
y Warning: Do not expose the rechargeable battery pack to water or salt water, or allow
the battery pack to get wet.
y Warning: Do not store the rechargeable battery pack with metallic objects that may
cause a short circuit.
y Warning: Substitution of components may impair intrinsic safety.
SPECIAL INSTRUCTIONS FOR INTRINSIC SAFETY
For personal safety, always conrm the rating of any known hazardous or potentially
hazardous location where the light is to be used.
INITIAL USE
Warning: To prevent ignition of a hazardous atmosphere, do not attempt to charge
this product in the hazardous environment. This task must ONLY be performed in an
area known to be non-hazardous.
Fully charge the XPR-5542 before the rst use, or if the battery is new or has been unused
for several months. The maximum charge time required is approximately 6 hours.
DAILY USE
WARNING: TO PREVENT IGNITION OF A HAZARDOUS ATMOSPHERE, DO NOT
ATTEMPT TO CHARGE THIS PRODUCT IN THE HAZARDOUS ENVIRONMENT. THIS
TASK MUST ONLY BE PERFORMED IN AN AREA KNOWN TO BE NON-HAZARDOUS.
y Use only the supplied Nightstick charger, 5500-BATT rechargeable battery pack and AC
or DC adapter. For best performance, charge the 5542 when the ashlight beam starts
to dim.
y Connect the AC power adapter to the charger. The LED indicator will not be illuminated
at this point.
y With the ashlight facing forward, slide the 5542 into the charger until the contacts snap
into place.
y The LED indicator changes to constant red indicating the 5542 is properly inserted into the
charger and is in fact charging. The LED indicator remains red until the battery is fully charged.
At full charge, the LED indicator turns green.
y The total time to full charge the 5542 varies depending on the remaining charge in the
battery pack.
y To conrm a full charge, keep the 5542 in the charger and turn it on. The LED indicator
will change to red. Turn off the 5542. If the 5542 is fully charged, the LED indicator will
turn green. If not, it remains red until the charge is completed and the LED indicator turns
green. The 5542 will now be fully charged.
REPLACING LITHIUM-ION RECHARGEABLE BATTERY
WARNING: TO PREVENT IGNITION OF A HAZARDOUS ATMOSPHERE, DO NOT
OPEN THE LENS BEZEL IN THE HAZARDOUS ENVIRONMENT. THIS TASK MUST
ONLY BE PERFORMED IN AN AREA KNOWN TO BE NON-HAZARDOUS.
WARNING: WHEN EXCHANGING THE RECHARGEABLE BATTERY PACK, USE
ONLY THE APPROVED 5500-BATT RECHARGEABLE BATTERY PACK FROM BAYCO
PRODUCTS.
WARNING: TO PREVENT IGNITION OF A HAZARDOUS ATMOSPHERE, THE
RECHARGEABLE BATTERY PACK MUST ONLY BE EXCHANGED IN AN AREA
KNOWN TO BE NON-HAZARDOUS.
y Loosen the locking screw located on the side of the tail cap. CAUTION: Do NOT attempt
to completely remove the locking screw. Doing so is not necessary and may damage the
threads. The screw simply needs to be loosened enough to allow the tail-cap to unscrew.
y Unscrew the tail-cap from the housing in a counter-clockwise direction.
y Turn the light upside down and carefully shake the light in order to remove the battery.
Allow the battery to slide into your hand.
y Next, allow the 5500-BATT rechargeable battery pack to slide out of the light paying close
attention to the battery pack’s orientation within the handle.
y Using only the approved replacement 5500-BATT rechargeable battery pack from Bayco
Products, slide the new battery pack into the handle of the light using the directional arrow
marked on the side of the pack to be a guide to proper battery orientation.
y Replace the tail-cap by screwing it onto the housing in a clockwise direction.
y Tighten locking screw. CAUTION: Do NOT over-tighten. Doing so may damage the
threads and impact the light’s Intrinsic Safety.
OPERATION
THE XPR-5542 HAS SEVEN LIGHT MODES:
y Momentary ashlight
y Full brightness ashlight
y Medium brightness ashlight
y Low brightness ashlight
y Floodlight
y Dual-light
y Strobe
The XPR-5542 has two body switches providing access to all modes.
Momentary Flashlight Mode
Lightly press the top body switch for momentary operation. Release the switch to turn
the light off.
Constant-on
Press the top body switch until it clicks and then release for constant-on in high-brightness
mode. Press and release the top body switch again to turn the light off.
Select Brightness Level
Press and hold down the top body switch. The light will cycle from high to medium to
low and then back up again at a rate of approximately one mode per second. The light will
continue to cycle up and down through the various modes as long as the top body switch
is held down. When the desired brightness level is reached, simply release the top body
switch, and the light will remain in that brightness mode. Press and release the top body
switch to turn the light off.
Floodlight
Press the bottom body switch until it clicks and then release for oodlight mode. Press
and release the bottom body switch again to turn the light off.
Question and Answer IconNeed help?

Do you have a question about the NightStick XPR-5542 and is the answer not in the manual?

Summary

Intrinsic Safety and Warnings

Intrinsic Safety Precautions

Warnings about preventing ignition in hazardous environments, battery use, and component integrity.

Intrinsic Safety Location Confirmation

Instruction to confirm location rating for personal safety in hazardous areas.

Battery Management

Initial and Daily Charging

Procedures for first-time and daily charging, including indicators and time.

Battery Pack Replacement

Step-by-step guide for safely replacing the rechargeable battery pack.

Operation Modes

Flashlight Modes Explained

Overview of seven light modes: momentary, constant, brightness levels, and floodlight.

Dual-Light and Strobe Functions

Instructions on how to activate and use the Dual-Light and Strobe modes.

Overview

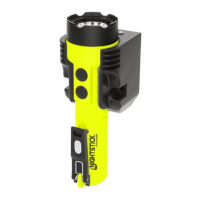
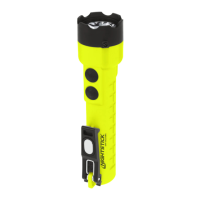
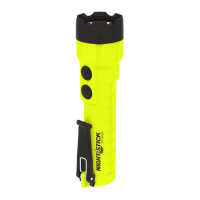
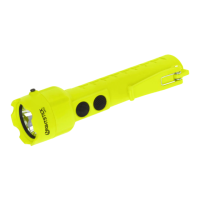
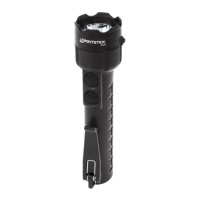
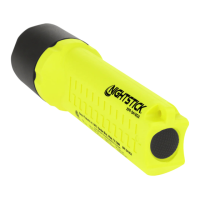
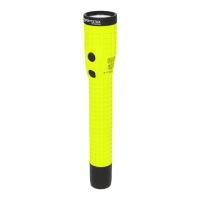
The Nightstick XPR-5542 is a high-performance, intrinsically safe flashlight designed for use in hazardous locations. This robust device is engineered to provide reliable illumination in environments where flammable gases, vapors, dusts, or fibers may be present, ensuring safety and operational efficiency. Its design prioritizes both user safety and versatile functionality, making it an essential tool for professionals working in demanding conditions.

Function Description

The primary function of the XPR-5542 is to provide powerful and adaptable illumination. It features seven distinct light modes, allowing users to select the most appropriate lighting for various tasks and environments. These modes include:

  • Momentary Flashlight: Provides temporary illumination, ideal for quick checks or signaling.
  • Full Brightness Flashlight: Delivers maximum light output for situations requiring extensive visibility.
  • Medium Brightness Flashlight: Offers a balanced level of illumination, suitable for general tasks and conserving battery life.
  • Low Brightness Flashlight: Provides minimal light, perfect for close-up work, preserving night vision, or extending run time significantly.
  • Floodlight: Emits a wide, diffused beam, excellent for illuminating broad areas and enhancing situational awareness.
  • Dual-Light: Combines the focused beam of the flashlight with the wide spread of the floodlight, offering comprehensive illumination for complex tasks where both distance and peripheral vision are critical.
  • Strobe: A flashing light mode, primarily used for signaling or attracting attention in emergency situations.

The flashlight is powered by a rechargeable lithium-ion battery pack, specifically the approved 5500-BATT from Bayco Products. This ensures consistent power and eliminates the need for disposable batteries, contributing to both cost-effectiveness and environmental responsibility. The device is designed to be intrinsically safe, meaning it is incapable of releasing sufficient electrical or thermal energy to ignite a hazardous atmospheric mixture. This critical safety feature is certified for various hazardous classifications, including Class I Div 1 GRPS A-D T4, Class II & III Div 1 GRPS E-G, Class I Zone 0 GRP IIC T4, and Class II Zone 20 IIIC T135°C.

Usage Features

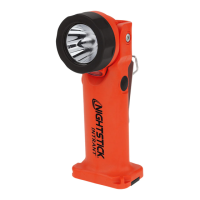
The XPR-5542 is designed for intuitive and flexible operation, controlled by two body switches: a top switch and a bottom switch.

  • Momentary Flashlight Mode: To activate momentary light, the user simply presses the top body switch lightly. Releasing the switch turns the light off. This feature is useful for brief inspections or signaling without committing to continuous illumination.

  • Constant-on Flashlight Modes (Full, Medium, Low Brightness): For continuous illumination, the user presses the top body switch until it clicks and then releases it. This activates the flashlight in high-brightness mode by default. To turn it off, the user presses and releases the top body switch again.

  • Selecting Brightness Level: The XPR-5542 offers a convenient way to cycle through its brightness levels. While the flashlight is on, pressing and holding down the top body switch will cause the light to cycle from high to medium to low, and then back up again, at a rate of approximately one mode per second. The light will continue to cycle through these modes as long as the top body switch is held down. Once the desired brightness level is reached, the user simply releases the top body switch to lock in that mode. To turn the light off from any constant-on mode, the user presses and releases the top body switch.

  • Floodlight Mode: To activate the floodlight, the user presses the bottom body switch until it clicks and then releases it. To turn the floodlight off, the user presses and releases the bottom body switch again. This mode is ideal for illuminating a broad area, such as a workspace or path.

  • Dual-Light Mode: This advanced feature allows the user to simultaneously activate both the flashlight and the floodlight, providing comprehensive illumination. First, the user selects the desired brightness level for the flashlight using the top switch as described above. Then, the user presses and releases the bottom switch to activate the floodlight. Both light sources will now be active. To turn off Dual-Light mode, the user presses and releases both the top and bottom body switches. This mode is particularly useful in situations where both a focused beam and wide area illumination are required, such as navigating complex environments or performing detailed tasks in a larger space.

  • Strobe Function: For signaling or emergency situations, the XPR-5542 includes a strobe function. From an off state or any active mode, the user rapidly double-clicks either body switch to activate the strobe. The strobe operates at full brightness. To turn off the strobe, the user presses and releases either body switch.

The XPR-5542's dual-switch interface is designed for ease of use, even when wearing gloves, allowing for quick and precise control over its various lighting functions. The logical progression through modes and the clear distinction between momentary and constant-on operations enhance its usability in critical situations.

Maintenance Features

Proper maintenance of the XPR-5542 is crucial for ensuring its continued intrinsic safety and optimal performance, especially when operating in hazardous environments. The manual outlines specific procedures for charging and battery replacement, emphasizing safety precautions.

  • Initial Use and Charging: Before the first use, or after extended periods of storage, the XPR-5542 must be fully charged. The maximum charge time is approximately 6 hours. Charging must ONLY be performed in a non-hazardous area. The charging process involves connecting the AC power adapter to the charger. The flashlight is then slid into the charger until the contacts snap into place. An LED indicator on the charger provides feedback on the charging status: constant red indicates charging, and green indicates a full charge. If the flashlight beam starts to dim during use, it's an indication that charging is needed for best performance.

  • Battery Replacement: The XPR-5542 uses a specific, approved 5500-BATT rechargeable lithium-ion battery pack from Bayco Products. Battery replacement must ONLY be performed in a non-hazardous area to prevent ignition of a hazardous atmosphere. The procedure involves:

    1. Loosening the locking screw on the tail cap. It's important not to completely remove the screw to avoid damaging the threads; only loosen it enough to allow the tail cap to unscrew.
    2. Unscrewing the tail cap from the housing in a counter-clockwise direction.
    3. Turning the light upside down and carefully shaking it to remove the battery, allowing it to slide into the hand.
    4. Carefully sliding the old battery pack out, noting its orientation.
    5. Inserting the new, approved 5500-BATT battery pack into the handle, using the directional arrow on the pack as a guide for proper orientation.
    6. Replacing the tail cap by screwing it onto the housing in a clockwise direction.
    7. Tightening the locking screw. Caution is advised not to over-tighten, as this can damage the threads and compromise the light's intrinsic safety.
  • General Warnings and Safety: The manual provides several critical warnings to ensure intrinsic safety and prevent injury:

    • Charging and battery replacement must always occur in a non-hazardous area.
    • Only the included and approved 5500-BATT rechargeable battery pack from Bayco Products should be used.
    • No other rechargeable or non-rechargeable batteries should be used.
    • The lens bezel should not be opened in a hazardous environment.
    • The battery pack should not be exposed to water or salt water, or allowed to get wet.
    • The battery pack should not be stored with metallic objects that could cause a short circuit.
    • Substitution of components may impair intrinsic safety.
    • Users should always confirm the rating of any known hazardous location where the light is to be used.

These maintenance guidelines and safety warnings underscore the importance of adhering to specific procedures to maintain the intrinsic safety certification and ensure the long-term reliability and safe operation of the Nightstick XPR-5542 in challenging industrial environments. The device's design and accompanying instructions are geared towards providing a dependable and safe lighting solution for professionals.

NightStick XPR-5542 Specifications

General IconGeneral
Run Time6.5 hours
Beam Distance193 meters
Battery TypeRechargeable Lithium-ion
Weight5.6 oz (with batteries)
Water ResistanceIP67
Light SourceLED
Body ColorBlack
WarrantyLimited Lifetime Warranty
Drop Rating2 m
CertificationscETLus, ATEX, IECEx

Related product manuals